

26
English
3139 115 21511
1
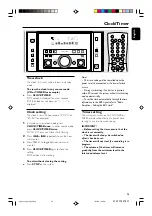
Press and hold
CLOCK/TIMER
for more than
two seconds
to select timer mode.
➜
"
00:00
" or the last timer setting starts
flashing.
➜
TIMER
starts flashing.
➜
The selected source will be lighted while
other available sources are flashing.
2
Press
3 CDC
,
TUNER
or
TAPE
to select the
desired source.
●
Before setting timer, make sure the music source
has been prepared.
3 CDC
– Load the disc(s). To start from a
specific track, make a programme (refer to “CD
Operation - Programming the disc tracks”).
TUNER
– tune to the desired radio station.
TAPE
– load the prerecorded tape into tape
deck 2.
3
Press
S
or
T
repeatedly to set the hour
and minutes for the timer to start..
●
Press PRESET to toggle between hour and
minutes.
4
Press
CLOCK/TIMER
to store the start time.
➜
TIMER
remains on the display.
●
At the preset time, the selected source will play.
To exit without storing the setting
●
Press
STOP
on the system.
Notes:
– When the preset time is reached and the
selected disc tray is empty, the next available disc
will be selected. If all the disc trays are not
available, Tuner will be selected automatically.
– If the selected source is TAPE, and if the preset
time is reached while high speed dubbing in
progress, Tuner will be selected automatically.
– During timer setting, if no button is pressed
within 90 seconds, the system will exit timer setting
mode automatically.
Deactivating the timer
1
Press and hold
CLOCK
/
TIMER
(
TIMER
) for
more than
two seconds
.
2
Press
STOP
on the system to cancel the timer.
➜
"
OFF
" is displayed and the
TIMER
disappears.
Activating the timer
(for the same preset
time and source)
1
Press and hold
CLOCK
/
TIMER
(
TIMER
) for
more than
two seconds
.
2
Press
CLOCK
/
TIMER
again to store.
➜
TIMER
is shown.
Sleep timer setting
The sleep timer enables the system to switch to
standby mode automatically at a preset time.
1
Press
SLEEP
on the remote control repeatedly
to select a preset time.
➜
The selections are as follows (time in
minutes):
60
™
45
™
30
™
15
™
OFF
™
60
…
➜
"
SLEEP XX
" or "
OFF
" is displayed. "
XX
" is
the time in minutes.
2
When you reach the desired length of time, stop
pressing the
SLEEP
button.
➜
SLEEP
is shown, except for "
OFF
" mode.
➜
The sleep timer is now set. Before the system
switches to standby mode, a countdown of 10
seconds is displayed.
"
SLEEP 10
"
™
"
SLEEP 9
"....
™
"
SLEEP 1
"
™
"
SLEEP
"
To deactivate the sleep timer
●
Press
SLEEP
repeatedly until "
OFF
" is
displayed, or press the
STANDBY ON
button.
Clock/Timer
pg 001-030_MZ9_22-Eng
1/23/02, 1:59 PM
26


