Do not turn the length setting adjustment ring beyond the
highest setting.
3
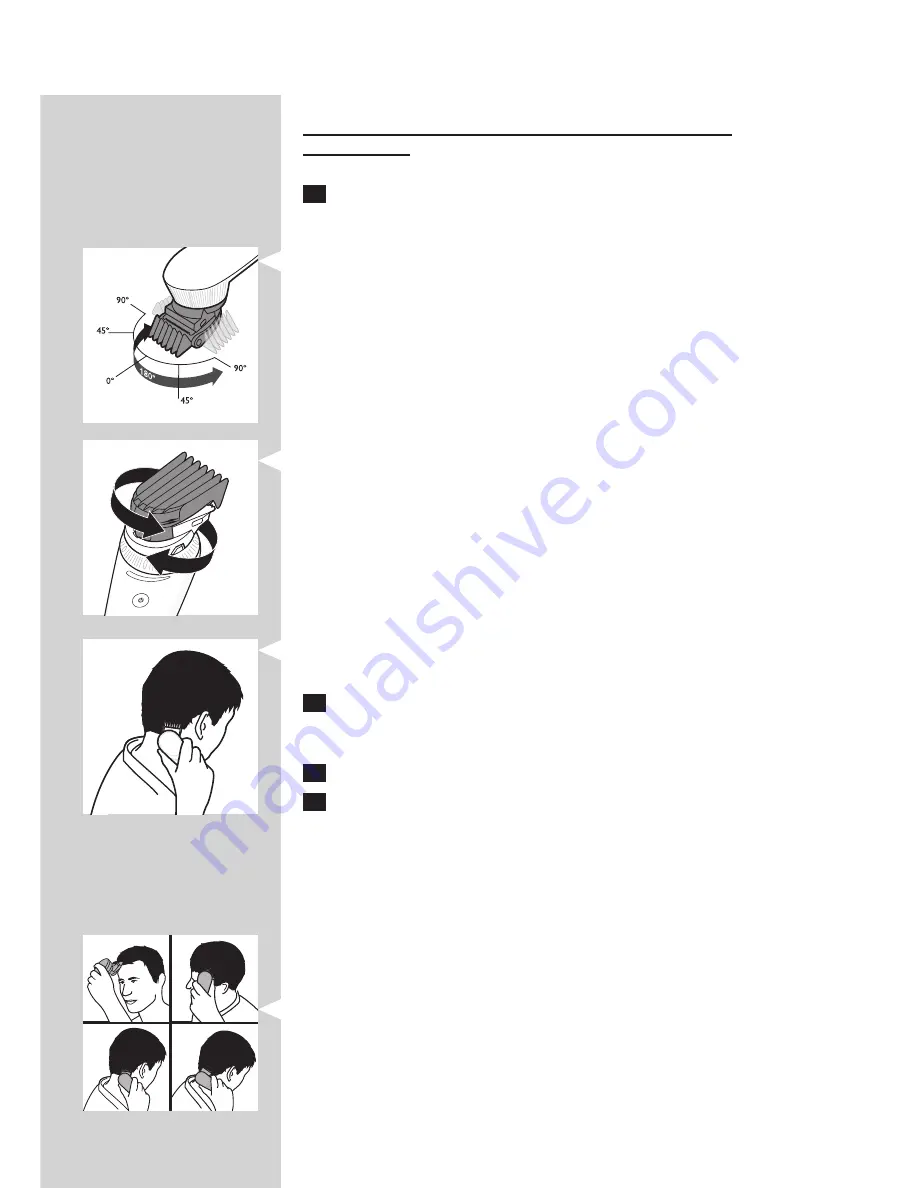
Turn the swivel head to the position that is most comfortable for
your arm when you clip the different parts of your head.
using the swivel head
-
From its starting position of 0° (pointing forwards), you can turn the
swivel head 45° or 90° to the left or right. This enables you to adjust
the position of the cutting element to the part of your head that you
are clipping. This makes it much easier to clip your own hair.
-
To set the cutting element to the desired position, turn the swivel
head (‘click’).
Note: Always adjust the position of the cutting element by turning the swivel
head. Do not turn the cutting element or the comb attachment.
Note: Do not turn the swivel head more than 90° to the left or right.
- The swivel head allows you to hold and use the appliance like a styling
comb.
4
Press the on/off button to switch on the appliance.
QC5570: Press the button briefly.
QC5580: Press the button more than 2 seconds.
5
Move the clipper through the hair slowly.
6
Regularly remove cut hair from the comb attachment.
If a lot of hair has accumulated in the comb attachment, remove the comb
attachment from the appliance and blow and/or shake the hair out of it.
When you remove the comb attachment, the selected setting does not
change.
Tips
- We advise you to start clipping at the highest setting of the regular
comb attachment and to reduce the setting gradually.
-
To clip most effectively, move the appliance against the hair growth
direction.
-
Since all hair does not grow in the same direction, you need to move
the appliance in different directions (upwards, downwards and across).
-
Make sure that the flat part of the comb attachment is always fully in
contact with the scalp to obtain an even result
- Write down the settings you use to create a certain hairstyle as a
reminder for future clipping sessions.
– 3 mm
– 5
– 7
English
9


