background image

13

12

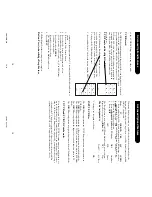
2 inches

Existing

remotes

LCD Remote

PI

P

PI

PPIP

PI

P

TOGGL

E

TOGGL

E

TOGGL

E

TOGGL

E

AU

X

AU

X

AU

X

AU

X

C

D

CDCD CD

CO
D

E

CO
D

E

CO
D

E

CO
D

E

SE

A

RC

H

SE

A

RC

H

SE

A

RC

H

SE

A

RC

H

PR
EV

PR
EV

PR
EV

PR
EV

CH
A

N

CH
A

N

CH
A

N

CH
A

N

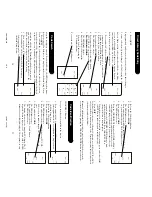
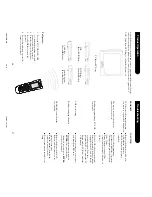
Remote along the line of remotes as you learn commands

from each of them in turn, making sure that you keep about

2 inches in between the remote you are learning from and

the LCD Remote.

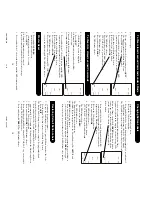
1.

Press and hold the Code Search button until the LED

remains on (after approximately 2-3 seconds) and the

display shows the Main Setup Screen.

2.

Release the Code Search button.

3.

Press and release 

MODE

.

The LED blinks of

f once.

4.

Press and release desired Mode button (TV

, VCR, SA

T

,

etc.) on the rubber keypad. The LED blinks of

f once.

5.

Press and release 

LEARN

.

The LED blinks of

f once.

The screen shows the current screen labels for that Mode.

The 

SETUP 

and 

LEARN 

labels are also shown.

6.

Press and release the LCD Remote button that you want

to store a learned function under

. Press 

SCREEN 

to

toggle the screen labels displayed. The LED blinks of

f.

7.

The display now shows a blank screen with just SETUP

and LEARN labels. Press and hold the original remote

button that you want to learn until the LED blinks of

f

and the LEARN/QUIT key screen is displayed (this

process can take up to 2 or 3 seconds to complete). T

o

learn another button, press and release the 

LEARN 

key

(on the LEARN/QUIT key screen) and repeat from Step

6.

If there is a problem with learning the LED flashes three

times. Go back to Step 6. If problems persist learning a

particular remote, try Clearing the Learned commands under

that Mode (see page 14) and start again. T

o

 abort learning,

press Code Search once and return to the Main Setup screen

SET
U

P

QU
IT

MO
D

E

SL

EEP

SET
U

P

QU
IT

LE

A

RN

SC

RE

EN

KE

Y?

CO
DE

KE

Y

?

SET
U

P

QU
IT

LE

ARN

MO
VE

GU
ID

E

DV

D

SET
U

P

TA

P

E

LE

VEL

VI

D

EO

RE

AR

QU
IT

EN

TE

R

CE

NT

ER

LE

A

RN

ME
N

U

FR

O

N

T

IN

P

UT

SC

RE

EN

IN

FO

MO
D

E

KE

Y?

SU

B-T

CD

OK

CO
DE

BA
ND

SL

EEP

TU

N

ER

TO

GGL

E

6

4

2

5

0

1

8

3

79

PI

P

RE

TU

RN

TV

TI

TL

E

CC

SU

B

DS

P

LR

N

-B

LR

N

-A

Sh
o

w

s C

u

rr

e

n

t

Scr
een

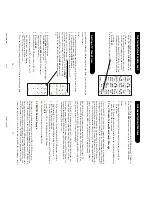
LED remains on and the LCD display returns (this can take 2-3 seconds).

No functions can be stored under the 

LEARN

SLEEP

, Code Search, TV

,

VCR, DVD, Cable, SA

T

, AUX, Audio or Audio 1 buttons, or the 

SCREEN

button.

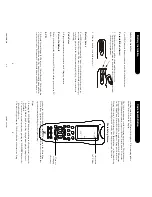
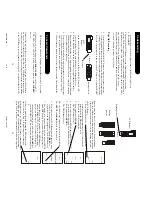
Gather all the remotes that you want to learn “from” and have them all lined

up on your cof

fee table side by side. Place the LCD Remote in front of your

existing remotes so that the 

top 

of your existing remotes point at the 

bottom

of the LCD Remote (see diagram on next page). Y

ou can then slide the LCD

performed once then the display returns to the Main Setup Screen.

8.

Press 

QUIT

.

Y

ou can teach the LCD Remote to learn commands from your existing

remotes. The Remote can store original remote commands consisting of up to

40 buttons each per Mode. Only one original remote type can be stored under

any one Mode (see T

ips on Learning). The Remote can also be pre-

programmed with one of the library codes and then have Learned buttons

“overlaid” in button positions of your choice.

T

ips On Learning

1.
Use fresh batteries for both the LCD remote and your original remote(s).

2.

It is recommended that your perform a Master Reset before attempting any

learning. Note this will reset all user programming back to factory defaults.

3.
Place the original remote to the rear of the LCD remote so that the IR LED

2 inches

Exiting remote

LCD

Remote

IR sensor

CHAN

CHAN

CHAN

CHAN +

+

+

+

on the front of the original remote is in line with the LCD remote’

s IR

sensor

, located below the hard button area. See diagram below

.

4.
Keep the distance between the two remotes to approximately 2 inches.

5.

Experiment by learning 2 or 3 buttons initially (to ensure compatibility and

familiarity) and then carry out a Master Reset before completely learning

your original remote’

s keyboard.

6.
Do not attempt to learn directly under an incandescent or low-voltage light

as these can cause interference with the IR transmissions. Keep at least

three feet away from any such light sources.

7.
When learning a button, do not release the button being learned until the

TVTVTVTV

V

C

R

VC
R

VC
R

VC
R

CB
L

CB
L

CB
L

CB
L

SA

T

SA

T

SA

T

SA

T

D

V

D

DV
D

DV
D

DV
D

AU

D

IO

AU

D

IO

AU

D

IO

AU

D

IO

PO
W

ER

PO
W

ER

PO
W

ER

PO
W

ER

PL

AY

PL

AY

PL

AY

PL

AY

ST

O

P

ST

O

P

ST

O

P

ST

O

P

RE

C

RE

C

RE

C

RE

C

PA

U

SE

PA

U

SE

PA

U

SE

PA

U

SE

MU
TE

M

UTE

M

UTE

MU
TE

V V V VOOOOL

LL L++++

PR

EV

PR

EV

PR

EV

PR

EV

CH
A

N

CH
A

N

CH
A

N

CH
A

N

CO
D

E

CO
D

E

CO
D

E

CO
D

E

SE

A

RCH

SE

A

RCH

SE

A

RCH

SE

A

RCH

AU

D

IO

1

AU

DI

O

1

AU

DI

O

1

AU

D

IO

1

AU

X

AU

X

AU

X

AU

X

MO
VE

IN

FO

LE

AR

N

DV
D

SET
UP

TA

PE

LE

VE

L

VI

DE

O

RE
AR

QU
IT

EN
TE

R

CE
NT

ER

GU
ID

E

ME
N

U

FR

O

N

T

IN

PU

T

SC
REEN

MO
DE

KE
Y?

SU
B-T

CD

OK

CO
DE

B

AND

SL

EEP

TU

N

ER

TO

GGL

E

6

4

2

5

0

1

8

3

79

PI

P

RE
TU

RN

TV

TI

TL

E

CC

SU
B

DS
P

LR

N

-B

LR

N

-A

SSSSCCCCAA

A ANNNN

CHA

PTE

R/CH

CHA

PTE

R/CH

CHA

PTE

R/CH

CHA

PTE

R/CH
++++

RE

PE

AT

RE

PE

AT

RE

PE

AT

RE

PE

AT

SSSSCCCCAA

A ANNNN

++++

CCCCHHHHA

AA APPPPT

TT TEEEER

RR R////CC

C CHHHH

TV

TV

TV

TV

VCR

VCR

VCR

VCR

CBL

CBL

CBL

CBL

SAT

SAT

SAT

SAT

DVD

DVD

DVD

DVD

AUDIO

AUDIO

AUDIO

AUDIO

POWER

POWER

POWER

POWER

PLAY

PLAY

PLAY

PLAY

STOP

STOP

STOP

STOP

REC

REC

REC

REC

PAU SE

PAU SE

PAU SE

PAU SE

MUTE

MUTE

MUTE

MUTE

VVVVOOOOL

LL L

++++

PREV

PREV

PREV

PREV

CHAN

CHAN

CHAN

CHAN

CODE

CODE

CODE

CODE

SEARCH

SEARCH

SEARCH

SEARCH

AUDIO1

AUDIO1

AUDIO1

AUDIO1

AUX

AUX

AUX

AUX

MOVE

INFO

LEARN

DVD

SETUP

TAPE

LEVEL

VIDEO

REAR

QUIT

ENTER

CENTER

GUIDE

MENU

FRONT

INPUT

SCREEN

MODE

KEY?

SUB-T

CD

OK

CODE

BAND

SLEEP

TUNER

TOGGLE

6

4

2

5

0

1

8

3

7

9

PIP

RETURN

TV

TITLE

CC

SUB

DSP

LRN-B

LRN-A

S

SS

SC

CC

C A

AA

A N

NN

N

CHAPTER/CH

CHAPTER/CH

CHAPTER/CH

CHAPTER/CH +

+

+

+

REPEAT

REPEAT

REPEAT

REPEAT

S

SS

S C

CC

CA

AA

A N

NN

N +

++

+

C

CC

C H

HH

H A

AA

A P

PP

P T

TT

T E

EE

E R

RR

R /

//

/ C

CC

C H

HH

H

Code Learning

T

o

 Learn Commands

Learning sensor

PM8TSMD.p65

12/9/02, 4:53 PM

12-13

Summary of Contents for PM8TSMD

Page 1: ...PM8TSMD Owner s Manual PM8TSMD p65 12 9 02 4 53 PM 1 ...

Page 2: ... EARCH B UTTON 5 Q UICK S ETUP G UIDE 6 B UTTON K EY D ESCRIPTIONS 8 D IRECT C ODE E NTRY 10 C ODE S EARCH 10 C ODE I DENTIFICATION 11 C ODE L EARNING 12 T O C LEAR L EARNED C OMMANDS UNDER A M ODE 14 T O C LEAR A LL L EARNED C OMMANDS 14 M ASTER C LEAR 14 C HANGING B UTTON LABELS 15 R ESTORING D EFAULT B UTTON LABELS 15 S ETTING A TV S LEEP T IMER 16 A DVANCED O PTIONS AND F EATURES 17 TV OR CD A...

Page 3: ...l on the tab and lift the cover off 2 Insert the batteries matching the batteries to the and marks inside the battery compartment 3 Slide the battery cover back into place Battery Saver Your LCD remote automatically times out if the buttons are depressed for more than about 30 seconds This saves your batteries should your remote get stuck in a place where the buttons remain depressed e g between t...

Page 4: ...rds any changes made and returns to normal operation 4 Any Setup routine button entry error or code entry error causes the remote to give an error warning 3 beeps To program your remote to control your TV or VCR or Cable etc 1 Press and hold Code Search the remote beeps 2 Release Code Search when you hear a second beep 3 Press and release MODE 4 Press and release TV VCR etc 5 Press and release COD...

Page 5: ...ection and display RETURN LCD key goes back to previous on screen selection INFO LCD key brings up DVD Display or Control Menu for Chapter Track Title number Time remaining elapsed indication system information etc MENU LCD key brings up the DVD disc Menu screen use with the Up Down Left Right navigation buttons OK LCD key is used for on screen Menu selection Note some DVD players require the Play...

Page 6: ...ains on after approximately 2 3 seconds and the display shows the Main Setup Screen 2 Release the Code Search button 3 Press and release MODE The LED blinks off once 4 Press and release the desired Mode button TV VCR SAT etc on the rubber keypad The LED blinks off once after the last digit is entered For an invalid code the LED flashes three times before going off In both cases the display returns...

Page 7: ...r Mode Only one original remote type can be stored under any one Mode see Tips on Learning The Remote can also be pre programmed with one of the library codes and then have Learned buttons overlaid in button positions of your choice Tips On Learning 1 Use fresh batteries for both the LCD remote and your original remote s 2 It is recommended that your perform a Master Reset before attempting any le...

Page 8: ...h button 3 Press and release MODE The LED blinks off once 4 Press and release desired Mode button TV VCR SAT etc on the rubber keypad The LED blinks off once 5 Press and release LEARN The LED blinks off once To Clear stored Learned Commands under a Mode Master Reset 5 Press and hold LEARN until the Main Setup Screen is displayed after approx 5 seconds 6 Press QUIT All Learned Commands are now clea...

Page 9: ...s of remotes only punch through from another Mode on the 6 VCR carriage keys to the device programmed under the VCR Mode key This is not much use if you are using a DVD programmed under a Mode other than VCR This remote punches through to the last VCR or DVD device you used For example if you have 3 DVD VCR devices programmed into this remote the last one you accessed on the remote will be the one...

Page 10: ...ss Acknowledge Beep Feature SETUP KEY 6 4 2 5 1 8 3 7 9 SETUP KEY 6 4 2 5 1 8 3 7 9 ENTER 0 Advanced Options Features Advanced Options Features INPUT LCD Key The INPUT button performs the TV VCR antenna switch function when in VCR Mode The INPUT button performs the A B switch function when in Cable Mode The INPUT button performs the TV SAT switch function when in SAT Mode The INPUT button performs...

Page 11: ...AIG 230 425 426 525 CURTIS MATHES 025 124 130 226 324 425 526 635 725 CYBERNEX 425 DAEWOO 026 135 625 626 726 825 826 926 DAYTRON 135 Code List TV ABEX 120 ADMIRAL 701 918 ADVENTURA 019 AIKO 407 AIWA 121 221 ALLERON 206 AMARK 603 AMTRON 906 AKAI 801 AMSTRAD 520 ANAM NATIONAL 104 805 901 906 920 AOC 002 003 102 119 217 302 502 814 ARCHER 603 AUDIOVOX 906 BANG OLUFSEN 620 BELCOR 002 BELL HOWELL 506 ...

Page 12: ...127 128 130 226 227 228 324 325 327 427 428 525 526 527 528 625 626 627 628 630 634 724 726 727 735 827 828 927 FISHER 025 029 129 328 330 426 428 928 FUJI 130 226 524 FUNAI 324 726 924 GARRARD 726 GE 124 130 136 226 425 429 635 835 GOLDSTAR 025 236 525 GRADIENTE 726 GO VIDEO 139 438 537 HARLEY DAVIDSON 726 HARMAN KARDON 025 930 HARWOOD 230 HEADQUARTER 428 HITACHI 136 235 324 336 538 629 638 829 8...

Page 13: ...MAHA 2 86 386 485 486 586 685 781 785 881 ZENITH 080 083 178 269 278 576 577 674 686 GE 265 863 GENERAL INSTRUMENTS 058 066 158 166 258 665 865 960 965 HITACHI DSS 765 864 HUGHES SATELLITE DSS 465 564 664 864 964 JANEIL 261 JERROLD 361 JVC 466 KENWOOD 461 LUXOR 561 MAGNAVOX DSS 259 565 862 MACOM STATE 661 NORSTAT 761 861 PACE 063 163 266 PANASONIC DSS 260 264 PRIMESTAR 364 665 PHILIPS 259 565 862 ...

Page 14: ...you want to operate 2 Aim the remote at the product 3 Press POWER to turn on the product 4 Press other buttons to operate the features of your product After the batteries are installed and you have programmed the remote for the codes that operate your products you can use your remote to operate a TV VCR Cable Box DVD Player or Satellite System etc TV Press TV First VCR Press VCR First DVD Player P...

Page 15: ...ccident misuse abuse tampering with or modification THIS WARRANTY IS IN LIEU OF ALL OTHER WARRANTIES EXPRESS OR IMPLIED INCLUDING THE IMPLIED WARRANTIES OF MERCHANTABILITY OR FITNESS FOR A PARTICULAR PURPOSE IN NO EVENT SHALL PHILIPS BE LIABLE FOR SPECIAL INDIRECT INCIDENTAL OR CONSEQUENTIAL DAMAGES WHETHER IN CONTRACT TORT OR NEGLIGENCE Some States do not allow limitations on how long an implied ...

Reviews: