background image

b

d

f

g

h

m

p

r

s

t

b

d

f

g

h

o

a

c

k

l

j

j

i

c

n

v

u

w

x

y

z

e

e

q

GB

AR

FR

TR

For our complete catalogue of mother and 
babycare products


Call FREE on

 0800 289 064

  GB ONLY (9am–4.30pm Mon-Fri)


Call FREE on

 1800 509 021

  IRL ONLY (9am–4.30pm Mon-Fri)

  1 300 364 474

  (Australia National)


0800 104 401


(+971) 

800AVENT


Pour obtenir notre catalogue de produits de petite puériculture :

Numéro Vert : 

0800 90 81 54


(France uniquement).

De Suisse, composez le : 

056 266 56 56

De Belgique / Luxembourg, 

composez le : 

+32 (0)9 259 1050

  0216- 573 62 00

TR

AR

FR

GB

AU

IRL

NZ

%3$

%3$

Summary of Contents for SCF304/60

Page 1: ...NLY 9am 4 30pm Mon Fri Call FREE on 1800 509 021 IRL ONLY 9am 4 30pm Mon Fri 1 300 364 474 Australia National 0800 104 401 971 800AVENT Pour obtenir notre catalogue de produits de petite puériculture Numéro Vert 0800 90 81 54 France uniquement De Suisse composez le 056 266 56 56 De Belgique Luxembourg composez le 32 0 9 259 1050 0216 573 62 00 TR AR FR GB AU IRL NZ 3 3 ...

Page 2: ...NLY 9am 4 30pm Mon Fri Call FREE on 1800 509 021 IRL ONLY 9am 4 30pm Mon Fri 1 300 364 474 Australia National 0800 104 401 971 800AVENT Pour obtenir notre catalogue de produits de petite puériculture Numéro Vert 0800 90 81 54 France uniquement De Suisse composez le 056 266 56 56 De Belgique Luxembourg composez le 32 0 9 259 1050 0216 573 62 00 TR AR FR GB AU IRL NZ 3 3 ...

Page 3: ...NLY 9am 4 30pm Mon Fri Call FREE on 1800 509 021 IRL ONLY 9am 4 30pm Mon Fri 1 300 364 474 Australia National 0800 104 401 971 800AVENT Pour obtenir notre catalogue de produits de petite puériculture Numéro Vert 0800 90 81 54 France uniquement De Suisse composez le 056 266 56 56 De Belgique Luxembourg composez le 32 0 9 259 1050 0216 573 62 00 TR AR FR GB AU IRL NZ 3 3 ...

Page 4: ...göstergesi YEŞİL renkte yanacak şekilde açıldığından emin olun Elektrik prizi ve pompa arasındaki kabloların düzgün şekilde bağlandığından emin olun Pompa yanıt vermiyor Pompa durursa ve güç ışığı KIRMIZI renkte yanıp sönüyorsa bir arıza vardır 3 yanıp sönme gecikme 3 yanıp sönme vb pom pada vakum arızası vardır Pompa motorunu kapatın ve borularda ve bağlantılarda tıkanıklık veya hasar olup olmadı...

Page 5: ...göstergesi YEŞİL renkte yanacak şekilde açıldığından emin olun Elektrik prizi ve pompa arasındaki kabloların düzgün şekilde bağlandığından emin olun Pompa yanıt vermiyor Pompa durursa ve güç ışığı KIRMIZI renkte yanıp sönüyorsa bir arıza vardır 3 yanıp sönme gecikme 3 yanıp sönme vb pom pada vakum arızası vardır Pompa motorunu kapatın ve borularda ve bağlantılarda tıkanıklık veya hasar olup olmadı...

Page 6: ...göstergesi YEŞİL renkte yanacak şekilde açıldığından emin olun Elektrik prizi ve pompa arasındaki kabloların düzgün şekilde bağlandığından emin olun Pompa yanıt vermiyor Pompa durursa ve güç ışığı KIRMIZI renkte yanıp sönüyorsa bir arıza vardır 3 yanıp sönme gecikme 3 yanıp sönme vb pom pada vakum arızası vardır Pompa motorunu kapatın ve borularda ve bağlantılarda tıkanıklık veya hasar olup olmadı...

Page 7: ...H I 6 7 v 8 1 2 u w 6 ...

Page 8: ...nt to vary the rhythm touch the button again to revert to manual The Twin Electronic Breast Pump is totally responsive to your needs Relax and enjoy the experience because you re always in complete control And when you re relaxed and comfortable you express more milk faster Please take a few minutes to read through the ENTIRE INSTRUCTION LEAFLET before you use your Philips AVENT Twin Electronic Br...

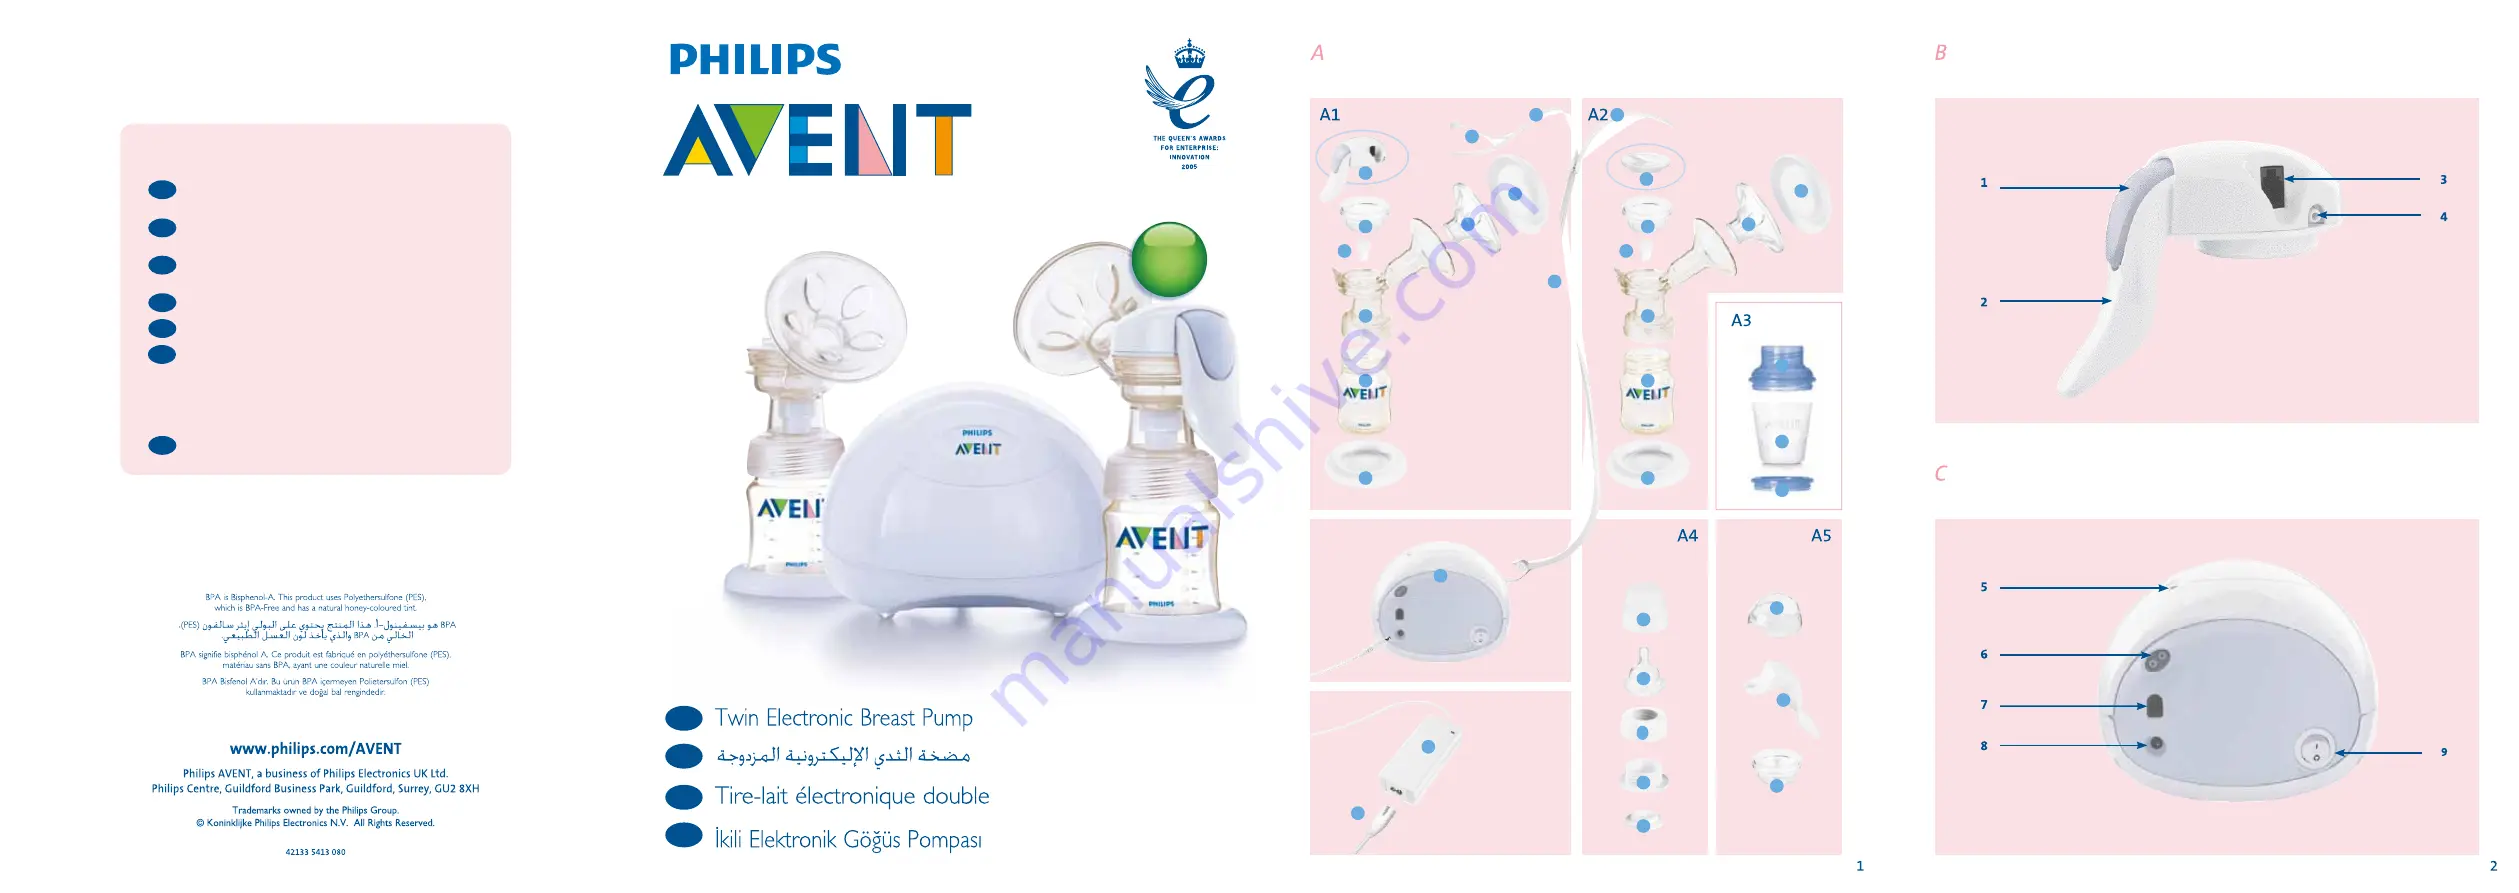
Page 9: ...ad Control handle diagram B 1 Control button 2 Control handle 3 Control cable socket 4 Tubing port NEVER STERILISE IMMERSE IN WATER Pump motor diagram C 5 Light 6 Twin tubing port 7 Control cable socket 8 Power socket 9 On off switch Bottle parts diagram A4 2x Dome cap 2x Extra Soft AVENT Teat Newborn Flow 0M 2x Screw ring 2x Sealing base 2x Sealing disc Manual parts diagram A5 1x Pump cover 1x Ha...

Page 10: ...red are the pump motor the control handle the tubing and the double pumping connector Do not attempt to remove the pump body from the breast while under vacuum Turn the unit off and break the seal between your breast and the pump funnel with your finger then remove the pump from your breast Never use while pregnant as pumping can induce labour Never use when sleepy or drowsy This appliance is inte...

Page 11: ...perience or knowledge unless they have been given supervision or instruction concerning use of the appliance by a person responsible for their safety Children should be supervised to ensure that they do not play with the appliance CAUTION To reduce the risks of injury device malfunction or failure The product should not be left unattended when plugged into an electrical wall socket Never drop or i...

Page 12: ...ump body d making sure it completely covers the edge of the funnel This is easier if the Let down Massage Cushion is wet 6 Firmly push the control handle a onto the pump body d so that it sits securely on top of the silicone diaphragm b 7 If not already attached push the transparent tube j securely onto the control handle a and click the control cable i into the adjacent socket 8 Now attach the ot...

Page 13: ...nto the double pumping connector l How to use your pump Wash your hands thoroughly and make sure your breasts are clean Relax in a comfortable chair leaning slightly forward use cushions to support your back Make sure you have a glass of water nearby as expressing can be thirsty work A photograph of your baby will help too To begin pumping see diagram G 1 Switch on your pump and the light on the t...

Page 14: ...y to double pump the second pump will already have learned your pumping pattern all you have to do is hold it against your other breast and create a seal just as you did with the controller pump Or if you prefer you can start with both pumps against your breasts To change your pumping rhythm If at any time you want to change your pumping rhythm press the control button again and the pump will reve...

Page 15: ...d to be fed to your baby Expressed breast milk can be stored in the refrigerator for up to 48 hours not in the door or in the freezer for up to 3 months If you are storing freshly expressed milk in the fridge to add to during the day only add milk which has been expressed into a sterile container Milk can only be kept like this for a maximum of 48 hours from first expression after which it must be...

Page 16: ... 5 Try expressing from one breast while your baby is feeding on the other or continue expressing just after a feed 6 Repositioning the pump on your breasts from time to time can help stimulate your milk ducts 7 Some women may prefer to use the pump without the Let down Massage Cushion However it has been shown that in most cases the massaging effect of the petals flexing in and out around the areo...

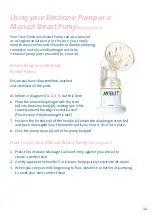
Page 17: ...cone diaphragm with the stem w into the pump body d making sure it fits securely around the edge to create a seal This is easier if the diaphragm is wet 7 Position the forked end of the handle v under the diaphragm stem w and push down gently on the handle until you hear it click into place 8 Click the pump cover u onto the pump body d How to use your Manual Breast Pump see diagram I 1 Press the L...

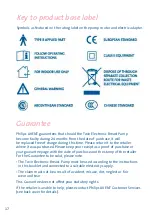
Page 18: ...amp of the retailer For the Guarantee to be valid please note The Twin Electronic Breast Pump must be used according to the instructions in this booklet and connected to a suitable electricity supply The claim must not be a result of accident misuse dirt neglect or fair wear and tear This Guarantee does not affect your statutory rights If the retailer is unable to help please contact Philips AVENT...

Page 19: ...improve after practice Refer to the Hints to help you succeed section You may be squeezing too hard You do not need to use all the suction the pump can generate Try squeezing the handle more gently and remember the 2 3 second pumping rhythm Consult your health professional breastfeeding advisor Remove and re fit the Let down Massage Cushion to ensure it is firmly attached and pushed far enough dow...

Page 20: ...nated GREEN Make sure the cables between the electrical wall socket and the pump are correctly connected Pump not responding If the pump stops working and the power light is flashing RED then a fault has been detected 3 flashes delay 3 flashes etc the pump has detected a vacuum fault Switch off the pump motor and check tubing and connections for obstructions or damage 2 flashes delay 2 flashes etc...

Page 21: ...20 ...

Page 22: ...21 ...

Page 23: ...22 ...

Page 24: ...23 ...

Page 25: ...24 ...

Page 26: ...25 ...

Page 27: ...26 ...

Page 28: ...27 ...

Page 29: ...28 ...

Page 30: ...29 30 l k a m d g s h ...

Page 31: ...30 ...

Page 32: ...31 a b c d e f g h i j k l m n o ...

Page 33: ...32 ...

Page 34: ...ation pressez la touche bleue pour revenir à une commande manuelle Le tire lait électronique double réagit immédiatement à vos instructions Détendez vous et profitez d une expérience que vous contrôlez totalement Dans la détente et le bien être vous tirez plus de lait et plus rapidement Veuillez consacrer quelques minutes à la LECTURE INTÉGRALE DU MODE D EMPLOI avant votre première utilisation du ...

Page 35: ... de commande photos B 1 Touche commande 2 Poignée de commande 3 Prise câble de commande 4 Prise de tuyau NE JAMAIS STÉRILISER IMMERGER Moteur photos C 5 Voyant lumineux 6 Prise tuyau double 7 Prise câble de commande 8 Prise fiche secteur 9 Interrupteur Pièces du biberon photos A4 2 Capuchons 2 Tétines extra souples AVENT débit nouveau né 1 trou 2 Bagues 2 Bases d étanchéité 2 Disques d étanchéité ...

Page 36: ...a poignée de commande les tuyaux et les fils de connexion N essayez pas de retirer l entonnoir de votre sein quand le tire lait est en marche Éteignez l appareil et dégagez la succion en glissant votre doigt dans l entonnoir puis ôter le tire lait de votre sein N utilisez jamais pendant la grossesse car tirer du lait peut déclencher l accouchement Ne vous en servez pas si vous avez sommeil ou que ...

Page 37: ...t d expérience ou de connaissances sauf si ces mêmes personnes ont reçu de la part d une personne responsable de leur sécurité les instructions nécessaires à l utilisation appropriée de l appareil Il est impératif de veiller à ce que les enfants ne jouent pas avec l appareil AVERTISSEMENT Pourréduiretoutrisqued accidents demauvais fonctionnementoudepanne L appareil ne devrait pas être laissé sans ...

Page 38: ...niformément les bords tout autour Ce qui est plus facile quand le coussin est mouillé 6 Poussez fermement la base de la poignée de commande a dans l entonnoir du tire lait d pour qu elle s y insère par dessus le diaphragme en silicone b le manche enclenché dans la charnière 7 S il n est pas déjà attaché poussez le tube transparent j dans sa prise sur la poignée de commande et insérez le câble de c...

Page 39: ...par dessus le diaphragme en silicone b 7 S il n est pas déjà attaché poussez le second tube transparent j dans le connecteur double pompage l Comment utiliser votre tire lait Lavez vous soigneusement les mains et assurez vous que vos seins sont propres Détendez vous dans un siège confortable légèrement penchée en avant avec quelques coussins dans le dos Gardez une boisson à portée de main tirer so...

Page 40: ... le tire lait est correctement assemblé comme indiqué page 11 Quand vous serez prête à tirer des deux seins à la fois le second tire lait aura déjà appris votre rythme d extraction et vous n aurez plus qu à l appliquer hermétiquement contre votre autre sein comme le tire lait à commande Ou si vous préférez vous pouvez déjà commencer avec les deux tire laits en même temps Pour modifier votre rythme...

Page 41: ...orte ou jusqu à 3 mois au congélateur Si vous avez déjà mis du lait tiré au réfrigérateur et que vous souhaitez en rajouter le même jour dans le même biberon n utilisez que du lait conservé dans un biberon stérilisé et assurez vous que vous replacez le biberon au réfrigérateur à chaque fois Un biberon ainsi constitué ne se conserve pas plus de 48 heures maximum à partir de la première extraction a...

Page 42: ... de tirer d un sein pendant que votre bébé tète de l autre ou juste après une tétée 6 Changez la position du tire lait de temps en temps pour stimuler les galactophores 7 Certaines mamans préfèrent peut être se passer du coussin en silicone Cependant les essais effectués ont prouvé que la plupart du temps l effet de massage sur l aréole dû à la flexion des alvéoles stimule la montée de lait et per...

Page 43: ...silicone w sur l entonnoir d en repliant les bords par dessus toute la circonférence Pressez des doigts tout autour pour assurer que l étanchéité est parfaite la tâche est facilitée quand les pièces sont encore mouillées 7 Positionnez la fourche de la poignée v sous le haut de la tige du diaphragme w et abaissez doucement sur la charnière où elle s installe avec un déclic 8 Posez fermement le couv...

Page 44: ...t valide veuillez noter que Le tire lait électronique double doit être utilisé conformément aux instructions fournies dans ce dépliant et doit être branché à une source d alimentation électrique adéquate La plainte ne doit pas découler d un accident d un abus d un manque de propreté d une négligence ou d usure normale Cette garantie n affecte pas vos droits légaux Si le détaillant ne peut pas vous...

Page 45: ...orrectement et que l aspiration s effectue Détendez vous et recommencez parce qu il faut un peu de pratique Consultez la section conseils d utilisation Douleur au sein pendant l extraction Vous appuyez peut être trop fort Vous n avez pas besoin de presser la poignée à fond mais juste assez pour votre propre débit Essayez d appuyer moins fort et souvenez vous du rythme à 2 3 secondes Parlez en à vo...

Page 46: ...os du fascicule pour obtenir des pièces de rechange Pump not responding Assurez vous qu il est correctement assemblé qu il est branché et que le voyant lumineux est VERT Vérifiez les connexions de fiches entre la prise secteur et le tire lait Clignotement ROUGE du voyant lumineux Si le tire lait s arrête et que le voyant lumineux clignote ROUGE l appareil a détecté une faute 3 clignotements temps ...

Page 47: ...hangi bir anda ritmi değiştirmek isterseniz manuel moda dönmek için düğmeye tekrar dokunun İkili Elektronik Göğüs Pompası ihtiyaçlarınıza tam olarak yanıt verir Tam kontrole sahip olduğunuzdan rahatlayın ve deneyimin keyfini çıkarın Daha gevşemiş ve rahat olduğunuzda daha fazla sütü daha hızlı alırsınız Philips AVENT İkili Elektronik Göğüs Pompasını ilk kez kullanmadan önce lütfen KULLANMA KILAVUZ...

Page 48: ... Kontrol kablo yuvası 4 Boru bağlantı noktası ASLA STERİLİZE ETMEYİN SUYA SOKMAYIN Pompa motoru çizim C 5 Işık 6 İkili boru bağlantı noktası 7 Kontrol kablo yuvası 8 Elektrik soketi 9 Açma kapama düğmesi Biberon parçaları çizim A4 2x Kapak 2x Ekstra Yumuşak Philips AVENT Emzik Yenidoğan Akışı 0 Ay 2x Vidalı halka 2x Sızdırmazlık tabanı 2x Sızdırmazlık diski Manuel parçalar çizim A5 1x Pompa kapağı...

Page 49: ...ecek parçalar sadece pompa motoru kontrol kolu boru ve çift pompa konnektörüdür Vakum altındayken pompa gövdesini göğsünüzden ayırmaya çalışmayın Üniteyi kapatın göğsünüz ve göğsünüzü tutan pompa hunisi arasına parmağınızı sokarak pompayı göğsünüzden ayırın Pompalama doğum sancıları çekmenize neden olabileceğinden hamileyken kesinlikle kullanmayın Uykulu iken kesinlikle kullanmayın Bu cihaz soruml...

Page 50: ...ağlayın 11 Fiş kablosunu o düzgün bir şekilde elektrik adaptörüne ve ardından bir elektrik prizine takın 12 Pompa motorunu açın 49 50 Pompanın temizlenmesi ve sterilize edilmesi bkz çizim A KESİNLİKLE YIKAMAYIN VEYA STERİLİZE ETMEYİN kontrol kolu a ikili boru k çift pompalama konnektörü l veya pompa motoru m Bu parçalar anne sütü ile temas ETMEZ Pompa motoru ve kontrol kolunu yumuşak bir bez kulla...

Page 51: ... huninin kenarlarını tamamen kapladığından emin olacak şekilde pompa gövdesine d yerleştirin Boşaltma Masaj Yastığı ıslaksa daha kolay olur 6 Kontrol kolunu a silikon diyaframın b üzerine düzgünce oturacak şekilde pompa gövdesine d sıkıca bastırın 7 Zaten takılı değilse şeffaf tüpü j sıkıca kontrol koluna a bastırın ve kontrol kablosunu i uygun sokete takın 8 Kablonun diğer ucunu pompa motorunun m...

Page 52: ...ıca çift pompalama konnektörüne l takın Pompanın kullanılması Ellerinizi iyice yıkayın ve göğüslerinizin temiz olduğundan emin olun Rahat bir koltuğa oturarak hafifçe öne eğilin sırtınızı desteklemek için yastık kullanın Süt sağmak sizi susatabileceğinden yanınızda bir bardak su bulundurun Ayrıca bebeğinizin bir fotoğrafı size yardımcı olacaktır Pompalamaya başlamak bkz çizim G 1 Pompayı açın pomp...

Page 53: ...gibi pompayı diğer göğsünüze bastırarak sıkıca oturmasını sağlamaktır Veya isterseniz her iki pompayı göğüslerinize yerleştirerek başlayabilirsiniz Pompalama ritmini değiştirmek Herhangi bir anda pompalama ritmini değiştirmek isterseniz kontrol düğmesine tekrar basın pompa parmak ucuyla manuel kontrole geri döner Işık tekrar sürekli YEŞİL renkte yanmaya başlar Kendinizi rahat hissedene kadar manue...

Page 54: ...kadar buzdolabı kapağında değil veya dondurucuda 3 aya kadar saklanabilir Buzdolabında gün içinde üzerine eklemek için yeni sağılmış süt bulunduruyorsanız sadece steril bir kaba sağılmış süt ekleyin Süt bu şekilde ilk sağılma anında başlayarak maksimum 48 saat saklanabilir bu sürenin sonunda hemen kullanılmalı veya daha sonra kullanmak üzere dondurucuya koyulmalıdır Dondurulmuş anne sütü gece boyu...

Page 55: ...deki ağrıları azaltabilir 5 Bebeğiniz bir göğsünüzden emerken diğerini sağmayı deneyin veya bebeğinizi emzirdikten hemen sonra sağarak devam edin 6 Zaman zaman göğsünüz üzerinde pompanın yerini değiştirmek süt kanallarınızı harekete geçirebilir 7 Bazı kadınlar pompayı Boşaltma Masaj Yastığı olmadan kullanmayı tercih edebilir Ancak çoğu durumda areola çevresindeki içeri ve dışarı petal esneme harek...

Page 56: ...duğu gibi ancak bu kez 6 Bağlantı parçası ile silikon diyaframı w sızdırmayacak şekilde ve sıkıca kenara oturduğundan emin olarak pompa gövdesine yerleştirin d Diyafram ıslaksa daha kolay olur 7 Kolun v çatal ucunu diyafram bağlantı parçasının w altına yerleştirin ve sesli bir şekilde yerine oturana kadar yavaşça kola bastırın 8 Pompa kapağını u pompa gövdesine d oturtun Manuel Göğüs Pompasının ku...

Page 57: ...ın garantinin geçerli olması için İkili Elektronik Göğüs Pompası bu kitapçıktaki talimatlara uygun olarak kullanılmalı ve uygun bir elektrik kaynağına bağlanmalıdır Değiştirme talebi kaza yanlış kullanım kir veya aşınmanın göz ardı edilmesinin sonucu olmamalıdır Bu Garanti yasal haklarınızı etkilemez Satıcı yardımcı olamıyorsa lütfen Philips AVENT Müşteri Hizmetleri ile iletişim kurun ayrıntılar i...

Page 58: ...ağma pratik yaparak gelişebileceğinden rahatlayın ve tekrar deneyin Başarılı olmanız için ipuçları bölümüne başvurun Çok fazla sıkıyor olabilirsiniz Pompanın tüm emiş gücünü kullanmanıza gerek yoktur Kolu daha hafif sıkmayı deneyin ve 2 3 saniyelik pompalama ritmini unutmayın Sağlık uzmanınıza danışın Sıkıca takıldığından ve huninin içine iyice oturduğundan emin olmak için Boşaltma Masaj Yastığını...

Page 59: ...göstergesi YEŞİL renkte yanacak şekilde açıldığından emin olun Elektrik prizi ve pompa arasındaki kabloların düzgün şekilde bağlandığından emin olun Pompa yanıt vermiyor Pompa durursa ve güç ışığı KIRMIZI renkte yanıp sönüyorsa bir arıza vardır 3 yanıp sönme gecikme 3 yanıp sönme vb pom pada vakum arızası vardır Pompa motorunu kapatın ve borularda ve bağlantılarda tıkanıklık veya hasar olup olmadı...

Page 60: ...NLY 9am 4 30pm Mon Fri Call FREE on 1800 509 021 IRL ONLY 9am 4 30pm Mon Fri 1 300 364 474 Australia National 0800 104 401 971 800AVENT Pour obtenir notre catalogue de produits de petite puériculture Numéro Vert 0800 90 81 54 France uniquement De Suisse composez le 056 266 56 56 De Belgique Luxembourg composez le 32 0 9 259 1050 0216 573 62 00 TR AR FR GB AU IRL NZ 3 3 ...

Reviews: