MP3-CD/CD PLAYER
MP3-CD/CD PLAYER
Finding a passage within a track
1.
During playback, press and hold
SEARCH
∞
or
§
(
5
or
6
on the remote control )
=
The disc is played at high speed and low vol-
ume.
=
No sound is heard during MP3-CD fast cue/
review.
2.
When you recognize the passage you want,
release
∞
or
§
.
=
Normal playback continues.
Programming track numbers
In the stop position, select and store your CD tracks in
the desired sequence. Up to 20 tracks can be stored in
the memory.
1.
In the stop position, press
∞
or
§
(on the remote
control
¡
or
™
) once or repeatedly to select your
desired track number.
MP3-CD only:
• First press
ALBUM/ PRESET –
or
+
once or more
to find your album.
2.
Press
PROGRAM
.
™
and the number of tracks stored
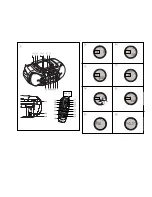
appear briefly. (See
5
)
™
Display shows:
PROG
and the selected track
number. (See
6
)
3.
Repeat steps
1-2
to select and store all desired
tracks.
4.
To start playback of your disc program, press
2;
.
Helpful Hints:
–
During normal playback, you can press
PROGRAM
to add a current track to your program list.
–
appears if you press
PROGRAM
and there is no track selected.
–
appears if you try to store more than 20
tracks.
Reviewing the program
•
In the stop position, press and hold down
PROGRAM
for a while until the display shows all
your stored track numbers in sequence.
Helpful Hints:
– Display shows :
if there is no track pro-
grammed.
Clearing a program
You can erase the contents of the memory by:
• Press
9
:
– Once, if in the stop position;
– Twice, during playback.
• Press
STANDBY ON
y
;
• Select another sound source;
• open the CD door
=
displayed briefly, and
program
disappears.
Different play modes: SHUFFLE and REPEAT
(See
7
-
8
)
You can select and change the various play modes
before or during playback. The play modes can be
combined with PROGRAM.
shuffle
- tracks of the entire CD/ program are
played in random order
repeat all shuffle
- to repeat the entire CD/ program
continuously in random order
repeat all
- repeats the entire CD/ program
repeat
- plays the current track continuously
1.
To select play mode, press
MODE
once or more.
(
SHUFFLE
/
REPEAT
on the remote control).
2.
Press
2;
to start playback if in the stop position.
• If you have selected
shuffle
, playback starts
automatically.
3.
To select normal playback, press
MODE
repeatedly until the various modes are no longer
displayed.
– You can also press the
9
to cancel your play
mode in playing.
AUX / CASSETTE RECORDER
CASSETTE RECORDER
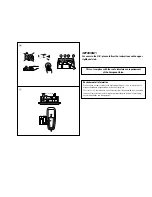
AUX (audio cable not included)
.
(See
9
)
This 3.5mm socket allows you to connect other audio
equipment to your system.
1.
Press
y
to on, then the
source selector
to select
AUX
.
=
Display shows:
AUX
and
PHILIPS
scrolls
2.
Use an audio cable to connect the AUX socket to
the LINE OUT/headphone socket on your external
equipment.
3.
To avoid noise distortion, turn down the volume on
your external equipment.
4.
To adjust the sound and volume, use the sound con-
trols on your external equipment and the AZ3067.
Cassette recorder
Cassette playback
1.
Press
y
to on, then the
source selector
to select
TAPE
.
=
Display shows
throughout tape
operation.
2.
Insert a cassette and close the door.
3.
Press
PLAY
1
to start playback.
4.
To pause, press
PAUSE
;
;. Press
PAUSE
;
again
to resume.
5.
Press
SEARCH
5
/
6
to fast wind the tape.
6.
To stop the tape, press
STOP•OPEN
9/
.
Helpful Hints:
- During playback, the keys are automatically
released at the end of a tape and the set is
switched off (unless PAUSE mode
;
has been
activated.)
- During fast forwarding/rewinding, the keys will
not be released at the end of a tape. To switch
off the set, make sure the cassette keys are
also released.
.
GENERAL INFORMATION ON RECORDING
• Recording is permissible insofar as copyright or.
other rights of third parties are not infringed.
• For recording, use only NORMAL type cassettes
(IEC type
I
) on which the tabs have not yet been
broken. This deck is not suited for recording on
CHROME (IEC
II
) or METAL (IEC
IV
) type cassettes.
• The best recording level is set automatically.
Altering the
VOLUME
or
BASS
controls will not
affect the recording.
• To protect a tape from accidental erasure, break out
the tabs. If you wish to record again, cover the tabs
with a piece of adhesive tape.
CD Synchro Start recording
1
Select CD function.
2
Insert a CD and if desired, programme track
numbers.
3
Open the cassette door.
4
Insert a suitable tape into the cassette deck and
close the door.
5
Press
RECORD
0
to start recording.
™
Playing of the CD/program starts automatically
from the beginning. You don’t need to start the
CD player separately.
• To select and record a particular passage within
a CD track:
– Press
∞
or
§
. Release the control when you
recognize the passage you want.
– To pause CD playback, press
2;
.
™
Recording starts from this exact point in the
track when you press
RECORD
0
.
6
To pause recording, press
PAUSE
;
.
Press
PAUSE
;
again to resume recording.
7
To stop recording, press
STOP/OPEN
9/
.
Recording from the Radio
1
Tune to the desired radio station (see Tuning to
radio stations).
2
Follow steps 3-7, under CD Synchro Start recording.


