background image

34 


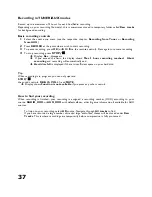
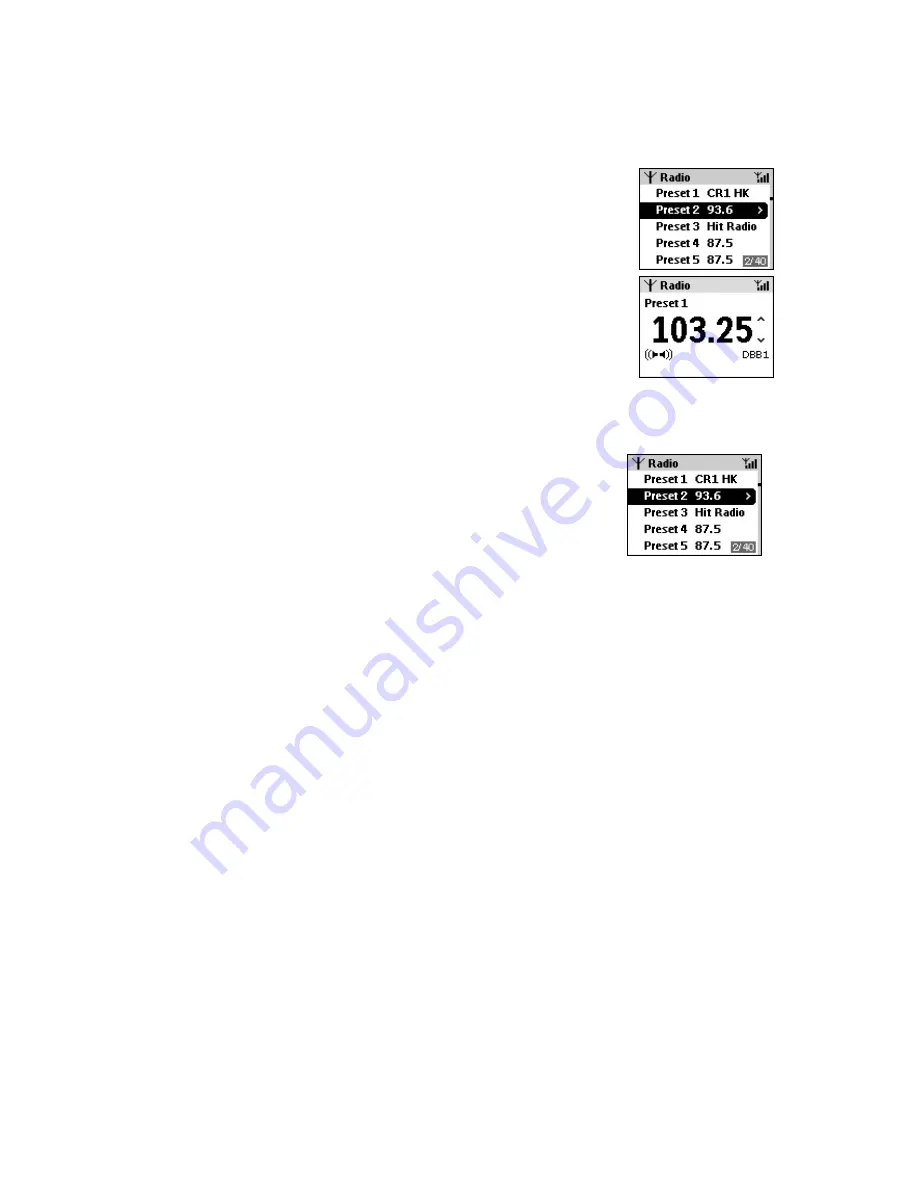
Programming presets manually


Program up to 40 stations. 
 

In tuner mode, press the left navigation key   to return to the 
preset list screen, if necessary. 

Use the up/ down navigation  /  control to select a preset 

frequency you want to overwrite. 

Tune to your desired station as described in 

Manual tuning

Press and hold 

OK

 on the unit for 2 seconds, or 

PROGRAM

 on the 

remote control to store your preset. 


If the frequency is not already stored, 

Preset X 

appears, where

 X 

is a number (

1-40

) of your preset location. 

Repeat steps 

1-4

 above to store your other desired stations. 


Listening to preset stations 
 

If necessary, press the left navigation key   to return to the preset 
list screen. 

Use the up/ down navigation  /  control to select a preset 
frequency you want to listen to. 

Press  /

OK

 to play the station. 


Summary of Contents for Streamium WACS700

Page 1: ...Wireless Music Center Station WACS700 User manual March 28 2005 www philips com support philips ...

Page 2: ...ed L or coloured red Do not connect either wire to the earth terminal in the plug marked E or e or coloured green or green and yellow Before replacing the plug cover make certain that the cord grip is clamped over the sheath of the lead not simply over the two wires Copyright in the U K Recording and playback of material may require consent See Copyright Act 1956 and The Performer s Protection Act...

Page 3: ...eration This set complies with the radio interference requirements of the European Community Hereby Philips Consumer Electronics BCU Audio Video Entertainment declares that this product WACS700 is in compliance with the essential requirements and other relevant provisions of Directive 1999 5 EC English Norge Typeskilt finnes på apparatens bakside Observer Nettbryteren er sekundert innkoplet Den in...

Page 4: ...ct and about new additions to this exciting range to make your home entertainment experience even more enjoyable Please visit www philips com support and enter your product name WACS700 to view FAQ Frequently Asked Questions Latest user manuals and PC software manuals Firmware upgrade files for WACS700 Latest PC software downloads interactive troubleshooting Since it is possible for you to upgrade...

Page 5: ...Consumer Electronics manufacturer s name Philips declare under our responsibility that the electrical product Philips WACS700 22 name type or model Wireless Music Center Station product description to which this declaration relates is in conformity with the following standards EN55013 2001 ...

Page 6: ...elated data from Gracenote Inc copyright 2000 2003 Gracenote Gracenote CDBB Client Software copyright 2000 2003 Gracenote This product and service may practice one or more of the following U S Patents 5 987 525 6 061 680 6 154 773 6 161 132 6 230 192 6 230 207 6 240 459 6 330 593 and other patents issued or pending Services supplied and or device manufactured under licence for following Open Globe...

Page 7: ..._____22 Recording CDs on the Center_______23 Renaming tracks_________________24 Selecting and searching ____________ Selecting a track when playback is stopped ______________________________ Selecting a track during playback ______ Searching for a passage during playback ______________________________ Additional selecting and searching on MP3 CDs only __________________________ Selecting an album ...

Page 8: ...____________41 Mounting kit______________________42 For computer users Philips Media Manager DMM _________43 General info Environmental information ___________ 44 Maintenance ______________________ 44 Disc handling ______________________44 Setup___________________________ 44 Technical data __________________ 45 Troubleshooting ________________46 Frequently asked questions _______46 Glossary_______...

Page 9: ...50 CDs use its built in gracenote CDDB Database to search and display any available ID3 tag information when you load original pre recorded audio CDs rip compress and store audio CD files into MP3 format record and store FM tuner or an AUX source up to 10 files of 3 hours each as audio Flash files connect to a computer using WiFi and or Ethernet You can then simply transfer files from your compute...

Page 10: ...4 Fig 1 Wireless Music Center WAC700 ...

Page 11: ...5 Fig 2 Wireless Music Station WAS700 ...

Page 12: ... towards these sensors SOURCE toggles 4 sound sources REC to record from a selected source Lights up red when recording on Center only INCR SURROUND Incredible Surround sound option on off MUTE mute sound on off Navigation control OK start pause playback confirm a setting previous next level screen Up previous scroll upwards fast search play backwards Down next scroll downwards fast search play fo...

Page 13: ...sh French Spanish German and Italian REFRESH Synchronize the remote display with the Center Station press briefly to switch to standby press and hold for ECO POWER standby On Display shows device status menus and track information CD MP3 CD selects switches on device to disc source on Center only HARDDISK selects switches on device to hard disk source TUNER AUX toggles switches on device to Tuner ...

Page 14: ...6 m n o mark or unmark tracks for ripping on Center only alphanumeric input SLEEP 7 p q r s sets the sleep timer to automatically switch off the device alphanumeric input DIM 8 t u v switches display lighting on off on Center only alphanumeric input RDS NEWS TUNER selects RDS information 9 w x y z In other modes activates deactivates news alphanumeric input MATCH GENRE activates preset sound setti...

Page 15: ... way remote Below is a list of variations alphanumeric input combined with other feature buttons as shown Server selects switches on device to hard disk source short press up long press to scroll browse backwards short press down long press to scroll browse downwards I go to previous level screen I go to next level screen fast search backwards fast search forwards TIP For an explanation of the oth...

Page 16: ...ven when operated near the Center Station Batteries contain chemical substances so they should be disposed of properly B ACK Station remote 1x CR2025 Center remote 4 x AAA TIPS For best operation avoid blocking your remote signal path Any obstruction between the 2 Way remote signal and the Center s IR sensor may cause a temporary delay between the Center s actual display and that shown on your rem...

Page 17: ...nnection wired option for computer users only Connect the supplied LAN Ethernet cables for each device to your PC 4 Connect the power plugs to your AC power supply For users in the U K please follow the instructions on page 3 4 4 2 2 3 3 TIP When the set is switched to standby it is still consuming some power To disconnect the set from the mains completely remove the mains plug from the wall socke...

Page 18: ...tation Station search and connection status is shown where X denotes the number of Stations detected On the Station Center search and connection status is shown HD screen appears Your unit is now ready to play 2 Install the Station a After you plugged in the unit the STANDBY ON LED lights up red Wait a few seconds until the display shows the PHILIPS screen b Press STANDBY ON on the unit the STANDB...

Page 19: ...er soon followed by No connection to Center and then Display shows Station number when found Display shows Station connection status is displayed for connected Stations If disconnected Other Connection status messages DMM found Is displayed if you are using WACS700 with a computer installed with Philips Digital Media Manager DMM Please ensure that the Center is in Station installation mode Switch ...

Page 20: ...owing screens from ECO POWER standby On the set only press SOURCE respectively to wake up your Center Station to active standby On the set remote control press STANDBY ON respectively to wake up your Center Station Display shows the Welcome screen then your chosen source screen last selected source TIP Inserting a CD into the Center slot loader wakes the set directly into CD mode If you have activ...

Page 21: ... the respective remote control press SOURCE once or more on the Center Station until your desired function screen appears on the display CD MP3 CD HARDDISK or TUNER AUX Server or Tuner Aux TIP Tuner preset stations recording and sound settings except for MATCH GENRE and if the last volume played exceeds level 10 are memorized and resumed when switching on from standby or ECO POWER mode Center remo...

Page 22: ...nce or more to toggle to enhance bass at 3 levels Display shows DBB and level status 1 2 or 3 INCR SURROUND The Incredible Surround magnifies the virtual distance between the front speakers for an incredibly wide stereo effect Press INCR SURR 4 ghi once or more to toggle on off If activated display shows IS ON If deactivated display shows IS OFF TIP Press MENU to select and navigate through EQUALI...

Page 23: ...ully processed What Main header icon Sublevel icon HD CD source Radio source Server source Playlists Artists Albums Genres All tracks Raw uncompressed tracks Repeat once Repeat all Shuffle and repeat Shuffle Music Follows Me Broadcast activated Station Broadcast deactivated Match Genre Searching WiFi signal strength Station connected Station disconnected Playable folder Data non playable folder RD...

Page 24: ... full screen displays will guide you through the status of your system information Confirmation progress screens warning error messages Busy animation This appears for features that require a few extra seconds to perform and indicates your unit is busy ...

Page 25: ...ATION submenus according to source HD Tuner Aux Upnp Browsing Equalizer Auto Store Equalizer Create Playlist Equalizer Settings Add to Playlist Settings Information Installation Mode Information Select Center Select Center Settings Information The number of menu options vary on the Center and Station as the Center is designed with more functions e g Settings menu below Navigate through each screen...

Page 26: ...NU on the device remote control A menu pop up appears 2 Use the OK navigation up down left right controls to highlight and select your option setting 3 Press OK to confirm play Example of options when you press MENU to select Settings submenu Center display Station display ...

Page 27: ...ress or on the remote control Skip to next previous item short press or on the remote control For speed use the remote control to key in the number of a desired track Display settings 2 options Backlight on off Contrast Use the navigation controls to adjust the display settings ...

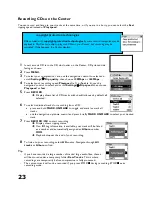
Page 28: ...utomatically switches the Center to CD source exception recording mode in progress Display shows Reading CD 2 To start playback press OK on the Center or II on the remote control Display shows current track title elapsed playtime and ID3 information if available Play mode and sound settings if selected 3 To pause playback press OK or II on the remote control 4 To stop playback press STOP 5 To ejec...

Page 29: ...ks use the navigation up down control and press briefly MARK UNMARK to select your desired track 7 Press RECORD OK to start recording Display shows ripping status If no ID3 tag information is available your track will be listed as a number and automatically assigned an Album number XXX Playback stops at the end of your recording 8 To listen to your recording select HD source Navigate through All t...

Page 30: ...24 Renaming tracks ...

Page 31: ...k press OK on the Center or II on the remote control Gracenote CDDB updates via the internet If you are have access to the internet and are either WiFi enabled or connected via Ethernet your Center will attempt to access the latest CDDB information via your internet connection if there is no information on the CD in your built in CDDB database There is a 60 sec time out for Gracenote searches via ...

Page 32: ...to play the Empty container 3 To start playback press OK or II on the remote control Display shows following details if available current track title file type bit rate elapsed playtime ID3 information equalizer sound setting and next track title Information on non playable tracks When playing a library option the system may not be able to play all the tracks in it due to different reasons In such...

Page 33: ...all your tracks according to a single specified music genre LIKE GENRE or artist LIKE ARTIST 1 In HD source or MP3 CD playback press LIKE GENRE or LIKE ARTIST to activate Display shows Like Artist or Like Genre message Playback starts to play all tracks according to a genre artist respectively from the current track selected Playback stops when the last song is played from your selected genre arti...

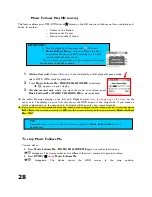
Page 34: ...urther adjustments on the second unit its display will then enter into normal standby If you wish to resume playback from the exact point as played on the source device first press pause II on the remote control or OK on the source device before you activate Music Follows Me TBC To stop Music Follows Me You can either Press Music Follows Me MUSIC FOLLOWS ME again or another function key disappears...

Page 35: ...own ends broadcast begins Playback on your Station is now the same as that playing and displayed on your Center For users with multiple Stations If you wish a Station to join an ongoing broadcast you will need to restart broadcasting see steps 1 3 above 1 Press right navigation control to select your desired Station 2 If necessary select to wake up the Station from standby IMPORTANT Not for playba...

Page 36: ... The Station resumes its previous status Rejected broadcast icon appears 2 To cancel completely on the Center press STOP Both the Center and Station will show the default HDD screen for 5 minutes If no other buttons are pressed the system automatically enters standby mode at the end of the 5 minutes ...

Page 37: ...Add to Playlist 4 Navigate and select your playlist in the menu 5 Press OK to add your selected track Each new track is added to the end of your playlist Display shows Playlist is full if you exceed the maximum number of tracks Deleting Playlists available on the Center only You can edit modify and delete playlists freely on the Center 1 In the default HD source screen Playlist highlighted press M...

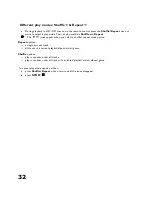
Page 38: ... Repeat The icons appear when you select a shuffle repeat mode option Repeat options a single current track all tracks of a current playlist album artist genre Shuffle options play in random order all tracks play in random order all tracks of a selected playlist artist album genre To cancel play mode options either press Shuffle Repeat once or more until the icons disappear press STOP ...

Page 39: ...enu options Select the Autostore option to automatically store up to 10 stations in order of increasing radio frequency Display shows auto stored stations as a list of preset numbers of each station frequency or RDS station name if available Remaining presets stations are default filled by the frequency 87 5 See next chapters to manually tune further presets Manual tuning You can either press the ...

Page 40: ...ing 4 Press and hold OK on the unit for 2 seconds or PROGRAM on the remote control to store your preset If the frequency is not already stored Preset X appears where X is a number 1 40 of your preset location 5 Repeat steps 1 4 above to store your other desired stations Listening to preset stations 1 If necessary press the left navigation key to return to the preset list screen 2 Use the up down n...

Page 41: ...roadcasts the necessary signal while sending the news The NEWS function can be activated from any mode except during streaming MUSIC FOLLOWS ME BROADCAST and tuner mode Activating the NEWS function On the remote control press RDS NEWS once or more to toggle between switching the NEWS function on off NEWS is shown and NEWS is displayed briefly The current active mode remains uninterrupted while the...

Page 42: ...36 Changing tuner grid 21 IFU versions only On your remote control press and hold TUNER and for X seconds GRID 9 GRID 10 appears respectively ...

Page 43: ...recording reached Abort recording and recording will automatically end Hard disc full is displayed if there is insufficient space on your harddisk Tip When recording is in progress you can only operate STOP the sound controls DBB IS VOL and MUTE Display shows Function is not available if you press any other controls How to find your recording When recording is finished your recording is assigned a...

Page 44: ...ecording from AUX 1 Select AUX source when you have connected another external device with a cable not supplied to AUX IN on the Center 2 Play the external device 3 On the Center press REC OK to start recording Display shows Recording Tip Always refer to the owner s manual of the other equipment for complete connection and use details ...

Page 45: ... Center you may wish to stream music direct from your PC music folder to your Station 6 Select your external server 7 Use the navigation control to browse for the folder you wish to access for playback 8 To start playback press OK on the Station or II on the remote control ...

Page 46: ... your preset time period 15 default 30 45 60 90 120 OFF 15 If SLEEP is activated Zz also appears Display shows a countdown of 10 seconds just before switching to standby SLEEP 10 SLEEP 9 SLEEP 8 then SLEEP and Good bye If recording is in progress during the end of a sleep period any partially ripped tracks will be deleted 2 To cancel SLEEP you can either Press SLEEP until you OFF appears Press STA...

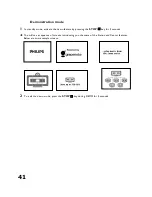
Page 47: ... the demo feature by pressing the STOP key for 5 seconds You will see a sequence of screens introducing you the some of the Station and Center features Below are some sample screens 2 To exit the demo mode press the STOP key during DEMO for 5 seconds ...

Page 48: ... noise and interference e g TVs fluorescent lamps microwaves Connect the power cord FM antennas and if necessary the supplied Ethernet cable when you test for accessibility of your best mounting location Decide whether you want to connect the unit with other audio equipment 1 Find a suitable clean flat wall surface to mount near a wall outlet power socket 2 Align the bracket at your chosen locatio...

Page 49: ...supplied Ethernet cable Option B If you already have a wireless computer network check the settings of your existing wireless computer network 5 Select your language 6 Select your internet configuration for the CDDB feature 7 Select your music folder 8 Follow the screen instructions to complete installation 9 Restart your computer if prompted 10 The Digital Media Manager icon X appears on your Des...

Page 50: ... ventilation Care of the cabinet Use a soft cloth slightly moistened with a mild detergent solution Do not use a solution containing alcohol spirits ammonia or abrasives Finding a suitable location Place the player on a flat hard and stable surface Disc handling To take a disc out of its box easily press the centre spindle while lifting it After use always take the disc out of the set and store it...

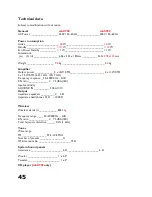
Page 51: ...____2 x 40W RMS_______________________2 x 10W RMS 2 x 75 W RMS 6 Ω 1kHz 10 THD Frequency response _ 50 20000 Hz 3dB S N ratio _____________ 75 dBA IEC Input sensitivity AUX CDR IN __________ 500 mV 1V Output Impedance speakers _________ 6 Ω Impedance headphones 32 Ω 1000 Ω Wireless Wireless standard ____________ 802 11g Frequency range ____ 50 20000 Hz 3dB S N ratio _____________ 75 dBA IEC Total ...

Page 52: ...dard for wireless broadband networking It is a technology for digital data transfer with wider range and bandwidth Streaming is process describing data is pulling between places can be multiple places The Wi Fi logo guarantees maximum interoperability among devices carrying this symbol The Philips Streamium connects quickly and easily to any other Wi Fi certified networking equipment How do I add ...

Page 53: ...mum distance between the Center and Station in order to allow effective wireless streaming The Standard Wi Fi specification is 100m However due to the material construction and design of homes multiple layers of wall doors furnishings etc create added barriers As a result the maximum distance for streaming without distortion is approximately 60m Can I download music from the internet and store the...

Page 54: ...s service automatically assigns IP Internet Protocol addresses to devices active in a LAN Local Area Network from the Center your server device DNS Domain Name System Firewall A firewall acts as a barrier that helps protect your network from intruders from the Internet The firewall specifies what information can be communicated from the computers on your network to the Internet and from the Intern...

Page 55: ... Internet Protocol a data coding system WEP Wired Equivalent Privacy a password or key used for wireless networks WEP is an encryption key for security When prompted you will need to enter your WEP to enable 2 or devices to share data ...

Page 56: ...50 Meet Philips at the Internet http www philips com Need more help or information on installation Visit www philips com support WACS700 Printed in China LC wk513 ENGLISH ...

Reviews: