E
NGLISH
A
DAPTING REMOTE CONTROL
43
43
1
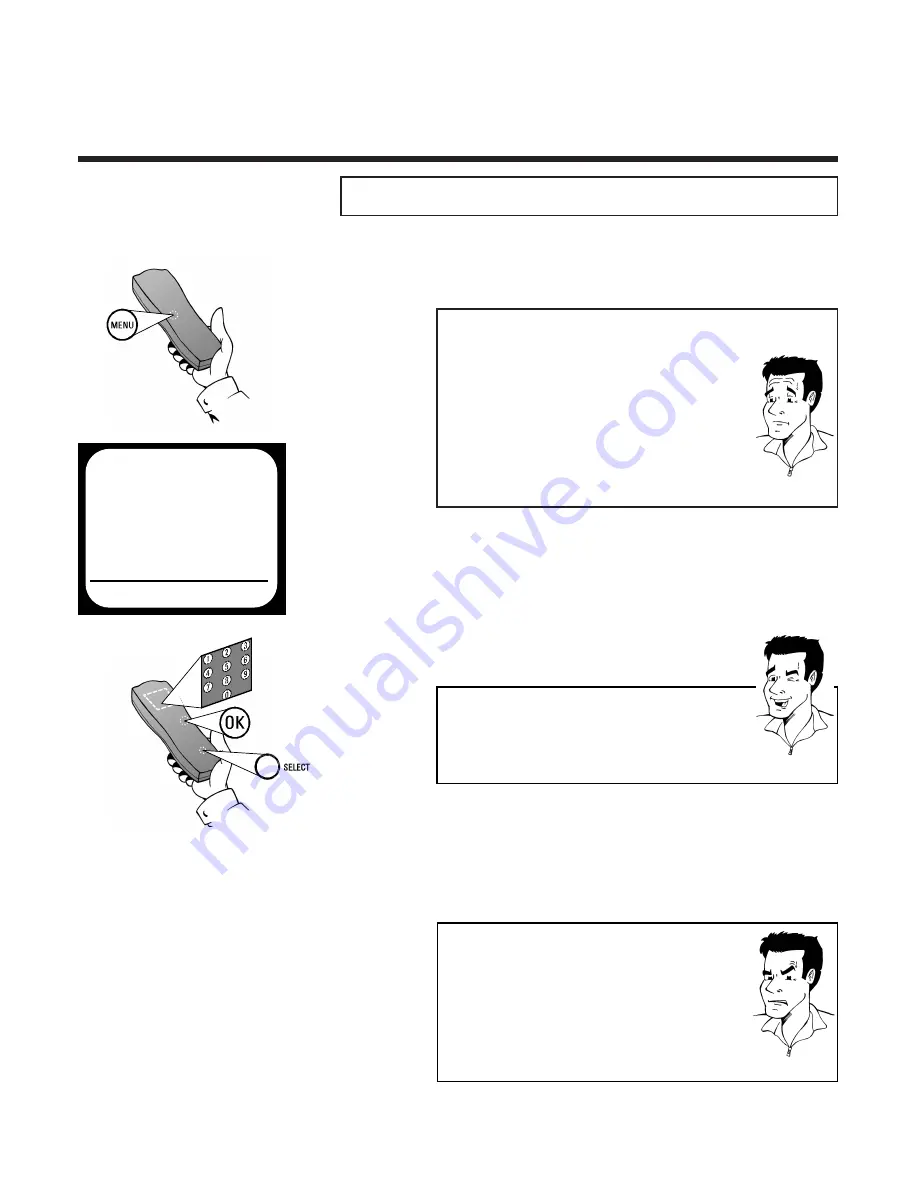
Press the M
MEEN
NU
U button on the remote
control.The on-screen menu appears
A
Addaappttiinngg rreem
moottee ccoonnttrrooll
If you are using two video recorders which both react to the same
remote control codes, you can use this function to change remote
control and video recorder to other codes.
2
On the remote control press the buttons
SSEELLEEC
CTT and 22 ssiim
muullttaanneeoouussllyy, to set the video
recorder to
VCR 2
(or SSEELLEEC
CTT and 11, to set
it to
VCR 1
)
3
Confirm with O
OK
K. The screen will show
RESPONDS TO VCR 2
or
RESPONDS TO
VCR 1
.The on-screen menu disappears The
adjustment of the remote control is
complete
MAIN MENU
CLOCK
AUTO INSTALL
MANUAL SEARCH
TV CHANNEL ALLOC.
RECORD SPEED
AUTO STANDBY
TV SYSTEM
SPECIAL SETTINGS
OK
W
Whhaatt aarree rreem
moottee ccoonnttrrooll ccooddeess??
Each time the button on your remote control is
pressed, an invisible infra-red signal is sent to the video
recorder. Each button has been allocated a specific
code, which ensures, that the video recorder will carry
out the corresponding function. If two video recorders
respond to the same codes, the remote control signal
emitted will be recognised and performed by both.
Therefore the possibility exists, to allocate different
remote control commands (with other codes) to this
video recorder.This means that the uninterrupted use
of both video recorders is possible once more.
PP
A
ARRD
DO
ON
N
??
T
TIIPP
W
Whhaatt m
muusstt II sseett??
If two video recorders respond to the same codes,
they are either both set to
VCR 1
or
VCR 2
.
Please change the setting of only one video recorder!
The factory setting of the video recorder is
VCR 1
.
PPRRO
OBBLLEEM
M
8
8
M
Myy oonn--ssccrreeeenn m
meennuu ddooeess nnoott ddiissaappppeeaarr
4
4
The video recorder does not recognise the change
of remote control codes. Repeat steps
2
and
3
8
8
A
Afftteerr tthhee bbuuttttoonnss aarree pprreesssseedd
VCR 1
oorr
VCR 2
aappppeeaarrss iinn tthhee ddiissppllaayy ooff tthhee vviiddeeoo rreeccoorrddeerr
4
4
Repeat step
2
to reset the remote control to
the displayed settings


