background image

6

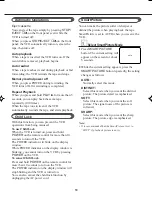
 Setting the Clock/Date

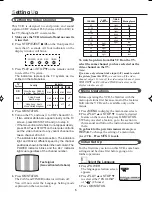
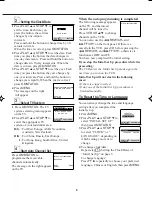
Press 

PLAY 

5 or 

STOP


∞  to

set the time. Each time you
press the button, the set time
changes by one-minute
intervals.
Press and hold the button to change time by 30-
minute intervals.
When the time is correct, press 

OK/STATUS

.

Press 

PLAY 

5 or 

STOP


∞ to set the date. Each

time you press the button, the date changes in
one-day increments.  Press and hold the button to
change dates in 15-day increments. When the
date is correct, press 

OK/STATUS

.

Press 

PLAY 

5 or 

STOP


∞ to set the year. Each

time you press the button, the year changes by
one-year intervals. Press and hold the button to
change years rapidly. When the year is correct,
press 

OK/STATUS

.

Press 

MENU

.

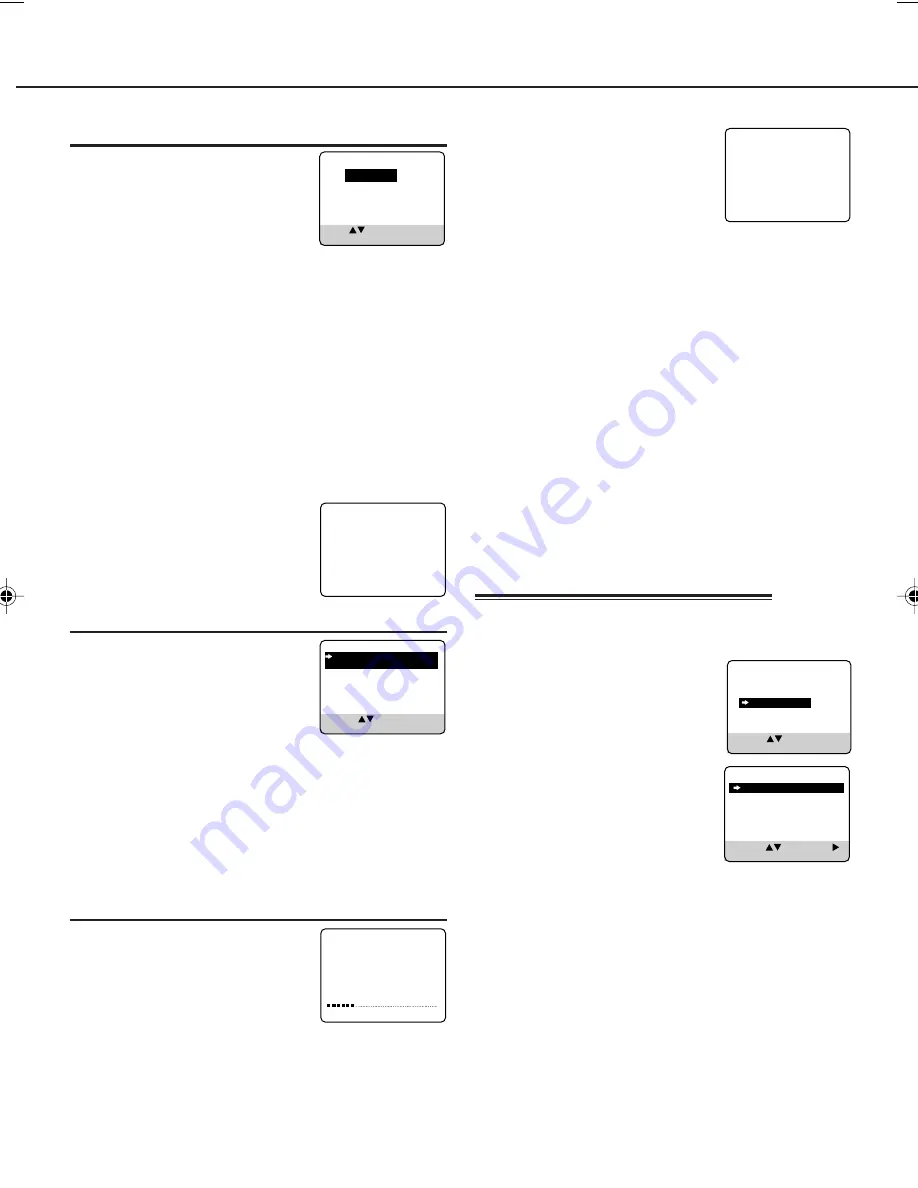
The message on the right

    will appear.

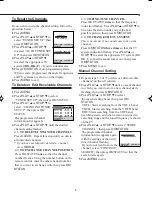
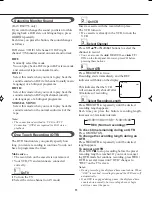
 Select TV System

 Press 

OK/STATUS.

 The TV

system selecting menu appears
on the TV.

Press 

PLAY 

5 or 

STOP


∞ to

select the appropriate TV
system of your residential area.
B/G : For West Europe, ASEAN countries,

Australia, New Zealand.

D/K : For China, Russia, East Europe.
      I : For Hong Kong, South Africa, United

Kingdom.

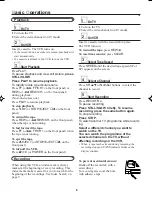
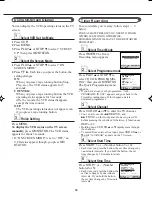
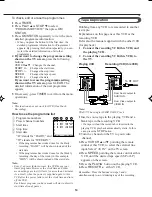
 Start Auto Channel Set

Press 

OK/STATUS

 to

programme the receivable
channels automatically.
The message on the right appears
on the TV.

2

When the auto programming is completed

The following message appears
on the TV, and the lowest
channel will be tuned in.
Press 

VCR CH


5/∞ to change

channels on the VCR.
You can also use the 

1

REW/CH-

 and

¡ 

FF/CH+

 on the front panel. If there is a

cassette in the VCR, press CH before pressing the
1

REW/CH-

 and 

¡ 

FF/CH+

, otherwise it

functions as REW and FF.
You have now completed the initial setting.
If you stop the Inital Set Up procedure while it is
proceeding:
The VCR enters the Initial Set Up mode again the
next time you turn on the VCR.
Initial Set Up will not start in the following
cases:
• If there is a tape inserted.
• If any one of the Initial Set Up procedures is
  finished manually.

3

CONNECT ANTENNA OR CABLE
TO VCR FOR AUTO CH. SET

READY: OK
END: MENU

   
AUTO CH. SET PROCEEDING

PLEASE WAIT 

START

         FINISH

   
AUTO CH.SET COMPLETED
  

4

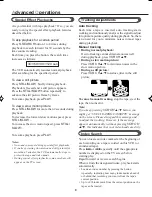
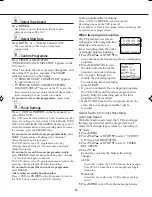
You can always change the time and language
setting after you completed the
initial set up.
Press 

MENU

.

Press 

PLAY 

5 or 

STOP


∞ to

select “INITIAL SET UP”
then press 

OK/STATUS

.

Press 

PLAY 

5 or 

STOP


to select “CLOCK” or “
LANGUAGE”, depending on
which setting you want to
change.

To change clock/date:

Repeat step  3   (Setting the Clock/Date) of
“Initial Set Up” on page 5.
To change language:
Press 

FF 

3 repeatedly to choose your preferred

language, Chinese or English, then press 

MENU

.


 TIME   - - : - -  

           DATE  01/01/01


SET:                         NEXT: OK
END: MENU

     SYS COUNTRY
     

B/G  W.EUR.  ASEAN  AUST.

             NZ

     D/K  CHINA  RUS.  E.EUR.
     I       HK  S.AF.  UK
    

SELECT:            CONFIRM: OK
END: MENU

To Reset the Time or Language

         VCR SET UP
         TUNER SET UP
         

INITIAL SET UP


 SELECT:             CONFIRM: OK
 END: MENU

SELECT:             CHANGE: 
END: MENU

CLOCK


LANGUAGE        ENGLISH

407/55A5

01.10.2, 8:57 AM

6

Summary of Contents for VR 655

Page 1: ...openings or holes If the ventilation openings or holes are blocked by a newspaper or cloth etc the heat may not be able to get out 3 DO NOT place heavy objects on the VCR or remote control 4 DO NOT place anything which might spill on top of the VCR or remote control If water or liquid is allowed to enter this equipment fire or electric shock may be caused 5 DO NOT expose the apparatus to dripping ...

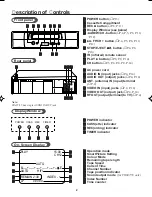
Page 2: ...13 2 2 2 2 2 Cassette Compartment 3 3 3 3 3 REC button P 8 P 11 4 4 4 4 4 Display Window see below 5 5 5 5 5 1REW CH button P 4 P 5 P 8 P 10 P 12 6 6 6 6 6 FF CH button P 4 P 5 P 8 P 10 P 12 7 7 7 7 7 STOP EJECT 7 0 button P 4 P 8 P 10 8 8 8 8 8 IR infrared remote sensor 9 9 9 9 9 PLAY 3 button P 8 P 9 P 10 0 0 0 0 0 CH button P 5 P 6 P 8 P 9 P 14 Note VR407 55 has single AUDIO IN OUT jack On Scre...

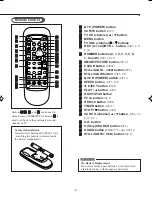
Page 3: ... P 8 OK STATUS button FF 3 button P 8 REW 2 button P 8 TIMER button P 13 STOP button P 8 q q q q q VCR CH channel 5 button P 6 P 9 P 12 P 13 w w w w w ALT button e e e e e S Skip SEARCH button P 9 r r r r r AUDIO button VR607 55 only P 11 t t t t t STILL SLOW button P 8 CAUTION On Battery Replacement Do not mix old and new batteries Also never mix alkaline batteries with manganese batteries 1 4 7 ...

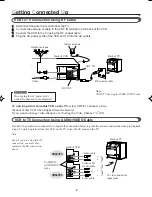
Page 4: ...a picture from this VCR on the TV select the AV mode on the TV Note Even if you are using this AV connection you must also complete the RF connection above To watch a picture from this VCR on the TV select UHF E36 channel video channel of this VCR when shipped from the factory If you want to change video channel see Setting the Video Channel P 5 VCR to TV Connection Using AUDIO VIDEO Cable CAUTION...

Page 5: ...POWER blink blink blink CASS REC TIMER Indicator blink blink blink blink blink blink off off off Test signal two vertical white bars For the first time you turn on this VCR some basic settings must be done first before going on to further operations Select the Language 1 Press POWER The language selection screen appears 2 Press PLAY 5or STOP to select either ENGLISH or Chinese 3 Press OK STATUS 1 ...

Page 6: ...be tuned in Press VCR CH 5 to change channels on the VCR You can also use the 1 REW CH and FF CH on the front panel If there is a cassette in the VCR press CH before pressing the 1 REW CH and FF CH otherwise it functions as REW and FF You have now completed the initial setting If you stop the Inital Set Up procedure while it is proceeding The VCR enters the Initial Set Up mode again the next time ...

Page 7: ...ect the search starting band then press OK STATUS VHF L Starts searching from the VHF L band VHF H Starts searching from the VHF H band UHF Starts searching from the UHF band Searching starts and when a station is tuned in searching stops and the tuned frequency is shown on the TV 4 Press PLAY 5or STOP to select STORE CHANNEL then press OK STATUS The programmed channel information list appears aga...

Page 8: ... hole with adhesive tape On TV 1 Turn on the TV 2 Select the video channel or AV mode On VCR Insert a cassette The VCR turns on If the record tab on a cassette is removed playback will start automatically If a cassette is already in the VCR turn on the VCR Start Playback Press PLAY To pause playback and view still picture press STILL SLOW Press PLAY to resume playback To rapidly locate a particula...

Page 9: ...a tape is inserted auto tracking starts working and continuously analyses the signal to adjust for optimum picture quality during playback So there is no need for you to minimize noises in most tapes during playback Manual tracking During normal playback If auto tracking cannot eliminate noises well during playback press VCR CH 5 During a slow motion picture Press VCR CH 5 to minimize noises in th...

Page 10: ...on the display window While POWER indicator on the display window is blinking you cannot turn on the VCR by pressing POWER on the VCR To cancel Child Lock Press and hold POWER on the remote control for more than 10 seconds to turn on the VCR The POWER indicator on the display window will stop blinking and the VCR is turned on You can also cancel the child lock function by unplugging the AC power c...

Page 11: ...urns off automatically If an OTR is engaged during pause the displayed time counts down normally but recording does not begin until you cancel the pause The OTR function lets you quickly specify how long you want a recording to continue You do not have to programme the timer Make sure The record tab on the cassette is not removed Your VCR TV and antenna are connected correctly On TV 1 Turn on the ...

Page 12: ...u press the button the set time changes by one minute intervals If you hold the button the set time changes by 30 minute intervals Using On Screen Display You can display the VCR operating status on the TV screen Select VCR Set Up Mode 1 Press VCR 2 Press MENU 3 Press PLAY 5or STOP to select VCR SET UP then press OK STATUS Select On Screen Mode 1 Press PLAY 5or STOP to select ON SCREEN MODE 2 Pres...

Page 13: ...TE or Number button 3 or 6 The year and day of the week are displayed automatically Confirm Programme Press TIMER or OK STATUS PROGRAM WAS COMPLETED appears on the TV screen After 5 seconds the above message disappears and the normal TV picture resumes The TIMER indicator lights up on the display If PROGRAM NOT COMPLETED appears try again from step 1 If PROGRAM NOT COMPLETED PRO GRAM OVERLAP appea...

Page 14: ...he VCR keeps your timer programs However the clock time and other menu settings are lost if it lasts for more than 3 minutes As a result when the power is supplied again to this VCR after the power failure set the clock time and turn off the VCR Each timer program you have made will start unless its start time already passes 1 Insert a source tape in the playing VCR and a blank tape in the recordi...

Page 15: ...ved Set the timer on time and timer off time correctly Make sure that the VCR is turned off after setting is made Timer recording may not be performed or stopped if a power interruption occurs before or during timer recording Select your video channel correctly Adjust the tracking slowly in either direction Try to change to another tape you may not have this problem Because the VCR playback signal...

Page 16: ...ays in advance 365 or every day or every week T u n e r T u n e r T u n e r Aerial input B G D K I K1 VHF L 42 MHz 175 MHz VHF H 175 MHz 470 MHz UHF 470 MHz 870 MHz CATV V i d e o V i d e o V i d e o Input VIDEO IN 0 5 V p p to 2 0 V p p 75 ohms Output VIDEO OUT 1 0 V p p 0 2 V p p 75 ohms Resolution Better than 240 lines Signal noise ratio Better than 43 dB A u d i o A u d i o A u d i o Input AUD...

Reviews: