background image

B

B

asic 

O

O

perations

7

8

1

2

3

1

2

3

4

5

Recording

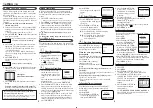
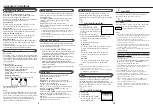
Are you familiar with tape playback?  If so, you are
ready to enjoy the special effect playback features
described below.

To skip playback for a certain period
Press 

SKIP SEARCH 

button 1 to 4 times during

playback to search forward for 30 seconds by the
time counter reading.
Each time you press the button, the search time
increases as follows:

30

=

60

=

90

=

120 sec.

The VCR automatically resumes normal playback
after searching for the specified period.

To view a still picture
Press 

STILL/SLOW

(or 

STILL/PAUSE


on

the  front panel)


briefly during playback.

Playback is freezed and a still picture appears.
Press the 

STILL/SLOW


button repeatedly to

advance the still picture frame by frame.
To resume playback, press 

PLAY


3.

To view a slow motion picture
Press 

STILL/SLOW


for more than 2 seconds

during playback.
To decrease the slow motion speed, press

STILL/SLOW

 –.

To increase the slow motion speed, press

STILL/SLOW

 +.

To resume playback, press 

PLAY 

3.

Notes:
• No sound comes out during special effect

playbacks.

• If you keep viewing slow motion and still pictures

for more than 5 minutes, the VCR automatically
stops to protect the tape and video heads.

• During special effect playbacks, some noise bars

will appear on the TV screen.

Special Effect Playbacks

Selecting Colour Mode

When using this VCR, an index mark is always
marked at the beginning of every recording. This
index marks make it easier for you to search for the
beginning of the recordings. See “Index Search” at
page 9.

On TV

Turn on the TV.
Select the video channel (or AV mode).

On VCR

Insert a cassette with the record tab in place.
The VCR turns on.
To rewind the tape, press 

REW


1.

To reset the time counter, press 

CLEAR.

Select Tape Speed

After pressing VCR, press 

ALT/SPEED

 until the

desired tape speed (SP, LP or SLP) appears on the
display.
SP, LP: For PAL signal.
SP, SLP: For NTSC signal.

Select a Channel

Press 

CH


5 or ∞ or 

Number

 buttons  to select the

channel to record.

Start Recording

Press 

REC/OTR 

.

To pause recording
Press 

STILL/SLOW


0

 briefly. To resume

recording, press the same button again.

To stop recording
Press 

STOP 

.

To watch another TV programme while recor-
ding
Select a different channel you want to watch on
the TV.
You can watch the programme of the selected
channel on the TV, without affecting recording on
the VCR.

• When  a tape reaches its end during recording, the

recording stops and 

 blinks on the display window.

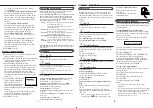
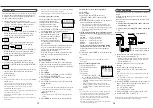
Before using the VCR, you need to set the colour
mode both for recording and playback.
Press 

COLOUR MODE

 on the front panel for more

than 2 seconds. The current setting will appear on
the screen for about 5 seconds. While the current
setting appears, press 

COLOUR MODE

 repeatedly,

the setting changes as follows.

AUTO: Normally select this mode. The colour system

is automatically detected.
If “AUTO” does not work well, choose the
other settings below.

NTSC3.58: To record the NTSC signals or playback an

NTSC3.58 tape on an NTSC TV.

NTSC4.43: To record the NTSC signals or playback an

NTSC4.43 tape on a PAL TV.

NTSC

=

=

=

=

=PAL TV (ONLY FOR PLAYBACK): To

playback an NTSC3.58 tape on a PAL TV.

PAL:

To record PAL signals or playback a PAL TV.

MESECAM: To record SECAM signals or playback a

MESECAM tape.

When playing back an NTSC tape with “AUTO” mode
selected, 
the NTSC signal is converted to PAL signal and is
played back.

Playback

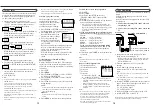
To prevent accidental erasure:

Break off the record tab with a
screwdriver.
To record again, cover the hole
with adhesive tape.

On TV

Turn on the TV.
Select the video channel (or AV mode).

On VCR

Insert a cassette. The VCR turns on.

• If the record tab on a cassette is removed, playback

will start automatically.

• If a cassette is already in the VCR, turn on the VCR.

Start Playback

Press 

PLAY


3.

To pause playback and view still picture, press 

STILL/

SLOW 

0

 (or 

STILL/PAUSE 

on the front panel).

Press 

PLAY


3 to resume playback.

To rapidly locate a particular scene, press 

FF

¡  or

REW

1 during playback. (No sound comes out.)

Press 

PLAY


3 to resume playback.

To stop playback, press STOP 

.

To rewind the tape, press 

REW


1 when the tape is not

running.

To fast forward the tape, press 

FF


¡ when the tape is

not running.

To eject the tape, press 

0

 EJECT

.

To turn off the VCR, press 

POWER

.

* If you have accidentally deleted a  channel,
   press 

REW


2.

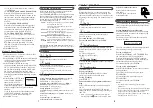
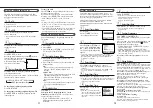
    5.2: TO EXCHANGE CHANNEL POSITION:

Press OK/STATUS once so that the channel
number flashes. Using the number button on the
remote control, enter the other channel number
that you want to exchange with, then press OK/
STATUS.

    5.3: TO FINE-TUNE CHANNELS
    Press OK/STATUS twice so that the frequency
    indication flashes.  Press 

PLAY

5 or 

STOP

    to fine-tune the station until you get the best
    possible picture, then press OK/STATUS.
    5.4: TO CHANGE THE TV SYSTEM:
    
This is necessary if no sound comes out on the
    channel.
    Press OK/STATUS three times so that the TV
    system indication flashes.  Press 

PLAY

5 or


STOP

∞ to select the approriate TV system

    (BG, DK, I) so that the sound comes out, then
    press OK/ STATUS.
Press 

MENU 

to exit.

Repeat steps 1-4 of “To delete or edit receivable

channels” on the left column

.

Press 

PLAY


5 or 

STOP


∞ until a vacant channel

in which you want to store a new channel starts
flashing, then press OK/STATUS.

Press 

PLAY


5 or 

STOP


∞ to select

    the search starting band, then press OK/STATUS.
    VHF L: Starts searching from the VHF L band.
    VHF H: Starts searching from the VHF H band.
    UHF: Starts searching from the UHF band.

Searching starts, and when a station is tuned in,
searching stops and the tuned frequency is shown
on the TV.

Press 

PLAY


5 or 

STOP


∞ to

select “STORE CHANNEL”,
then press OK/STATUS.

    The programmed channel in-

formation list appears again
with the settings of the newly tuned channel
flashing.

    If you do not want to store the channel, select

“CONTINUE SEARCH”, then press OK/
STATUS so that the search starts again.

Press MENU to exit.

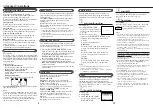
Manual Channel Setting

SELECT:             CONFIRM: OK 
END: MENU

STORE CHANNEL    


CONTINUE SEARCH

Summary of Contents for VR220/55

Page 1: ...minal to TV P 4 CHANNEL REC OTR MENU POWER PLAY OK STATUS COLOUR MODE VIDEO AUDIO STILL PAUSE STOP EJECT When the equipment is installed in a cabinet or a shelf make sure that it has sufficient space on all sides to allow for ventilation 10 cm or more on both side on top and at the rear When discarding batteries environmental problems must be considered and the local rules or laws governing the di...

Page 2: ...minal to TV P 4 CHANNEL REC OTR MENU POWER PLAY OK STATUS COLOUR MODE VIDEO AUDIO STILL PAUSE STOP EJECT When the equipment is installed in a cabinet or a shelf make sure that it has sufficient space on all sides to allow for ventilation 10 cm or more on both side on top and at the rear When discarding batteries environmental problems must be considered and the local rules or laws governing the di...

Page 3: ...age 15 for setting code instructions Followings are the operative buttons TV Makes the remote control ready for operating the TV Make sure you press this button before pressing the other operative buttons POWER Turns the TV on or off VCR TV Selects TV mode or Auxiliary mode at TV ALT for PHILIPSTV only Goes back to the previously selected channel on TV VOL5 5 5 5 5 Changes the TV volume CH5 5 5 5 ...

Page 4: ...age 15 for setting code instructions Followings are the operative buttons TV Makes the remote control ready for operating the TV Make sure you press this button before pressing the other operative buttons POWER Turns the TV on or off VCR TV Selects TV mode or Auxiliary mode at TV ALT for PHILIPSTV only Goes back to the previously selected channel on TV VOL5 5 5 5 5 Changes the TV volume CH5 5 5 5 ...

Page 5: ...IRM OK END MENU To Delete or Edit Receivable Channels 1 Press VCR 2 Press MENU 3 Press PLAY 5or STOP to select TUNER SET UP then press OK STATUS 4 Press PLAY 5or STOP to select CHANGING TUNER SET UP then press OK STATUS The programmed channel information list appears 5 Press PLAY 5or STOP until the desired channel setting flashes 5 1 TO DELETE UNWANTED CHANNELS Press CLEAR Repeat this step until y...

Page 6: ...IRM OK END MENU To Delete or Edit Receivable Channels 1 Press VCR 2 Press MENU 3 Press PLAY 5or STOP to select TUNER SET UP then press OK STATUS 4 Press PLAY 5or STOP to select CHANGING TUNER SET UP then press OK STATUS The programmed channel information list appears 5 Press PLAY 5or STOP until the desired channel setting flashes 5 1 TO DELETE UNWANTED CHANNELS Press CLEAR Repeat this step until y...

Page 7: ...ork well choose the other settings below NTSC3 58 To record the NTSC signals or playback an NTSC3 58 tape on an NTSC TV NTSC4 43 To record the NTSC signals or playback an NTSC4 43 tape on a PAL TV NTSC PAL TV ONLY FOR PLAYBACK To playback an NTSC3 58 tape on a PAL TV PAL To record PAL signals or playback a PAL TV MESECAM To record SECAM signals or playback a MESECAM tape When playing back an NTSC ...

Page 8: ...ork well choose the other settings below NTSC3 58 To record the NTSC signals or playback an NTSC3 58 tape on an NTSC TV NTSC4 43 To record the NTSC signals or playback an NTSC4 43 tape on a PAL TV NTSC PAL TV ONLY FOR PLAYBACK To playback an NTSC3 58 tape on a PAL TV PAL To record PAL signals or playback a PAL TV MESECAM To record SECAM signals or playback a MESECAM tape When playing back an NTSC ...

Page 9: ...ogramme in its entirety first perform the following steps 1 Press and hold STILL SLOW or PAUSE STILL 8on the front panel and press REC OTR to engage the RECORD PAUSE mode The VCR then automatically checks the condition of the tape and after approximately 7 seconds re enters RECORD PAUSE 2 Press REC OTR again to start recording If you want to bypass the DSPC system and begin recording immediately s...

Page 10: ...ogramme in its entirety first perform the following steps 1 Press and hold STILL SLOW or PAUSE STILL 8on the front panel and press REC OTR to engage the RECORD PAUSE mode The VCR then automatically checks the condition of the tape and after approximately 7 seconds re enters RECORD PAUSE 2 Press REC OTR again to start recording If you want to bypass the DSPC system and begin recording immediately s...

Page 11: ... START or Number button 1 or 4 Each time you press the button the set time changes by 1 minute intervals If you hold the button the set time changes by 30 minute intervals Select Stop Time Press STOP or Number button 2 or 5 Each time you press the button the set time changes by 1 minute intervals If you hold the button the set time changes by 30 minute intervals 1 2 3 4 5 Select Tape Speed Press A...

Page 12: ... START or Number button 1 or 4 Each time you press the button the set time changes by 1 minute intervals If you hold the button the set time changes by 30 minute intervals Select Stop Time Press STOP or Number button 2 or 5 Each time you press the button the set time changes by 1 minute intervals If you hold the button the set time changes by 30 minute intervals 1 2 3 4 5 Select Tape Speed Press A...

Page 13: ...the power is supplied again to this VCR after the power failure set the clock time and turn off the VCR Each timer program you have made will start unless its start time already passes 1 Insert a source tape in the playing VCR and a blank tape in the recording VCR If a tape without the record tab is inserted in the play ing VCR playback automatically starts In this case press the STOP button 2 Tur...

Page 14: ...the power is supplied again to this VCR after the power failure set the clock time and turn off the VCR Each timer program you have made will start unless its start time already passes 1 Insert a source tape in the playing VCR and a blank tape in the recording VCR If a tape without the record tab is inserted in the play ing VCR playback automatically starts In this case press the STOP button 2 Tur...

Page 15: ...se to operate your TV are explained on page 3 1 2 TV Manufacturers Codes PHILIPS 01 02 03 EMERSON 14 GOLDSTAR 04 GRUNDIG 24 25 HITACHI 12 JVC 05 MITSUBISHI 13 26 PANASONIC 07 17 19 20 RCA 10 SAMSUNG 18 SANYO 11 SHARP 16 SONY 09 THOMSON 21 22 23 TOSHIBA 08 ZENITH 06 15 G e n e r a l G e n e r a l G e n e r a l Mains voltage AC 110 V 240 V Mains frequency 50 Hz 60 Hz Power consumption Approx 14W Amb...

Page 16: ...se to operate your TV are explained on page 3 1 2 TV Manufacturers Codes PHILIPS 01 02 03 EMERSON 14 GOLDSTAR 04 GRUNDIG 24 25 HITACHI 12 JVC 05 MITSUBISHI 13 26 PANASONIC 07 17 19 20 RCA 10 SAMSUNG 18 SANYO 11 SHARP 16 SONY 09 THOMSON 21 22 23 TOSHIBA 08 ZENITH 06 15 G e n e r a l G e n e r a l G e n e r a l Mains voltage AC 110 V 240 V Mains frequency 50 Hz 60 Hz Power consumption Approx 14W Amb...

Reviews: