background image

21

Select WADM’s display language

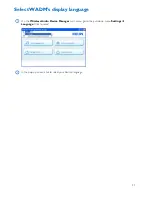
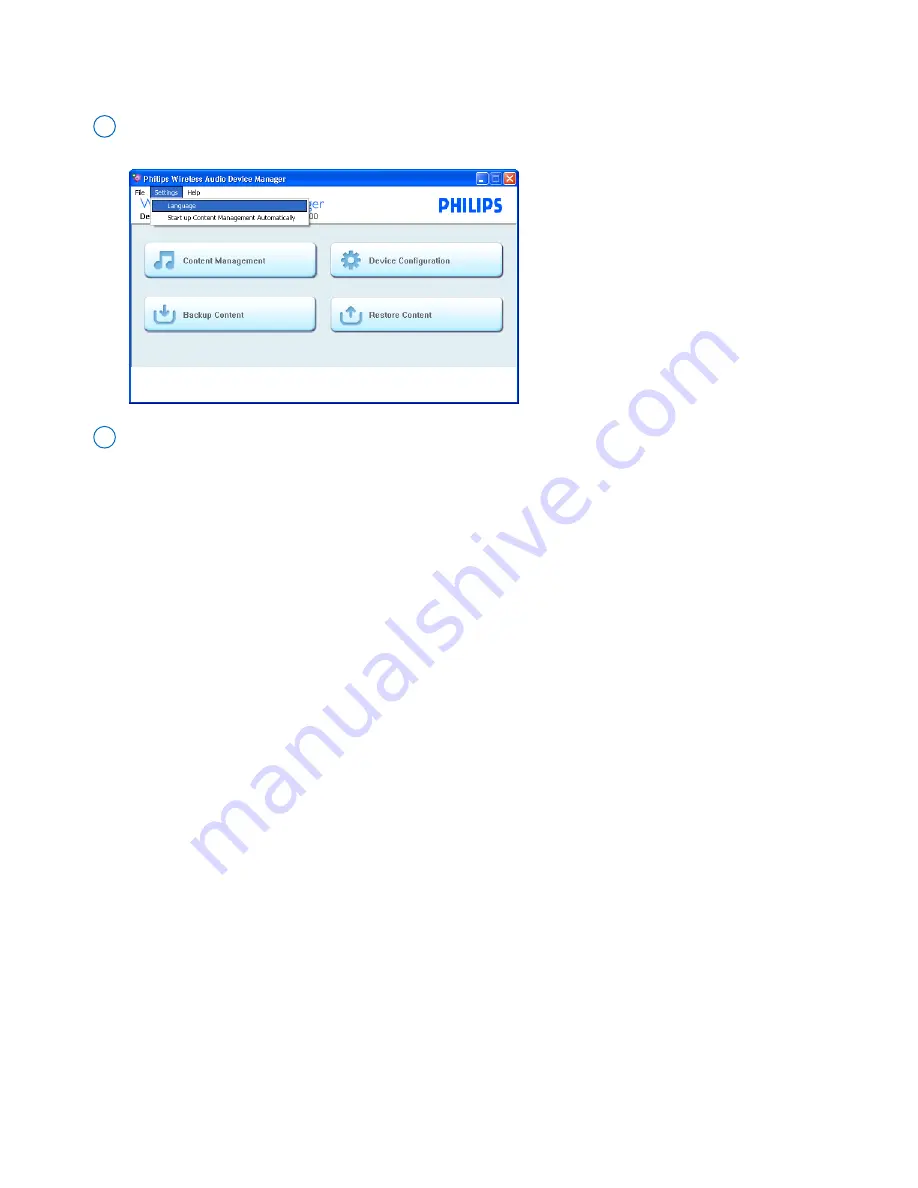
On the 

Wireless Audio Device Manager 

main menu, go to the pull-down menu 

Settings 

Language

. Click to select

1

In the pop-up screen, click to select your desired language

2

Summary of Contents for WADM

Page 1: ...trademarks of Gracenote The Gracenote logo and logotype and the Powered by Gracenote logo are trademarks of Gracenote With Wireless Audio Device Manager WADM you can Connect Philips Wireless Music Center Station and your PC through the supplied Ethernet cable see the manual Connect to your PC Manage the contents of Philips Wireless Music Center on your PC including Transfer music files from your P...

Page 2: ...Center s music files Create and rename playlists for Center s music files In Device configuration you can In the sub menu System display the name of Center Station In the sub menu Wired Network Wireless Network and Internet Setting manage the network settings of Center Station In the sub menu Firmware upgrade upgrade the firmware of Center Station In the sub menu CD Database update update Center s...

Page 3: ...ng the contents of connected Philips Wireless Music Center Selector panel selects the content categories Content panel displays the contents of your PC and Philips Wireless Music Center Station Pull down menus 1 2 5 13 10 15 12 2 5 1 7 3 3 4 expanded view displays item contents in full 3 collapsed view item contains more contents to display 4 6 8 creates a new playlist 6 14 11 Scroll bar scroll th...

Page 4: ...memory on Philips Wireless Music Center s hard disk 11 Click to highlight an item 13 Resizing buttons minimizes maximizes WADM view or exit WADM 9 Status bar appears when transferring music is in progress Click it to show the dialog box of file transfer 8 Get Track Info shows detailed information of the selected music file 15 Transfer Track s to Device Transfers music files from PC to the center 1...

Page 5: ...e are 3 file transfer options Always Overwrite Always Skip and Prompt Go to the pull down menu Preference Transfer Sync Options Click to select Always Overwrite transfers all the selected files and overwrites the same files already stored in Center Note When overwriting a file in Center you will remove it from your Center s playlists Always Skip transfers only the files not stored in Center and sk...

Page 6: ...he music files in supported formats In the file list click to select your desired music files 3 Click the Open button to start file transfer The file transfer dialog box appears All the transferred files will be sorted by their track information e g Artist Album Genre 4 Go to the pull down menu File Transfer Tracks Click to select 1 A file explorer window appears To import music files form PC ...

Page 7: ...ress To drag and drop music files from My Computer window or other music management software On the content panel of My Computer window or other music management software click to highlight the desired file 1 Tips Press and hold Ctrl on your PC keyboard and click to select more than one file Drag the selection to the device window to its content panel or a category in its selector panel 2 ...

Page 8: ...ht click on your mouse Click Track Info 3 An ID3 tag edit box appears To edit click on the text box of Track name Track No Artist Album Genre and Year 4 On the selector panel of the device window click to select an album or a playlist 1 On the content panel a track list appears On the track list click to highlight the desired track 2 Click OK to save the information Click Cancel to discard changes...

Page 9: ...r more on the content panel to select one or more tracks 3 Drag the selection to the desired playlist 4 To rename the playlist a Right click on your mouse Click Rename Text box becomes blue and the cursor flashes b Input the desired playlist name using the PC keyboard c To confirm click outside the text box To cancel the changes press Esc 2 To adjust the playback sequence drag and drop tracks to t...

Page 10: ...l of the device window click once or more to select an album artist or a genre If necessary click once or more on the content panel to select one or more tracks 1 Go to the pull down menu File New Playlist from Selection Click to select 2 You will create a playlist consisting of your selection at a time As prompted press Yes to confirm or press No to cancel 3 To create a playlist of selected track...

Page 11: ...ect your view options as needed Adjust the column area Click on the separator between columns Drag the separator to adjust the column area Adjust the panel area Drag the border area between the selector panel and the content panel Drag the border area between My Computer window and the device window ...

Page 12: ...anagement when launching WADM On the Wireless Audio Device Manager main menu go to the pull down menu Settings Start up WADM automatically Click to select 1 You will enter the Content management windows when launching WADM ...

Page 13: ... where you wish to store the backup files on your PC 2 Backup starts The IE browser is launched Backup files are saved to the specified location and named after current date Tips If you did backup previously only the newly added music will be saved to PC Do not delete the backup file by using Windows explorer If you want to delete the previ ously backed up file please use WADM to manage ...

Page 14: ...c Center Click the Restore content button to start 1 Click to select the desired files 2 The backup files will be restored to Philips Wireless Music Center Click the Open button to start restoring files 3 Tips Press and hold Ctrl on your PC keyboard and click to select more than one item ...

Page 15: ...configuration button to start 1 On the selector panel of Device configuration screen click your desired sub menu System Wired Network Wireless Network Internet Setting Firmware Upgrade CD database Update or Status 2 The IE browser is launched ...

Page 16: ...reless Music Center Station in a more straight forward way With your PC you can easily connect the device with external wired wireless network or Internet for CD information update Click to enter the Wired Network Wireless Network or Internet Setting sub menu 1 Follow the screen instructions to adjust the network setting wired wireless or Internet setting for CD information update 2 The name of th...

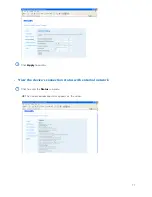
Page 17: ...17 Click Apply to confirm 3 View the device s connection status with external network Click to enter the Status sub menu 1 The device s connection status appears on the screen ...

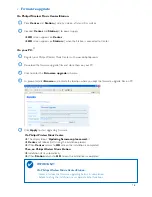
Page 18: ...Center and Station s to power supply 2 HD screen appears on Center HD screen appears on Station s when the Station is connected to Center On your PC O On Philips Wireless Music Center The display shows Updating firmware please wait Center will reboot itself during the installation process When Center returns to HD screen the installation is completed Then on Philips Wireless Music Station Installa...

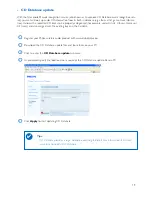
Page 19: ... sub menu 3 With the Gracenote music recognition service also known as Gracenote CD Database music recognition serv ice your set will look up audio CD information from its built in database e g album artist genre track informa tion It allows the recorded CD tracks to be properly categorized for example under Artists Albums Genres or All tracks and also merged with the existing tracks in the harddi...

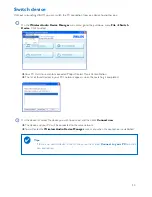
Page 20: ...eless Music Center Station The list of found devices in your PC s network appears when the searching is completed On the device list select the device you wish to connect and then click Connect now 2 The device and your PC will be connected to the same network You will enter the Wireless Audio Device Manager main menu when the connection is established Tips If there is no desired device in the lis...

Page 21: ...21 Select WADM s display language On the Wireless Audio Device Manager main menu go to the pull down menu Settings Language Click to select 1 In the pop up screen click to select your desired language 2 ...

Reviews: