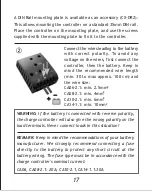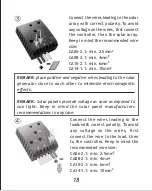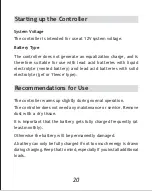
16
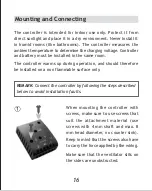
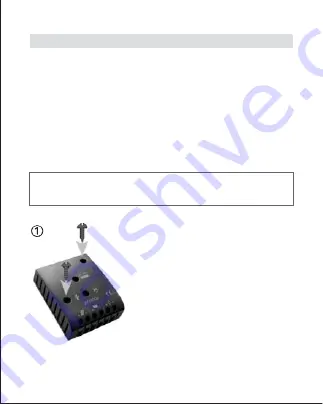
When mounting the controller with
screws, make sure to use screws that
suit the attachment material (use
screws with 4 mm shaft and max. 8
mm head diameter, no counter sink).
Keep in mind that the screws also have
to carry the force applied by the wiring.
Make sure that the ventilator slits on
the sides are unobstructed.
The controller is intended for indoor use only. Protect it from
direct sunlight and place it in a dry environment. Never install it
in humid rooms (like bathrooms). The controller measures the
ambient temperature to determine the charging voltage. Controller
and battery must be installed in the same room.
The controller warms up during operation, and should therefore
be installed on a non flammable surface only.
Mounting and Connecting
REMARK:
Connect the controller by following the steps described
below to avoid installation faults.
Summary of Contents for CA06-2.1
Page 2: ...Phocos CA CID 181802511...
Page 3: ...1 13 14 26 27 39 40 52 53 65 66 77 CONTENTS...
Page 4: ...Phocos CA Solar Laderegler Bedienungsanleitung Deutsch 1...
Page 5: ...Funktionsbeschreibung 2...
Page 6: ...3 Montage und Anschluss...
Page 7: ...4...
Page 8: ...5...
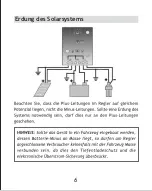
Page 9: ...6 Erdung des Solarsystems...
Page 10: ...7 Inbetriebnahme Hinweise zum Betrieb...
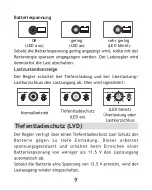
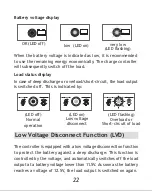
Page 12: ...9 Tiefentladeschutz LVD OK LED aus gering LED an sehr gering LED blinkt Batteriespannung...
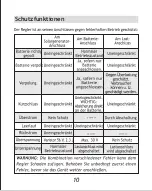
Page 13: ...10 Schutzfunktionen...
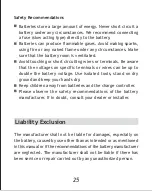
Page 15: ...12 Sicherheitshinweise Haftungsausschluss...
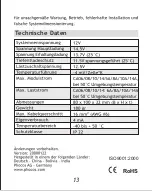
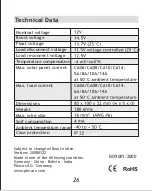
Page 16: ...13 Technische Daten RoHS ISO9001 2000...
Page 30: ...Phocos CA 27...
Page 31: ...28...
Page 32: ...29...
Page 33: ...30...
Page 34: ...31...
Page 35: ...32 Toma de tierra del Sistema Solar...
Page 36: ...33 Activar el controlador Recomendaciones de Uso...
Page 37: ...34...
Page 38: ...35 Visualizaci n del estado del consumo OK bajo LED encendida muy bajo LED haciendo flashes...
Page 39: ...36 Caracter sticas de Seguridad...
Page 40: ...37 Generales sobre Seguridad y Manejo...
Page 41: ...38 Recomendaciones Generales de Seguridad...
Page 42: ...39 RoHS ISO9001 2000...
Page 43: ...Phocos CA 40...
Page 44: ...Description des fonctions 41...
Page 45: ...42 Montage et Connexion...
Page 46: ...43...
Page 47: ...44...
Page 48: ...45...
Page 49: ...46 Recommandations d utilisation...
Page 50: ...47...
Page 51: ...48 OK...
Page 52: ...49...
Page 53: ...50 Erreur Affichage Cause...
Page 54: ...51...
Page 55: ...52 Fiche technique RoHS ISO9001 2000...
Page 56: ...Phocos CA 53...
Page 57: ...54...
Page 58: ...55 Montando e Conectando...
Page 59: ...56...
Page 60: ...57...
Page 61: ...58...
Page 62: ...59 Iniciando o Controlador...
Page 63: ...60...
Page 64: ...61 OK...
Page 65: ...62...
Page 66: ...63 Erro Mostrador...
Page 67: ...64...
Page 68: ...65 RoHS ISO9001 2000...
Page 69: ...Phocos CA 66...
Page 70: ...67...
Page 71: ...68...
Page 72: ...69...
Page 73: ...70...
Page 74: ...71...
Page 75: ...72...
Page 76: ...73...
Page 77: ...74...
Page 78: ...75...
Page 79: ...76...
Page 80: ...77 RoHS ISO9001 2000...

