Solar Charge Controller CML05-2, CML08-2, CML10-2, CML15-2, CML20
User Manual English, Page 1
Dear Client,
Thank you very much for buying a Phocos product. With your new CML controller
you own a state-of-the art device which was developed according to the latest
available technical standards. It comes with a number of outstanding features, like:
Clear, readable display of the state of charge
Acoustic signal when the state of charge changes
Low voltage disconnect regulated by state of charge or voltage
16 mm² connector clamps
Complete electronic protection
This manual gives important recommendations for installing, using and programming as
well as remedies in case of problems with the controller. Read it carefully in your own
interest and mind the safety and usage recommendations at the end of this manual.
Description of Functions
The charge controller protects the battery from being overcharged by the solar
array and from being deep discharged by the loads. The charging characteristics
include several stages which include automatic adaptation to the ambient tempera-
ture.
The charge controller adjusts itself automatically to 12V or 24V system voltage.
The charge controller has a number of safety and display functions.
Mounting and Connecting
The controller is intended for indoor use only. Protect it from direct sunlight and place
it in a dry environment. Never install it in humid rooms (like bathrooms).
The controller measures the ambient temperature to determine the charging voltage.
Controller and battery must be installed in the same room.
The controller warms up during operation, and should therefore be installed on a non
flammable surface only.
REMARK: Connect the controller by following the steps described below to avoid
installation faults.
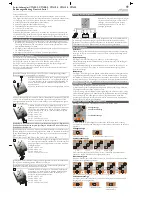
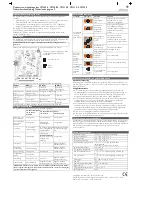
1
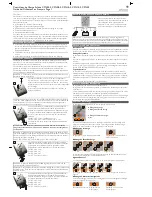
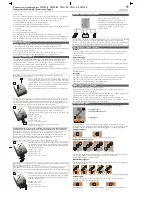
Mount the controller to the wall with screws that fit to the wall
material. Use screws with 4 mm shaft and max. 8 mm head
diameter, no counter sunk. Mind that the screws have to carry
also the force applied by the wiring.
Make sure that the ventilator slits on the sides are unob-
structed.
A DIN Rail mounting plate is available as an accessory (CX-DR2). This allows mount-
ing the controller on a standard 35mm DIN rail. Remove the screws at the backside of
the controller and screw the mounting plate with the (long) fastening screw onto the
backside of the controller.
2
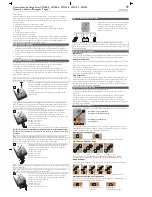
Connect the wires leading to the battery with correct polarity.
To avoid any voltage on the wires, first connect the controller,
then the battery. Mind the recommended wire length (min 30
cm to max approx. 100 cm) and the wire size:
CML05: min 2.5 mm²
CLM08: min 4 mm²
CML10: min 6 mm²
CML15, CML20: min 10 mm²
Wrong polarity will cause a permanent warning sound.
WARNING: If the battery is connected with reverse polarity, the load terminals
will also have the wrong polarity. Never connect loads during this condition!
REMARK: Mind the recommendations of your battery manufacturer. We strongly
recommend connecting a fuse directly to the battery to protect any short circuit at the
battery wiring. The fuse must take the charge controller nominal current:
CML05: 20A, CML08: 20A, CML10: 30A, CML15: 30A, CML20: 40A
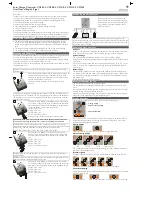
3
Connect the wires leading to the solar array with correct
polarity. To avoid any voltage on the wires, first connect the
controller, then the solar array. Mind the recommended wire
size:
CML05: min 2.5 mm²
CLM08: min 4 mm²
CML10: min 6 mm²
CML15, CML20: min 10 mm²
REMARK: Place positive and negative wire close to each other to minimize electro-
magnetic effects.
REMARK: Solar panels provide voltage as soon as exposed to sun light. Mind the solar
panel manufacturer’s recommendations in any case.
4
Connect the wires leading to the loads with correct polarity.
To avoid any voltage on the wires, first connect the wire to the
load, then to the controller. Mind the recommended wire size:
CML05: min 2.5 mm²
CLM08: min 4 mm²
CML10: min 6 mm²
CML15, CML20: min 10 mm²
Grounding the Solar System
Be aware that the positive terminals of the
CML controller are connected internally and
therefore have the same electrical potential. If
any grounding is required, always do this on
the positive wires.
REMARK: If the device is used in a vehicle which has the battery negative on the
chassis, loads connected to the controller must not have an electric connection to the
car body, otherwise the Low Voltage Disconnect and electronic fuse functions of the
controller are short circuited.
Starting up the Controller
Self Test
As soon as the controller is supplied with power either from the battery or the solar
array, it starts a self test routine. Then the display changes to normal operation.
System Voltage
The controller adjusts itself automatically to 12 V or 24 V system voltage.
As soon as the voltage at the time of start-up exceeds 20.0 V, the controller implies a
24 V system.
If the battery voltage is not within the normal operation range (ca. 12 to 15.5 V or ca.
24 to 31 V) at start-up, a status display according to the section ERROR DESCRIP-
TION occurs.
Battery Type
The controller is preset to operate with lead acid batteries with liquid electrolyte. If
you intend to use a lead-acid battery with solid electrolyte ('gel' type or 'fleece' type)
you can adjust the charging characteristics (see "Settings"). The equalization charge is
deactivated then.
In case of any doubts consult your dealer.
Recommendations for Use
The controller warms up during normal operation.
The controller does not need any maintenance or service. Remove dust with a dry
tissue.
It is important that the battery gets fully charged frequently (at least monthly). Other-
wise the battery will be permanently damaged.
A battery can only be fully charged if not too much energy is drawn during charging.
Keep that in mind, especially if you install additional loads.
Display Functions
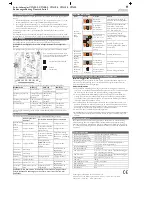
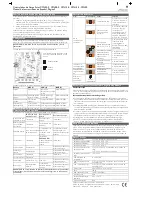
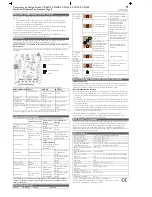
The controller is equipped with 5 LEDs and an acoustic warning signal.
Charge display
State of charge display
Load status display
In normal operation, the controller shows the state of charge of the battery and the
charge from the solar panels. Any change of the state of charge (SOC) to a lower
status is additionally signaled acoustically.
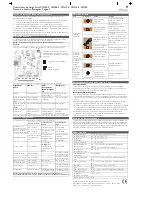
Charge display
Solar array supplies electricity Solar array does not supply electricity
State of charge display
>75% 25-75% <25%
flashes:
<10%
The percentage corresponds to the available energy until Low Voltage Disconnect in
relation to a fully charged battery.
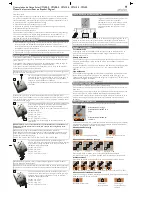
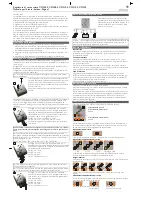
Acoustic signals
A change in the state of charge (SOC) to a lower status is indicated by an acoustic
signal.
1x
3x
5x
25x
The loads are disconnected approx. 1 minute after a series of 25 signals.
Load status display
In case of deep discharge or overload/short-circuit of load, the load output is switched
off. This is indicated by:
Normal operation
Low voltage disconnect Overload or Short-circuit of load

