Connecting and Grounding
The controller is intended for indoor use only. Protect it from direct sunlight and place it in a dry
environment. Never install it in humid rooms (like bathrooms). The controller warms up during
operation, and should therefore be installed on a non flammable surface only.
Connect the controller by following the steps described below to avoid installation faults.
Observe the following connection sequence when installing the system:
1. Connect the battery to the charge controller – plus and minus.
2. Connect the photovoltaic modules to the charge controller – plus and minus.
3. Connect the load to the charge controller – plus and minus.
Follow the reverse procedure when uninstalling!
To avoid any voltage on the wires, first connect the wire to the controller, then to the
battery and to the photovoltaic modules. But for the load, first connect the wire to the
load, then to the controller.
Recommended minimum wire size: CXNup 10 : 4 mm
2
; CXNup 20 : 6 mm²,
CXNup 40 : 10 mm²
Make sure the wire length between battery and controller is as short as possible.
Be aware that all negative connections of the CXNup controller are common and therefore
have the same electrical potential. If any grounding is required, always do this on the
negative wire.
When connecting inductive loads (motors, relays, etc.), a freewheel diode must be
connected in parallel to the loads in the reverse biased direction.
Due to their high inrush currents, large inverters should always be connected directly to
the battery.
REMARK:
Mind the recommendations of your battery manufacturer. We strongly recommend
connecting a fuse directly to the battery to protect any short-circuit at the battery wiring. The
fuse must correspond to the nominal current of the charge controller: 15 A for CXNup 10 , 30 A
for CXNup 20 and 50 A for CXNup 40.
24
Summary of Contents for CXNup
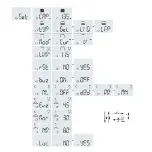
Page 14: ...11 Loc Men Sperren der Einstellungen YES Ja NO Nein 12...
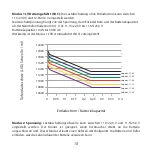
Page 22: ...20 CXNup sicherer Betriebsbereich SOA Nennlaststrom...
Page 27: ...25 USB charging connector Interface for MXI MXI232 Temperature sensor NTC connector...
Page 34: ...32...
Page 42: ...40 CXNup Safe Operating Area SOA...
Page 47: ...45 Conector USB de carga Interfaz para MXI MXI232 Sensor de temperatura Conector NTC Fusi ble...
Page 55: ...53...
Page 76: ...11 Menu Loc Verrouillage des param tres YES oui NO non 74...
Page 84: ...82 Aire de s curit CXNup SOA Courant nominal charge...
Page 97: ...95...
Page 105: ...103 CXNup rea de prote o segura SOA Corrente de carga nominal...
Page 107: ...CXNup LCD PWM USB MP3 CXNup GEL AGM LiFePO4 12 24 V 1 5 LiFePO4 BMS 105...
Page 108: ...CE CE 12 V 24 V 106...
Page 110: ...108 NTC MXI232 MXI USB...
Page 111: ...12 V 24 V 18 V 24 V LCD 109...
Page 112: ...110 LCD ESC DOWN UP SET...
Page 113: ...LVD C PWM SET DOWN UP 111...
Page 114: ...90 70 90 30 70 10 30 0 10 0 25 1 112...
Page 117: ...11 Loc YES NO 115...
Page 118: ...1 2 3 4 50 V 50 V 15 5 31 0V 1 2 4 6 3 4 150 2 Min 200 3 s 116...
Page 120: ...15 5 31 0 V 1 118...
Page 121: ...C Err NTC 119...
Page 122: ...12 V 24V CXNup 10 CXNup 20 CXNup 40 12 24 V 10 A 20 A 40 A 10 A 20 A 40 A 120...
Page 125: ...123 CXNup SOA...

