Programming the Radio
2476_en_I
PHOENIX CONTACT
4-3
4
Programming the Radio
4.1
Configuring a PC to Communicate with the Radio
1.
Go to the “Network Connections” dialog box, and then select “Local Area Connections”.
Right-click and select “Properties” from the context menu.
2.
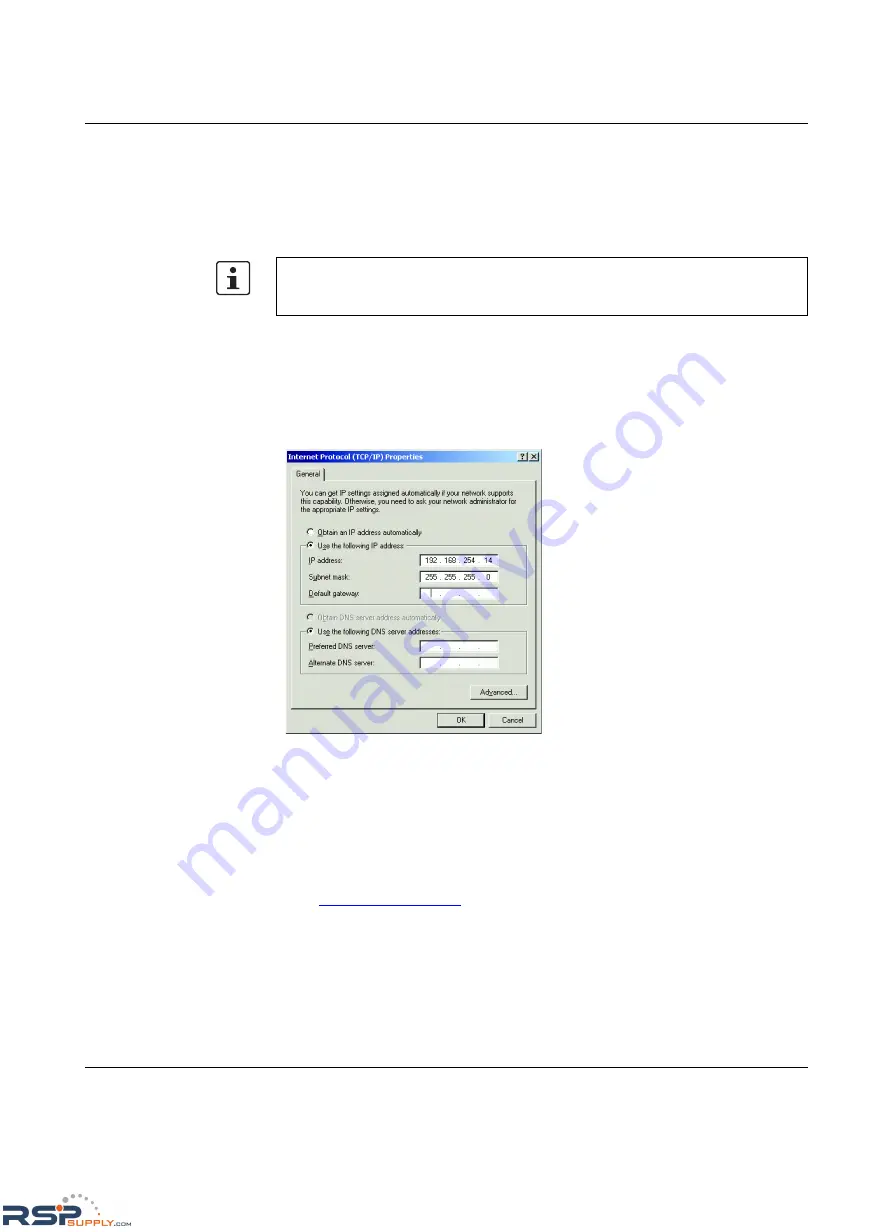
Highlight “Internet Protocol (TCP/IP)”, and then click the “Properties” button (see
Figure 4-1).
3.
Click the “Use the following IP address” button and enter
192.168.254.xxx
(xxx can be
between 2 and 253) in the “IP address” field.
4.
Enter
255.255.255.0
in the “Subnet mask” field, and then click the “OK” button.
Figure 4-1
“Internet Protocol (TCP/IP) Properties” dialog box
4.2
Logging into the Radio
1.
Apply power to the transceiver and run a browser program (such as Internet Explorer)
on the computer. Wait approximately 10 seconds for the radio to boot up.
2.
Enter the following IP address into the “Address” field of the browser
https://192.168.254.254
3.
Enter the default case-sensitive credentials:
Username: Admin
Password: admin
The instructions below are for a Windows® 2000 operating system. Other operating
systems will be similar but not identical. You may need to be logged in as an administrator
to make these settings.
RSPSupply - 1-888-532-2706 - www.RSPSupply.com
http://www.RSPSupply.com/p-12970-Phoenix-Contact-2900016-Radio-900-MHz-Ethernet-Radio.aspx


