6 Master Blaster Use and Care Manual
TROUBLESHOOTING GUIDE:
Should an obvious problem occur with your cooler consult the following table. If you cannot correct the problem, or if it persists,
contact qualified service personnel.
PROBLEM / SYMPTOM
POSSIBLE CAUSE
CORRECTIVE ACTION
Water draining from unit
Float valve out of adjustment
Adjust float to 2-1/2" water depth
Float movement obstructed
Free float from obstruction
Float valve non-functional
Replace float assembly
Dry pads
Pump intake clogged
Remove obstruction
Water pump non-functional
Replace water pump
Clogged water line
Locate and free obstruction
Pad trough clogged
Clear debris from trough
Switch non-functional
Replace switch
Wiring non-functional
Repair or replace non-functional wiring
Water turned off to cooler
Turn on water supply
No water
Fill reservoir
Motor does not start or no air
delivery
Electrical power disconnected
Check power receptacle and cord
Belt too loose or too tight
Adjust belt tension
Defective motor
Replace motor
Defective switch
Replace switch
Broken belt
Replace belt
Inadequate air delivery
Insufficient air exhaust
Open windows to increase air flow
Belt too loose
Adjust belt tension or replace if necessary
Pads plugged
Replace pads
Motor cycles on & off
Low voltage
Check voltage
Excessive belt tension
Adjust belt tension
Blower shaft tight or locked
Oil or replace bearings
Bearing dry
Oil bearings
Pad frame(s) or air outlet grille removed
Re-install pad frame(s) or air outlet grille
Noisy operation
Blower rubbing on housing
Reposition wheel
Motor sheave or blower set screws loose
Tighten set screws
Excessive humidity in house
Inadequate exhaust
Open doors and windows to increase ventilation
Musty or unpleasant odor
Stale or stagnant water in cooler
Drain, clean, and flush reservoir
Media pads clogged or mildewed
Replace media pads
Media pads not completely wet before starting
fan motor
Turn pump ON for several minutes prior to starting
cooler
New pads have an odor that goes away after
about 4-8 hours.
Drain reservoir multiple times until odor dissipates
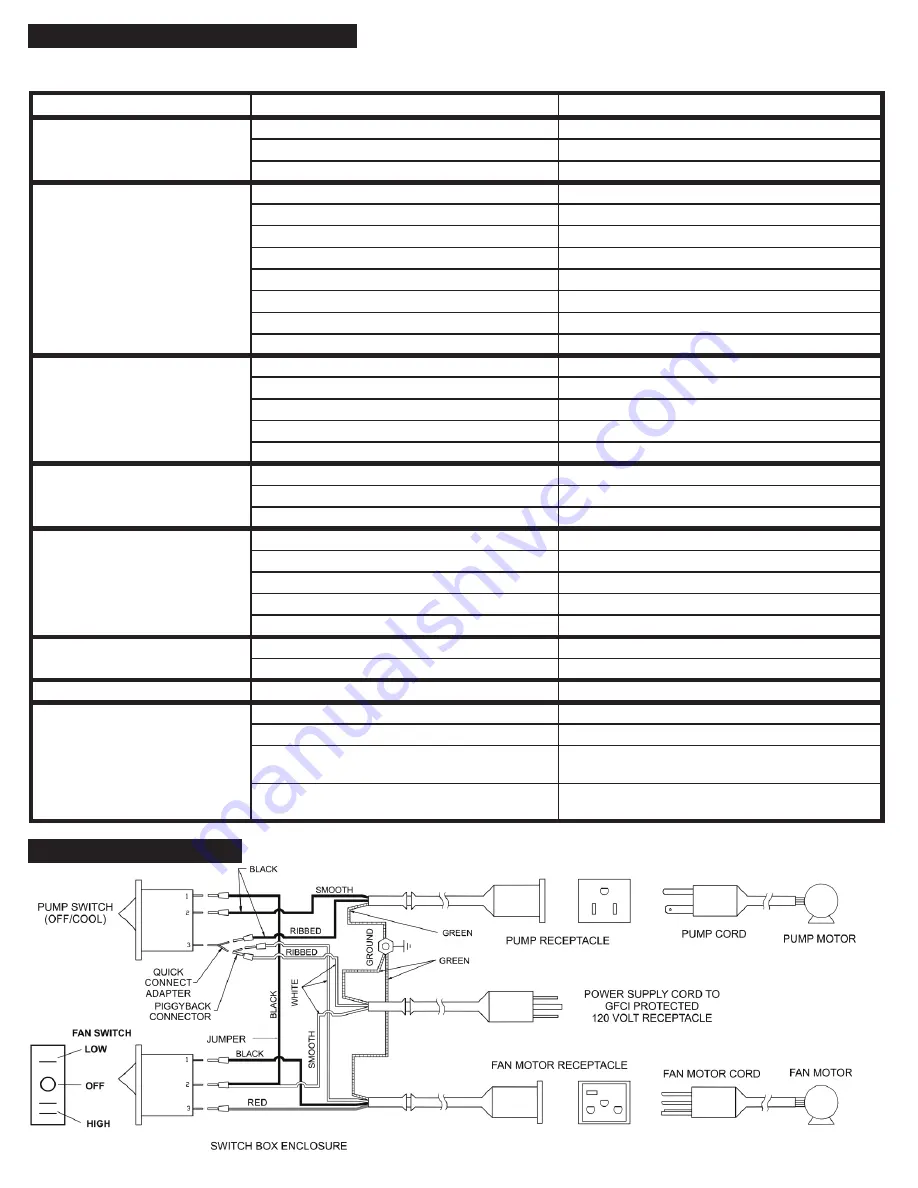
WIRING DIAGRAM


