background image

54

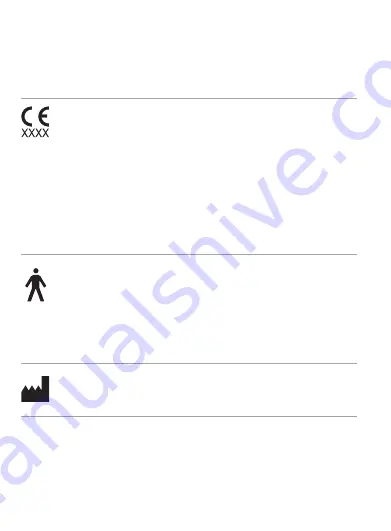
With the CE symbol, Sonova AG confirms that  
this product – including accessories – meets the 
requirements of the Medical Devices Directive 
93/42/EEC as well as the Radio Equipment 
Directive 2014/53/EU. The numbers after the  
CE symbol correspond to the code of certified 
institutions that were consulted under the 
above-mentioned directives.

This symbol indicates that the products  
described in these user instructions adhere to  
the requirements for an applied part of Type B  
of EN 60601-1. The surface of the hearing aid  
is specified as an applied part of Type B.

Indicates the medical device manufacturer, as 
defined in EU Directive 93/42/EEC.

21. Information and description  

of symbols

Summary of Contents for Bolero M Series

Page 1: ...Phonak BoleroTM M User Guide Phonak Bolero M PR Phonak Bolero M PR Trial...

Page 2: ...ds Phonak Bolero M90 PR Phonak Bolero M70 PR Phonak Bolero M50 PR Phonak Bolero M30 PR Phonak Bolero M PR Trial Charging accessory Phonak Charger BTE RIC 2019 2019 2019 2019 2019 2019 This user guide...

Page 3: ...rmold c Universal eartip c Dome c SlimTip If no box is checked and you do not know the model of your hearing aid or charging accessory please ask your hearing care professional The hearing aids descri...

Page 4: ...4...

Page 5: ...rtise and are designed to keep you connected to the beauty of sound We thank you for making such a great choice and wish you many years of listening pleasure Please read the user guide carefully to ma...

Page 6: ...arging the hearing aids Using the hearing aid 5 Left right hearing aid markings 6 Putting on the hearing aid 7 Removing the hearing aid 8 Multi function button with indicator light 9 On Off 10 Connect...

Page 7: ...unity 16 Operating conditions 17 Care and maintenance 18 Exchanging the earpiece 19 Service and warranty 20 Compliance information 21 Information and description of symbols 22 Troubleshooting 23 Impor...

Page 8: ...ring aid After placing your hearing aid in the charger the indicator light will show the charging state of the battery until the hearing aid is fully charged When fully charged the indicator light wil...

Page 9: ...our individual instructions If paired with a Bluetooth enabled phone a short press will accept and a long press will reject an incoming call On Off Firmly press the lower part of the button for 3 seco...

Page 10: ...entify your personal models by checking Your hearing aid charger details on page 3 comparing your hearing aid and charger with the following models Charging contacts Anchor optional Earpiece Dome deta...

Page 11: ...11 Charger USB port to external power supply Indicator light for power Hearing aid charging slots with left right indicators...

Page 12: ...charging cable into the power supply b Plug the smaller end into the USB port on the charger c Plug the power supply into a power outlet d The indicator light is green when the charger is connected t...

Page 13: ...fore you have to charge the hearing aids this can vary depending on the hearing aid settings The hearing aid contains a built in and non removable rechargeable lithium ion battery Before using your he...

Page 14: ...left and right hearing aid markings match the left blue right red indicators next to the charging slots The hearing aids will automatically be muted when inserted into the charger 2 The indicator ligh...

Page 15: ...charged so the hearing aid can be safely left in the charger It can take up to 3 hours to charge the hearing aid The charger can be closed while charging Charging times Indicator light Charging state...

Page 16: ...rger is connected to the power supply the hearing aid switches on automatically when removed from the charger The indicator light starts blinking The solid green light indicates for 3 seconds that the...

Page 17: ...g aid markings There is a red or blue marking on the back of the hearing aid and on the speaker This will tell you if it is a left or a right hearing aid Blue marking for left hearing aid Red marking...

Page 18: ...rmold up to your ear and place the ear canal part into your ear canal 6 1 Putting on the hearing aid with classic earmold 2 Place the hearing aid behind your ear 3 Insert the upper part of the earmold...

Page 19: ...d with dome SlimTip or universal eartip 1 Place the hearing aid behind your ear 2 Insert the earpiece into your ear canal 3 If there is an anchor attached to the earpiece tuck it into the bowl of your...

Page 20: ...id with classic earmold 7 Removing the hearing aid 1 Lift the hearing aid above the upper part of your ear 2 Grasp the earmold with your fingers and gently remove it Please try to avoid gripping the t...

Page 21: ...21 7 2 Removing the hearing aid with dome SlimTip or universal eartip 1 Pull on the bend of the tube and remove the hearing aid from behind the ear...

Page 22: ...ndicated in your individual Hearing aid instructions Please ask your hearing care professional for a printout The multi function button has several functions If the hearing aid is paired with a Blueto...

Page 23: ...the lower part of the button for 3 seconds until the indicator light blinks green The solid green light indicates for 3 seconds that the hearing aid is ready Switch off hearing aid Press and hold the...

Page 24: ...e connectivity options available for your hearing aid The TV Connector can be connected to any audio source such as a TV PC or hi fi system Roger wireless microphones can be connected to your hearing...

Page 25: ...th enabled devices in the connectivity setting menu 2 Switch on both hearing aids You now have 3 minutes to pair your hearing aids with your device It is only necessary to perform the pairing procedur...

Page 26: ...ist of Bluetooth enabled devices This will pair both hearing aids simultaneously A beep confirms successful pairing For more information about pairing instructions for Bluetooth wireless technology go...

Page 27: ...red to your device they will automatically connect again when switched on The connection will be maintained as long as the device remains ON and within range Your hearing aids can be paired to up to t...

Page 28: ...ed phones When paired and connected to your phone you will hear the caller s voice directly in your hearing aids Your hearing aids pick up your voice through their own microphones Caller s voice Your...

Page 29: ...ort press on the upper or lower part of the multi function button on the hearing aid less than 2 seconds or directly on your phone 12 1 Making a call Enter the phone number and press the dial button Y...

Page 30: ...30 12 3 Ending a call A call can be ended by a long press on the upper or lower part of the multi function button on the hearing aid more than 2 seconds or directly on your phone long press 2 sec...

Page 31: ...4 Rejecting a call An incoming call can be rejected by a long press on the upper or lower part of the multi function button on the hearing aid more than 2 seconds or directly on your phone long press...

Page 32: ...en flying some operators require all devices to be switched into flight mode Entering flight mode will not disable normal hearing aid functionality only the Bluetooth connectivity functions 13 1 Enter...

Page 33: ...econds signifying that the hearing aid is switching off 2 Press and hold the lower part of the button The green indicator light blinks when the hearing aid starts up 3 Keep pressing the button for 7 s...

Page 34: ...34 13 2 Exit flight mode To enable the wireless function and exit flight mode in each hearing aid Switch the hearing aid off and then on again refer to chapter 9...

Page 35: ...the button for at least 15 seconds It does not matter if the hearing aid is switched on or off before you start pressing the button There is no light or acoustic notification at the end of the 15 seco...

Page 36: ...will find Living with Hearing Loss A set of interesting articles on how to live with hearing loss Forum A forum to meet and engage with a growing number of people who face the same challenges Blog A b...

Page 37: ...to 104 Fahrenheit atmospheric pressure range 800 hPa to 1500 hPa and humidity 0 to 85 non condensing Bolero M PR is classified IP68 depth of 1 meter for 60 minutes and designed to be used in all daily...

Page 38: ...tstanding performance and a long service life To ensure a long service life Sonova AG provides a minimum of a five year service period after phase out of the respective hearing aid Please use the foll...

Page 39: ...ese products may damage it Your hearing aids are resistant to water sweat and dust under the following conditions After exposure to water sweat or dust the hearing aid is cleaned and dried The hearing...

Page 40: ...g care professional for advice Chargers Make sure that charger slots are clean Never use cleaning agents such as household detergents soap etc for cleaning your charger Weekly Hearing aid Clean the ea...

Page 41: ...ed with a SlimTube you may need to exchange or clean the earpiece Please check the earpiece regularly and exchange or clean it if it looks dirty or if the hearing aid volume or sound quality is reduce...

Page 42: ...piece from the SlimTube by holding the SlimTube in one hand and the earpiece in the other 18 1 Removing the earpiece from the SlimTube 2 Gently pull on the earpiece to remove 3 Clean the SlimTube with...

Page 43: ...ld the SlimTube in one hand and the earpiece in the other 18 2 Attaching the earpiece to the SlimTube 2 Slide the earpiece over the sound outlet 3 The SlimTube and the earpiece should fit perfectly to...

Page 44: ...tional warranty valid from the date of purchase This limited warranty covers manufacturing and material defects in the hearing aid and charger respectively but not accessories such as tubes earpieces...

Page 45: ...used by third parties or non authorized service centers renders the warranty null and void This warranty does not include any services performed by a hearing care professional in their office Serial n...

Page 46: ...or the local Phonak representative whose address can be taken from the list on www phonak com us en certificates Phonak worldwide locations Australia New Zealand Indicates a device s compliance with...

Page 47: ...47 The hearing aids listed on page 2 are certified under Phonak Bolero M PR M90 M70 M50 M30 Phonak Bolero M PR Trial USA FCC ID KWC BSR Canada IC 2262A BSR...

Page 48: ...ressly approved by Sonova AG may void the FCC authorization to operate this device Notice 3 This device has been tested and found to comply with the limits for a Class B digital device pursuant to Par...

Page 49: ...the equipment off and on the user is encouraged to try to correct the interference by one or more of the following measures Reorient or relocate the receiving antenna Increase the separation between...

Page 50: ...ions Business Law Compliance This device is granted pursuant to the Japanese Radio Law and the Japanese Telecommunications Business Law This device should not be modified otherwise the granted designa...

Page 51: ...requency Modulation Radiated power Bluetooth Range Bluetooth Profiles supported Resonant loop antenna 2 4 GHz 2 48 GHz GFSK Pi 4 DPSK GMSK 1 mW 1m 4 2 Dual Mode HFP Hands free profile A2DP Radio infor...

Page 52: ...iance with emission and immunity standards Emission standards EN 60601 1 2 2015 IEC 60601 1 2 2014 EN 55011 2009 A1 CISPR11 2009 AMD1 2010 CISPR22 1997 CISPR32 2012 ISO 7637 2 2011 CISPR25 2016 EN 550...

Page 53: ...4 2 2008 EN 61000 4 3 2006 A1 A2 IEC 61000 4 3 2006 A1 A2 EN 61000 4 4 2012 IEC 61000 4 4 2012 EN 61000 4 5 2014 IEC 61000 4 5 2014 EN 61000 4 6 2014 IEC 61000 4 6 2013 EN 61000 4 8 2010 IEC 61000 4...

Page 54: ...nd to the code of certified institutions that were consulted under the above mentioned directives This symbol indicates that the products described in these user instructions adhere to the requirement...

Page 55: ...ices in these user guides Important information for handling and product safety This symbol confers that the electromagnetic interference from the device is under limits approved by the US Federal Com...

Page 56: ...can be identified Indicates the manufacturer s catalogue number so that the medical device can be identified This symbol indicates that it is important for the user to read and take into account the...

Page 57: ...ortation keep dry The symbol with the crossed out garbage bin is to make you aware that this hearing aid and charger may not be thrown away as normal household waste Please dispose of old or unused he...

Page 58: ...w battery Hearing aid not functioning no amplification Earpiece blocked Hearing aid is switched off Hearing aid will not switch on Battery fully discharged Button was inadvertently deactivated by pres...

Page 59: ...chapter 4 Clean earpiece chapter 17 Contact you hearing care professional Charge hearing aid chapter 4 Clean earpiece chapter 17 Switch on the hearing aid chapter 9 Charge hearing aid chapter 4 Perfor...

Page 60: ...lty battery Indicator light on hearing aid switches off when the hearing aid is removed from charger Auto On feature is disabled Indicator light on hearing aid remains solid green after removal from t...

Page 61: ...e is 5 to 40 Celsius 41 to 104 Fahrenheit Contact your hearing care professional Switch on the hearing aid chapter 9 Reboot the hearing aid chapter 14 Contact your hearing care professional A battery...

Page 62: ...ing aid does not permit a user to attain full benefit from it The use of a hearing aid is only part of hearing habilitation and may need to be supplemented by auditory training and instruction in lipr...

Page 63: ...aired hearing The hearing aids specially programmed for each hearing loss must only be used by the intended person They should not be used by any other person as they could damage hearing Changes or m...

Page 64: ...re insert the tube into the ear canal Hearing programs in the directional microphone mode reduce background noises Please be aware that warning signals or noises coming from behind e g cars are parti...

Page 65: ...at least 15 cm 6 inches away from the active implant If you experience any interference do not use the wireless hearing aids and contact the manufacturer of the active implant Please note that interf...

Page 66: ...sed electromagnetic emissions or decreased electromagnetic immunity of this equipment and result in improper operation Portable RF communications equipment including peripherals such as antenna cables...

Page 67: ...canal it is strongly recommended to see a physician for safe removal Avoid strong physical impacts to the ear when wearing a hearing aid with customized earpiece The stability of customized earpieces...

Page 68: ...ties such as swimming or bathing Always remove your hearing aid before these activities as the hearing aid contains sensitive electronic parts Never wash the microphone inputs Doing so could cause it...

Page 69: ...is is to prevent the dome from detaching from the tube spout during insertion into or removal from the ear Do not drop your hearing aid or charger Dropping onto a hard surface can damage your hearing...

Page 70: ...generating magnetic fields Hearing aids don t need to be removed when passing security gates airports etc If X ray is used at all it will be in very low doses and will not affect the hearing aids Do n...

Page 71: ...batteries with a Watt hour rating 20 Wh which have been tested according to UN 38 3 of the UN Manual of Tests and Criteria and should be shipped in accordance with all the rules and regulations on th...

Page 72: ...Notes...

Page 73: ......

Page 74: ...74...

Page 75: ......

Page 76: ...029 0787 02 V2 00 2019 06 cu 2019 Sonova AG All rights reserved Manufacturer Sonova AG Laubisr tistrasse 28 CH 8712 St fa Switzerland www phonak com Your hearing care professional 7 613389 288407...

Reviews: