background image

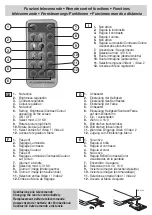
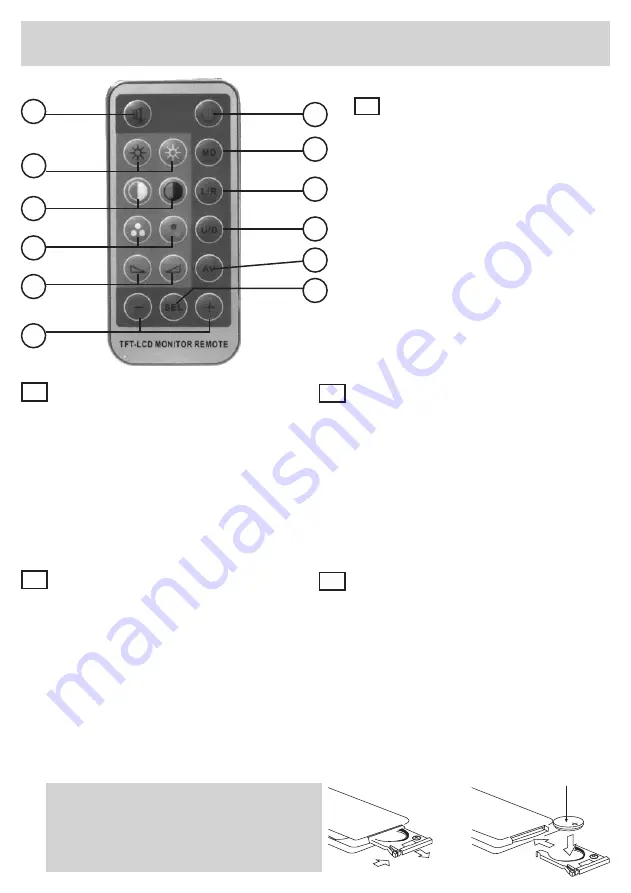
Funzioni telecomando • Remote control functions • Fonctions

télécommande • Fernsteuerungs-Funktionen • Funciones mando a distancia

I

  1.   Non attivo


2.   Regola la luminosità


3.   Regola il contrasto


4.   Regola il colore


5.   Non attivo


6.   Regola Luminosità/Contrasto/Colore


visualizzati sullo schermo


7.   Accensione / Spegnimento


8.   Seleziona mod. 4:3 16:9


9.  Ruota immagine (destra/sinistra)


10. Ruota immagine (sopra/sotto)


11.  Selezione Ingressi Video1 / Video 2


12.  Accede al Menù regolazioni

1.  Not active

2.  Brightness-regulation

3.  Contrast-regulation

4.  Colour-regulation

5.  Not active

6.  Setting  Brightness/Contrast/Colour


appearing on the screen

7.  ON / OFF

8.  Select mod. 4:3 16:9

9.  Rotate picture (right/left)

10. Rotate picture (up/down)

11.  Select entries for Video 1 / Video 2

12.  Access to regulation-Menu

1. 

Pas actif

2.  Réglage Luminosité

3.  Réglage Contraste

4.  Réglage Couleur

5. 

Pas actif

6.  Réglage Luminosité/Contraste/Couleur


sur l’écran

7.  Allumer / éteindre

8.  Sélection mod. 4:3 16:9

9.  Tourner l’image (droite/gauche)

10.  Tourner l’image (en haut/en bas)

11.  Sélection entrée Vidéo 1 / Vidéo 2

12. Entrée au Menu de Réglage

1.  Unbesetzt

2.  Einstellung der Helligkeit

3.  Einstellung des Kontrastes

4.  Einstellung der Farbe

5.  Unbesetzt

6.  Einstellung Helligkeit/Kontrast/Farbe


auf dem Bildschirm

7.  Ein- / Ausschalten

8.  Wahl 4:3  16:9

9.  Bild drehen (rechts/links)

10.  Bild drehen (oben/unten)

11.  Wahl des Eingangs Video 1/Video 2

12.  Zugang zum Einstellungs-Menü

1.   No activo

2.   Regula el brillo

3.   Regula el contraste

4.   Regula el color

5.   No activo

6.   Regula Brillo/Contraste/Color


visualizados en la pantalla

7.   Encendido / Apagado

8.  Seleciona mod. 4:3  16:9 

9.  Invierte la imagen (derecha/izquierda)

10.  Invierte la imagen (encima/debajo)

11.  Seleciona entrada Video1 / Video 2

12.  Accede al Menù de ajuste

Sostituzione pila telecomando

Changing the reòote control battery

Remplacement batterie télécommande

Auswechseln der batterie der Fernbedienun

Sustitución bateria mando a distancia

CR 2025

1

2

3

4

5

6

7

9

8

12

11

10

GB

F

D

E

Summary of Contents for VM181

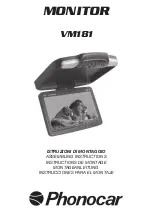
Page 1: ...ISTRUZIONI DI MONTAGGIO ASSEMBLING INSTRUCTIONS INSTRUCTIONS DE MONTAGE MONTAGEANLEITUNG INSTRUCCIONES PARA EL MONTAJE MONITOR VM181 ...

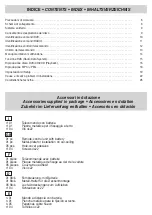
Page 2: ... n 01 Plancha metálica para la fijación al techo n 05 Pegatinas cubre hueco n 04 Tornillos 4x22 Accessori in dotazione Accessories supplied in package Accessoires en dotation Zubehör im Lieferumfang enthalten Accesorios en dotación INDICE CONTENTS INDEX INHALTSVERZEICHNIS Precauzioni di sicurezza 6 Schema di collegamento 8 Sistema antifurto 9 Caricamento ed esplulsione del disco 9 Identificazione ...

Page 3: ...rature inside the car is very high a short cooling down period has to be observed before using the Appliance At low temperatures the display could be slightly dark after switch on The display will in any case come to its normal brightness after a few minutes This situation is normally due to the physical characteristics of the liquid cristals In the presence of condensing water switch the Applianc...

Page 4: ...sofort ausschalten und erst nach Verschwinden der Feuchtigkeit wieder einschalten Das Gerät ist vollautomatisch deshalb bitte nicht versuchen den Bildschirm manuell einzustellen bzw manuell zu öffnen oder zu schließen Verkehrsvorschriften gut nachlesen und sicherstellen dass die Installierung des Geräts diesen Vorschriften entsprechend vorgenommen wird das Verkehrsschutzgesetz verbietet das Fernse...

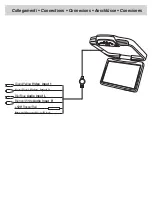
Page 5: ...Collegamenti Connections Connexions Anschlüsse Conexiones Giallo Yellow Video Input 1 Nero Black Video Input 2 Blu Blue Audio Input L Bianco White Audio Input R 12V Rosso Red Massa Ground Nero Black ...

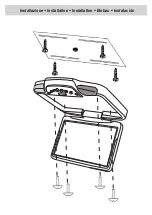
Page 6: ...Installazione Installation Installation Einbau Instalación ...

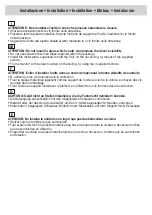
Page 7: ... visibilité de conduite N utiliser que les vis fournies dans la confection Fixer la plaque métallique agissant comme support de l unité au ciel de la voiture au moyen des vis fournies dans l emballage Fixer l écran au support installé sur le plafond en utilisant les 4 vis fournies dans la confection D ACHTUNG Gerät nicht an Stellen installieren die die Fahrersicht behindern könnten Die Befestigung...

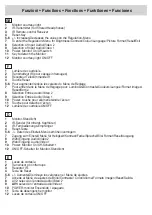
Page 8: ...re telecomando IR 4 Tasto Reset 5 6 aumenta diminuisce i valori nel MENU regolazioni 7 Accede al MENU di regolazioni Luminosità Contrasto Colore Lingua Formato immagine Reset Uscita 8 AV 2 seleziona l ingresso Audio Video 2 9 AV 1 seleziona l ingresso Audio Video 1 10 Power accende spegne il monitor 11 Tasto di sgancio monitor 12 Luce di cortesia ON OFF ...

Page 9: ... 8 Sélection Entrée Audio Video 2 9 Sélection Entrée Audio Video 1 10 Power touche pour allumer éteindre l écran 11 Touche pour détacher l écran 12 Lumière de courtoisie ON OFF D 1 Monitor Standlicht 2 IR Sender für Infrarot Kopfhörer 3 IR Fernbedienungs Empfänger 4 Reset Taste 5 6 Daten des Einstell Menüs erhöhen verringern 7 Zugang zum Einstell Menü für Helligkeit Kontrast Farbe Sprache Bild For...

Page 10: ...raste Couleur sur l écran 7 Allumer éteindre 8 Sélection mod 4 3 16 9 9 Tourner l image droite gauche 10 Tourner l image en haut en bas 11 Sélection entrée Vidéo 1 Vidéo 2 12 Entrée au Menu de Réglage 1 Unbesetzt 2 Einstellung der Helligkeit 3 Einstellung des Kontrastes 4 Einstellung der Farbe 5 Unbesetzt 6 Einstellung Helligkeit Kontrast Farbe auf dem Bildschirm 7 Ein Ausschalten 8 Wahl 4 3 16 9 ...

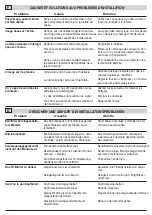
Page 11: ...I AI PROBLEMI D INStallazione Problem Cause Remedy Display does not show anything The current supply cable may not have been inserted correctly or the fuse may be defect Consequently check the current supply cable or replace the fuse If the picture on the Monitor appears out of focus The AV signal cables may be too near to central boxes or the cables may be causing interferences Consequently put t...

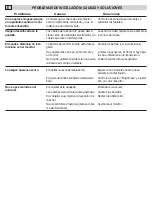
Page 12: ... au dehors du champs maximum de transmission Allumer les écouteurs et remplacer les batteries Eliminer les obstacles Rapprocher l écran GB CAUSES ET Solutions aux problemes d installation F URSACHEN UND ABHILFE BEI INSTALLATIONSPROBLEMEN D Problem Ursache Abhilfe Kein Bild bei eingeschalte tem Monitor Das Stromkabel ist nicht ordnungsgemäß angeschlossen oder die Sicherung ist fehlerhaft Stromkabel...

Page 13: ...escar gada Hay obstáculos entre el control remoto y el monitor No ha sido quitada la protección que aísla la batería al mando a distancia Cambiar la batería ver instrucciones Limpiar los sensores Verificar si hay obje tos que interfieren en la transmisión Quitar la protección de seguridad La imagen aparece oscura El habitáculo está demasiado frío El ajuste del brillo está fijado demasiado bajo Esp...

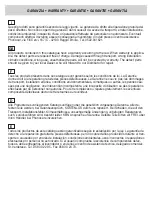
Page 14: ...port installation erronée conditions environnementales climatiques ou autres les pannes cau sées par une négligence une intervention incompétente une incapacité d utilisation ou des réparations effectuées par du personnel non autorisé Pour être remplacés ou réparés gratuitement les éventuels composants défectueux devront être retournés au revendeur D Alle Produkte des vorliegenden Katalogs verfüge...

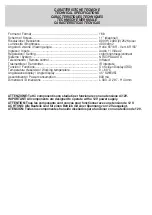
Page 15: ...itore Transmitter IR integrate Funzioni Functions On Screen Display OSD Temperatura d esercizio Working temperature 0 60 C Angolazione display Angle display 45 SWIEVEL Assorbimento Power consumption 800 mA Dimensioni Dimensions L 300 D 287 H 40 mm ATTENZIONE Tutti i componenti sono studiati per funzionare con una tensione di 12V IMPORTANT All components are designed to operate with a 12V power sup...

Page 16: ...sistance assurées par le Fabricant italien Tél Fax N Vert 0800 90 43 99 www phonocar fr e mail info phonocar it DEUTSCHLAND 71711 MURR Rudolf Diesel Strasse 13 Tel 07144 82302 0 Fax 07144 282114 www phonocar de e mail info phonocar de ESPAÑA Delegado Comercial Sr VERDERESE DOMENICO Tel 958 302295 Fax 958 302470 Movil 607592406 e mail info phonocar es ...

Reviews: