background image

24

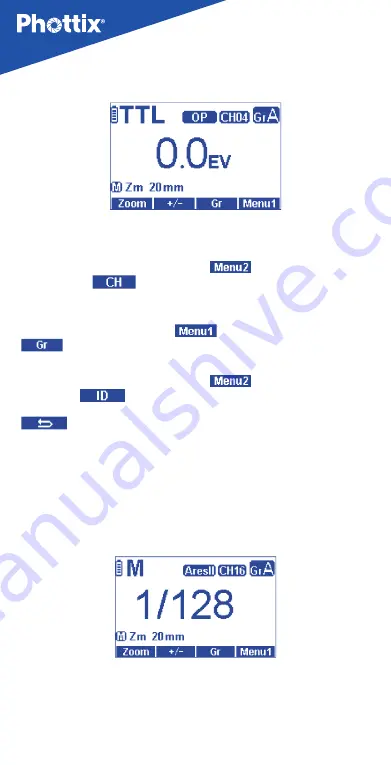
Odin II Rx Mode screen

Changing channels, groups and ID

1. Press Function Button 4 to access 

, use Function Button 1 

(underneath 

) to enter the Channels adjustment area. Use the 

Selection Dial to change the channels between CH1-CH32. Press the OK Button 

to confirm and exit channel adjustment area.

2. Press Function Button 4 to access

 use Function Button 3 (underneath 

) to enter groups adjustment area. Use the Selection Dial to change 

the groups between A,B,C,D,E.  

3. Press Function Button 4 to access 

, use Function Button 2 

(underneath 

) to enter ID adjustment screen. Press the ok Button to 

choose the digit in the ID and use the Selection Dial to change the digit, press   

Button to exit the ID interface

 Please note: 

In TTL Mode, the effect of EV adjustment is cumulative. If EV adjustment is set 

on the Odin II Rx screen and on an Odin II Transmitter or Juno TTL in Odin II Tx 

Mode, and/or in TTL Pref in the Custom Functions menu, all of these settings 

will be used to calculate final EV.

Ares II Rx(receiver) Mode screen


When the Ares II Rx Mode is selected, the Juno TTL will be triggered by Phottix 

Ares II Transmitters, Phottix Odin II Transmitters or a Phottix Juno TTL Flash in 

Odin II Tx Mode – when set to the same channel, group and Digital ID. 

Summary of Contents for Juno TTL

Page 1: ...En INSTRUCTION MANUAL 1 INSTRUCTION MANUAL 說明書 En CnTrad Phottix Juno TTL Transceiver Flash ...

Page 2: ...2 ...

Page 3: ...atteries in a hot location direct sunlight in a closed car etc 6 Remove batteries from the flash when not being used for an extended period of time 7 Change the batteries when required Use undamaged batteries in good condition Do not mix battery types or new and used batteries 8 Do not put opaque objects in front of the flash lens when firing the flash The energy emitted by the flash may cause obj...

Page 4: ...on Button 2 7 Function Button 3 8 Function Button 4 9 Power Switch 10 Selection Dial 11 OK Button 12 External Power Port 13 PC Sync Port 14 Micro USB Port Front Right side 1 Flash Head Locking Button 2 Battery Compartment 3 Bounce Card 4 Wide Angle Diffuser 5 Flash Head 6 Optical Signal Receiver 7 AF Assist Light 8 Hot Shoe ...

Page 5: ...evels Batteries can get hot when the flash is being used Use caution when changing batteries If you do not use the flash for an extended period of time store with batteries removed The Juno TTL Flash circuitry is designed to be used with either Alkaline Ni CD or NiMH rechargeable batteries Do not use Lithium AA batteries Battery Level Indicator The Battery Level Indicator on the LCD see below will...

Page 6: ... on Phottix websites Attaching the Flash to the camera 1 Turn off both the camera and flash 2 Align the flash hot shoe with the camera hot shoe 3 Slide the flash into the camera hot shoe until fully inserted 4 Lock the flash in position by pushing the locking lever to the right until the lock engages with a click 5 To Unlock press the locking release Button on the locking lever and slide to the le...

Page 7: ...light forward to assist with catch lights in a subject s eyes To use 1 Gently pull the Diffuser Panel and Bounce Card from the Flash Head using the ridge on the bottom of the Diffuser Panel 2 If using the Diffuser Panel it will drop into position over the Flash Head Gently push the Bounce Card back into the Flash Head if not needed 3 If using the Bounce Card only gently push the Diffuser Panel bac...

Page 8: ...ton will fire slave flashes on the same channel group and matching ID being controlled by the Master flash Modeling Flash 1 Pressing the camera depth of field preview Button if available will fire the flash continuously for 1 second This Modeling Flash is useful in seeing lighting effects and balance on the subject Please see your camera manual for more information on the DOF Button and Button ass...

Page 9: ...r display First Curtain Sync Mode High Speed Sync Mode Second Curtain Sync Mode Flash Exposure Compensation FEC Zoom Flash Exposure Bracketing Selection Button Wireless Receiving Mode Selection Button Flash Exposure Compensation Selection Button Sync Mode Selection Button Azoom Auto Zoom Mzoom Manual Zoom Manual Flash Mode Power Level M Manual Flash Auto Metering Mode ...

Page 10: ...lash Wireless Flash Selection Menu Wireless Function off Optical Mode Infrared Transmitter Master Mode Optical Mode Infrared Receiver Slave Mode Optical Mode Optical Slave Radio Ares II Receiver Radio Odin II Receiver Mode Radio Odin II Transmitter Mode Radio SKYPORT Receiving Mode ...

Page 11: ...din II Transmitter Flash Group Flash Mode Selectable between TTL M OFF Wireless Radio Mode Odin II Transmitter Ratio Mode Flash Ratio Flash Exposure Compensation of the Ratio Master Flash On Master Flash Off Wireless radio Mode Odin II Receiver Mode Wireless Radio Mode Odin II Receiver Mode Receiver Group ...

Page 12: ...es II Receiver Mode Wireless radio Mode Skyport RX Receiver Mode Signal Transmit Rate Normal Speed Wireless Radio Mode Skyport Receiver Mode Optical Mode Infrared Transmitter Master Mode Optical Mode Infrared Master Mode TTL Flash Group Master Flash On Master Flash Off ...

Page 13: ...En INSTRUCTION MANUAL 13 Flash Ratio Master Flash Infrared Transmitter Group Flash Power Optical Mode Infrared Receiver Slave Mode Optical Mode Infrared Receiver Slave Mode Optical Slave Group ...

Page 14: ...ay on the upper left corner of the LCD TTL Auto Flash In TTL Mode the flash and camera will work together to calculate the correct exposure When the Shutter Button is fully pressed the flash will fire a pre flash that the camera will use to calculate exposure and flash power the instant before the photo is taken Flash Exposure Compensation FEC The Juno TTL Flash allows Flash Exposure Compensation ...

Page 15: ...details 1 Hold down the Button for 2 seconds The FEC icon will displayed in the top right hand corner of the LCD 2 Use the Selection Dial to adjust the exposure bracket amount once selected flash will fire in sequence of the selected FEC Cancel FEB 1 Hold Button for 2s use the Selection Dial to set FEB to 0 Please note FEB can be used in conjunction with FEC and Flash Exposure Lock FEL For best re...

Page 16: ...he end of an exposure not the beginning This can be useful with slow shutter speeds for capturing special effect To use 1 Press Button to cycle through the Sync Mode of the flash 2 When the icon is displayed the flash is set at SCS Mode Note SCS Function is not available in Stroboscopic Mode M Manual Mode In Manual Mode the flash will fire at the power level set on the flash The Phottix Juno TTL F...

Page 17: ...n the flash LCD 3 When a photo is taken the flash will automatically calculate the manual power level and display it on the back of the flash 4 Subsequent photos will be taken at this power level 5 To re meter press and hold the OK Button for 2 seconds to re enter Auto Metering Mode Multi Stroboscopic Mode With Multi Stroboscopic Mode a series of rapid flashes will be fired The flash count frequen...

Page 18: ...to be used with various Stroboscopic Mode variables use the following formula Number of flashes Frequency Shutter Speed Example 5x number of flashes 10 Hz Frequency 5 second shutter speed This is a rough guideline You may need to increase or decrease the shutter speed to get the desired result Multi Stroboscopic Mode Output Chart 1 4 1 8 1 16 1 32 1 64 1 128 7 14 30 60 90 100 6 14 30 60 90 100 5 1...

Page 19: ...tton to select 3 Set the parameters for the selected Wireless Triggering Mode e g Channels and groups Wireless Triggering Mode available on Juno TTL Odin II Tx Transmitter Allows full adjustments to local and remote TTL and Manual flash power and zoom on other Juno TTL flashes in Odin II Rx Mode or compatible flashes equipped with Phottix Odin II receivers Flashes or studio lights with Strato II o...

Page 20: ... Mode Note Both OP Tx and OP Rx flash needs to be Juno TTL for Canon S1 Rx Slave Optical Slave In S1 Rx Mode other nearby flashes will trigger the Juno TTL in manual Mode only when they are fired Please note The Juno TTL cannot be triggered by Phottix Strato Odin I TCU or Ares In the wireless triggering Mode Selection screen if the OK Button is not pressed after 12 seconds the flash will enter the...

Page 21: ...Button to confirm and exit the Odin II Tx Mode editing menu Setting in Odin TX wireless mode The Auto Metering Mode can be used similarly to a light meter to measure and set the flash power needed for proper exposure To use auto metering 1 Set the respective groups to Manual Mode M the groups can be set to any power level 2 Press and hold the option confirm button until the LCD displays Auto Meter...

Page 22: ...ngs and use the Selection Dial to adjust the EV Press OK to confirm and exit 4 Press Selection Button 3 underneath and use the Selection Dial to adjust the ratio between 8 1 to 1 8 Press OK to confirm the setting 5 Pressing the MODE Button in Ratio Mode will exit Ratio Mode and return to Standard Mode Setting the master flash 1 Press Function Button 4 until the LCD displays Pressing Function Butto...

Page 23: ...n Setting channels 1 In Standard or Ratio Mode interface press Function Button 4 to access and use Function Button 1 underneath to enter the Channels Selection area 2 Use the Selection Dial to cycle through CH 1 32 Channels 1 32 3 Press the OK Button to confirm and exit the channel Selection Setting Digital ID 1 Press Function Button 4 to access press Selection Button 2 underneath to enter the Dig...

Page 24: ...underneath to enter ID adjustment screen Press the ok Button to choose the digit in the ID and use the Selection Dial to change the digit press Button to exit the ID interface Please note In TTL Mode the effect of EV adjustment is cumulative If EV adjustment is set on the Odin II Rx screen and on an Odin II Transmitter or Juno TTL in Odin II Tx Mode and or in TTL Pref in the Custom Functions menu ...

Page 25: ...roup adjustment area 4 Press Function Button 4 to access use Function Button 2 underneath to enter power adjustment area Use the Selection Dial to change the power of the flash between 1 1 to 1 128 with 1 3 stops increments Press the Function Button correspond to to confirm and exit the Selection screen 5 Use the Mode Button to change flash Mode between Manual M and Stroboscopic Multi Please note ...

Page 26: ...s such as HSS or SCS or wireless power zoom control Power and zoom levels must be set manually on the Juno TTL flash while in Skyport Rx Mode OP Tx Master and OP Rx slave wireless Mode OP Tx Master and OP Rx Slave Modes use Canon s wireless control and triggering system A Juno TTL flash set to OP Tx Master is needed on the camera to control remote slave flashes set to OP Rx Slave The same transmis...

Page 27: ...ls adjustment area Use the Selection Dial to change the channels between Ch1 4 2 Group setting Press Function Button 4 to access Press the Function Button correspond to to enter group selection area Use the Selection Dial to select between group A B C Press the OK Button to confirm Please note Make sure the OP Tx Master and OP Rx Slave flashes are set to the same transmission channel 1 4 Do not pl...

Page 28: ...n Button 4 to access press the Function Button correspond to to enter ratio adjustment state use the Selection Dial to adjust flash ratio between 8 1 to 1 8 Manual Mode In manual Mode M Master flash Group A B C flash power can be adjusted independently Setting and adjusting manual Mode 1 In OP Tx master wireless Mode press the Mode Button to cycle through all A B and manual Mode 2 Press Function B...

Page 29: ...g the camera shutter Button or pressing the test Button on the flash will wake up the Phottix Juno TTL 2 In Wireless Slave Mode the flash will go to Slave Idle Mode after 10 minutes if no Buttons have been pressed or it has not been fired IDLE will be displayed on the flash LCD Full pressing the camera shutter Button or pressing the Master flash test Button will wake up flashes in idle Mode Slave ...

Page 30: ...lt On ID code is used in Odin II and Ares II radio receiver Mode Firmware info Reset to factory defaults Custom Function No Function Setting options Setting description Auto backlight Default setting if no Button is pressed the backlight of the LCD will automatically turn off after 12 seconds To turn the backlight on press any Button of the flash Resetting to factory default 1 Press and hold Funct...

Page 31: ...own 7 to 90 degree 3 stops in 1 3 stop increments Manual flash exposure compensation and FEB can be combined First Curtain Sync Second Curtain Sync and High Speed Sync Frequency 1 199Hz Number of flashes 1 100 Normal flash Approx 0 1 4 sec Red LED indicator lamp lights up Using AA rechargeable batteries Four size AA alkaline batteries or size AA Ni MH batteries Compatible with Canon compact batter...

Page 32: ...ntrol v Not support different brand vi Output will NOT display Mirtros require to set to TTL i TTL ii HSS iii Auto Metering Function iv Remote manual power control v Cross Brand support vi Output display in real time i TTL Support different brand cameras ii HSS iii Auto Metering Function iv Remote Power control v Support different brand vi Output display in real time i TTL Support cross brand syst...

Page 33: ...reby Phottix HK Ltd declares that this product is in compliance with essential requirements and other relevant provisions of Directive 2014 53 EU This product can be used across EU member states A copy of the Declaration of conformity can be found at www phottix com ...

Page 34: ...try to correct the interference by one or more of the following measures Reorient or relocate the receiving antenna Increase the separation between the equipment and receiver Connect the equipment into an outlet on a circuit different from that to which the receiver is connected Consult the dealer or an experienced radio TV technician for help Caution Any changes or modifications to this device not...

Page 35: ...En INSTRUCTION MANUAL 35 What s included 1 Juno TTL unit X 1 2 Carrying bag 3 Diffuser cap white color 4 Printed user manual 5 Hot shoe stand www phottix com ...

Reviews: