background image

Chapter 4 Treatment

With DEEP OSCILLATION

®

Personal you can perform treatments according to preset indications which are

stored together with the corresponding therapy parameters on the therapy card. For each displayed indic-
ation you can refer to the recommended therapy instructions. Each indication features an image of a body
region to be treated, which shows the preferable direction of treatment.

Caution

Before each treatment, adjust the intensity to match the respective conditions and pay atten-
tion to the contraindications (refer to

Contraindications

on page 5)!

During the charging procedure, the patient must neither be connected with the titanium
neutral element, nor with the hand applicator!

4.1 Treatment with the Hand Applicator

How to Prepare Treatment

(1)

Before treatment, prepare the patient's skin area to be treated by drying or powdering.

(2)

Plug in the cables for the hand applicator as well as for the Titanium neutral element (ref.-no. 00382)
into the

Ports <3>

. The instrument operates in biphase mode; therefore, you don't have to pay at-

tention to the polarity.

(3)

Connect the Titanium neutral element with the other end of the cable and let the patient grip it. Al-
ternatively, you can attach it on any part of the patient's body.

(4)

Connect the applicator to the appropriate cable.

How to Perform a Treatment

(1)

Start up the instrument as described under

How to Start up the Instrument

on page 11.

(2)

Select an indication from the indications menu. The therapy parameters of the selected indication are
displayed.

Therapy Instructions - Parameters

(3)

Click the

symbol. Instructions on how to perform the treatment are shown.

PHYSIOMED ELEKTROMEDIZIN AG

4 Treatment

DEEP OSCILLATION

®

Personal

15

Summary of Contents for Deep Oscillation Personal

Page 1: ...Personal OPERATING INSTRUCTIONS REFERENCE NUMBER 00949 GB COPYRIGHT PHYSIOMED ELEKTROMEDIZIN AG...

Page 2: ...physiomed de DEEP OSCILLATION Personal is a registered trademark of PHYSIOMED ELEKTROMEDIZIN AG The therapy mode has been patented worldwide DEEP OSCILLATION Personal is made in Germany in compliance...

Page 3: ...ts 3 7 2 1 4 Card Reader 4 7 2 1 5 Battery Compartment 5 7 2 1 6 Control Light 6 7 2 1 7 Charger Socket 7 7 Chapter 3 Instrument Operation 8 3 1 Battery Operation 8 3 1 1 Important Notes on Handling t...

Page 4: ...ic Compatibility 19 A 5 Basic Settings 19 A 6 Technical Data 20 A 7 Training 21 Appendix B Scope of Delivery and Accessories 22 B 1 Scope of Delivery 22 B 2 Available Accessories 22 Appendix C Supplem...

Page 5: ...ht lead to limited operation of the in strument or insufficient therapeutical results Caution Alerts you in cases of possible damage to the instrument or risks of injury 1 2 General Notes The instrume...

Page 6: ...Front Panel Rear Face Back Cover removed Legend 1 Display 4 Card Reader 2 Data Selector 5 Battery Compartment 3 Ports 6 Control Light 7 Charger Socket 1 Introduction PHYSIOMED ELEKTROMEDIZIN AG 2 DEE...

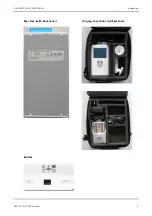
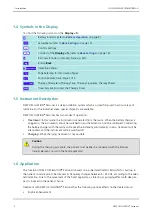
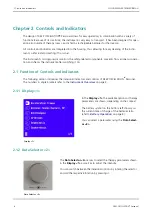
Page 7: ...Rear Face with Back Cover Carrying Case Front and Rear Face Bottom PHYSIOMED ELEKTROMEDIZIN AG 1 Introduction DEEP OSCILLATION Personal 3...

Page 8: ...n the battery charger is plugged in the instrument cannot be switched on and treatment can not be continued Connecting the battery charger with the mains will reduce the instensity automatically to ze...

Page 9: ...of pathogenic agents active tuberculosis acute venous diseases untreated thromboses untreated malignant processes erysipelas patients and therapists with cardiac pacemakers and other electronic implan...

Page 10: ...and Indicators The following section introduces the individual indicators and controls of DEEP OSCILLATION Personal The numbers in angle brackets refer to the Instrument Overview on page 3 2 1 1 Displ...

Page 11: ...rgeable batteries and connects them with the instru ment It is protected by a rear cover made of metal which is attached to the instruments housing by three magnets 2 1 6 Control Light 6 The Control L...

Page 12: ...edure the patient must neither be connected with the titanium neutral element nor with the hand applicator Note As an alternative to the charging procedure directly on the instrument described here yo...

Page 13: ...atteries from the instrument 4 Insert the fresh batteries into the Battery Compartment 5 of your DEEP OSCILLATION Personal Ensure that the polarity is correct and the removal strip is placed below the...

Page 14: ...t primary adaptors to match the line voltage of the destination country One primary adaptor for the respective country is in the scope of delivery Refer to Available Accessories on page 22 for availab...

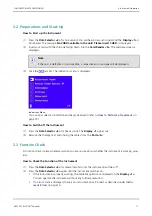
Page 15: ...h off the Instrument 1 Press the Data Selector 2 for five seconds The Display 1 goes out 2 Remove the therapy card and unplug the cables from the Ports 3 3 3 Function Check A function check is always...

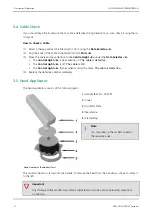
Page 16: ...ble is OK The Control Light 6 flashes when moving the cable The cable is defective 4 Replace the defective cable immediately 3 5 Hand Applicator The hand applicator consists of the following parts Han...

Page 17: ...at the foil is tightly fixed with the clamping ring on the outside and that the clamping ring is engaged Changing the Membrane Engaging the Oscillator Plate 3 6 Therapy Card All indications available...

Page 18: ...n on the Display 1 ERROR_01 ERROR_05 In this case treatment is automatically interrupted Switch off the instrument by pressing the Data Select or 2 and switch it on again If the error code persists ev...

Page 19: ...Prepare Treatment 1 Before treatment prepare the patient s skin area to be treated by drying or powdering 2 Plug in the cables for the hand applicator as well as for the Titanium neutral element ref n...

Page 20: ...erapy time elapses and the Control Light 6 under the Data Selector 2 is on In the example shown here treatment with two different therapy phases is performed Perform the treatment and pay attention to...

Page 21: ...low frequencies 10 40 Hz perform the therapy movement especially slow The leading movement may be quicker After switching to a new therapy phase it might be necessary to re adjust the intensity to re...

Page 22: ...intervals in cluding all accessories Please refer to the Manufacturer s Recommendations on page 24 for the safety regulations control A 2 Cleaning and Disinfection Clean the device and the accessories...

Page 23: ...ng Contrast of the Display 1 You can access the basic settings menu from the welcome screen which is displayed as soon as you insert the therapy card How to Configure the Basic Settings 1 Ensure that...

Page 24: ...e AA 1 2 V Output Impedance 10 MOhm Output Frequency 5 250 Hz Modulation 1 4 1 3 2 3 3 4 Ambient Temperature Operation 10 C 40 C Storage Temperature 10 C 40 C Dimensions W x H x D 10 0 x 3 1 x 19 0 cm...

Page 25: ...rument The operating instructions are used as training material Please submit your requests for trainings to the manufacturer PHYSIOMED ELEKTROMEDIZIN AG Hutweide 10 91220 Schnaittach Laipersdorf Germ...

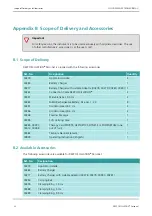
Page 26: ...argeable Battery Size AA 1 2 V 8 00381 Oscillator Head 5 0 cm 2 00386 Oscillator Head 9 5 cm 2 00348 Powder Package 1 00395 Soft Carrying Case 1 00385 00397 00414 00458 Therapy Card SPORTS AESTHETICS...

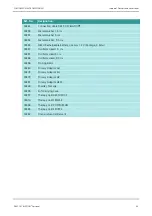
Page 27: ...Head 5 cm 00386 Oscillator Head 9 5 cm 00396 Pin Applicator 00280 Primary Adaptor AU 00278 Primary Adaptor EU 00279 Primary Adaptor UK 00281 Primary Adaptor US JP 00348 Powder Package 00395 Soft Carry...

Page 28: ...plementary Documents C 1 Manufacturer s Recommendations 0 1 2 3 4 5 4 4 4 162 172 182 4 4 4 192 4 4 1 2 6797 6 5 4 6797 6 9 3 1 2 5 9 Supplementary Documents PHYSIOMED ELEKTROMEDIZIN AG 24 DEEP OSCILL...

Page 29: ...sal 18 E effects 4 EMC 19 error code 14 erysipelas 5 F function 4 function check 11 H hand applicator 12 15 hypersensibility to electrostatic fields 5 I implantats electronic 5 indicators 6 function 6...

Page 30: ...ious 5 start up 11 T technical data 20 therapuetic fields 4 therapy card 13 thromboses untreated 5 Training 21 treatment 15 tuberculosis active 5 V venous diseases acute 5 W weight 20 Index PHYSIOMED...

Reviews: