-11-
PKI-0041-5-E
【6】Before starting the work procedures...
※ The following work procedures shown below are for the
"RF6" model but the same procedures can also be used
for units "RF10" and "RF18".
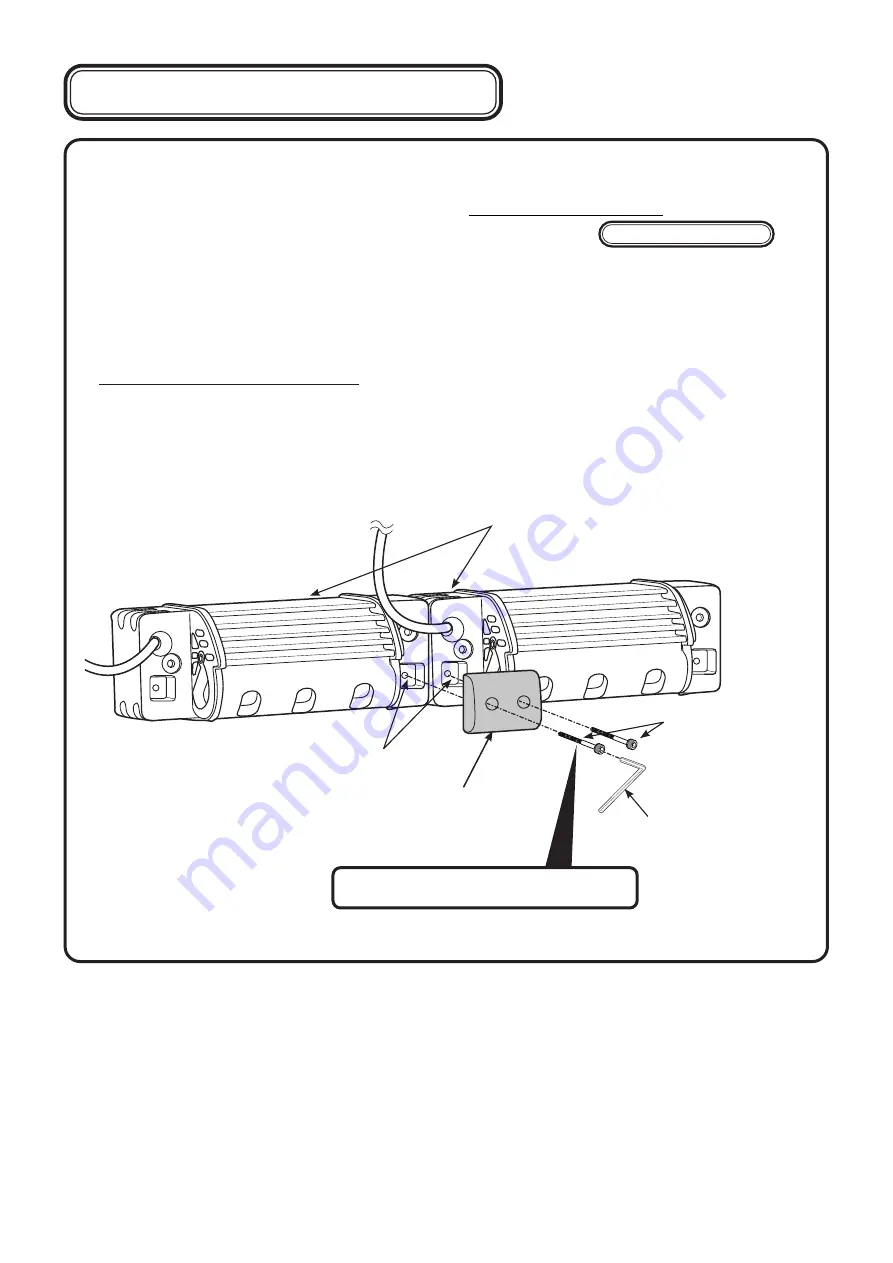
By using the Connection bracket (Item ⑲ ) 2 main lamp units (Item ① ) can be connected.
When installing and using the main lamp unit, follow the ■ Lamp connection procedures indicated below.
If not installing the main lamp unit using this procedure continue on to page 9, [4] I
nstallation preparations
and follow the instructions indicated there. In addition, if not connecting the lamps, the Connection brackets
(Item ⑲ ) and the Hexagon socket head bolt (M4/Item ⑳ ) will not be used. Therefore, please store them
properly for safekeeping.
Install the Connection bracket (Item ⑲ ) to the nut on the lamp main unit as shown in the fi gure. Use the
Hexagon socket head bolt (M4/Item ⑳ ) to secure it fi rmly in place.
Lamp main unit (Item ①)
Nut sections
Connection bracket
(Item ⑲)
Hexagon socket
head bolt (M4)
(Item ⑳)
Hexagonal wrench (M4)
(Item
㉛
)
Tightening torque:2.2ft・Ibs (3N・m)
■ Lamp connection procedures


