03_44
03_45
03_46
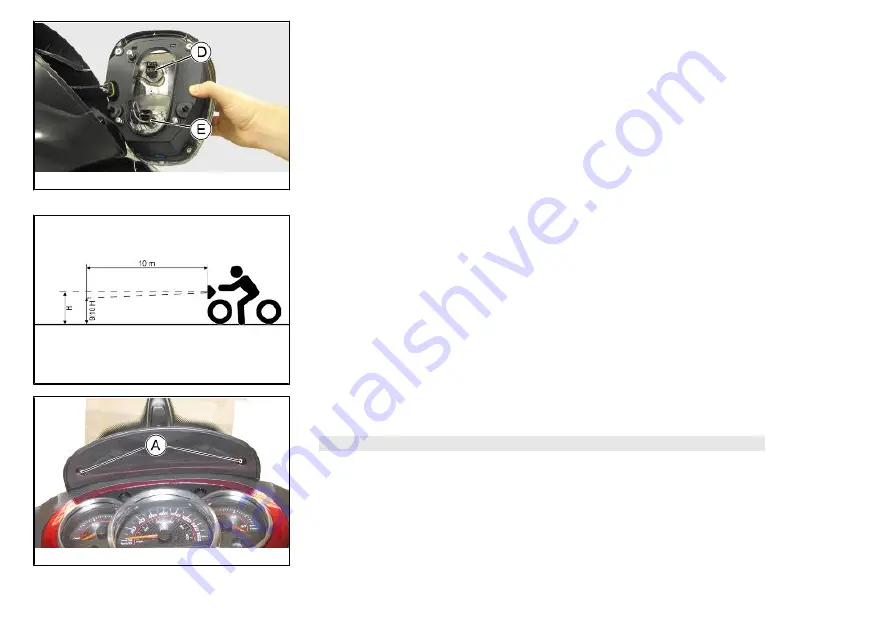
Head light adjustment (03_45, 03_46, 03_47)
Proceed as follows:
- Position the vehicle in running order and with the tyres inflated to the prescribed
pressure, onto a flat surface, 10 m away from a half-lit white screen; ensure that the
longitudinal axis of the vehicle is perpendicular to the screen;
- Turn on the headlight and check that the borderline of the projected light beam on
the screen is not higher than 9/10 or lower than 7/10 of the distance from the ground
to the centre of the vehicle headlamp;
- Otherwise, adjust the headlight. For this operation it is not necessary to remove the
windshield. Unscrew the two screws «
A
» and remove the pressure covering. Screw
in the screw «
B
» to lower the light beam, unscrew the screw «
B
» to raise the light
beam.
N.B.
THE ABOVE PROCEDURE COMPLIES WITH THE EUROPEAN STANDARDS RE-
GARDING MAXIMUM AND MINIMUM HEIGHT OF LIGHT BEAMS. REFER TO THE
STATUTORY REGULATIONS IN FORCE IN EVERY COUNTRY WHERE THE VE-
HICLE IS USED.
63
3 Maintenance
Summary of Contents for LUM Beverly Sport Touring 350 ie
Page 4: ...4 ...
Page 7: ...LUM Beverly Sport Touring Chap 01 Vehicle 7 ...
Page 8: ...Dashboard 01_01 01_01 8 1 Vehicle ...
Page 10: ...01_02 A High beam warning light B Turn indicator warning lights 10 1 Vehicle ...
Page 12: ...01_04 01_05 01_06 12 1 Vehicle ...
Page 26: ...26 1 Vehicle ...
Page 27: ...LUM Beverly Sport Touring Chap 02 Use 27 ...
Page 39: ...LUM Beverly Sport Touring Chap 03 Maintenance 39 ...
Page 53: ...03_27 03_28 03_29 53 3 Maintenance ...
Page 54: ...03_30 03_31 03_32 54 3 Maintenance ...
Page 75: ...LUM Beverly Sport Touring Chap 04 Technical data 75 ...
Page 76: ...04_01 76 4 Technical data ...
Page 81: ...LUM Beverly Sport Touring Chap 05 Spare parts and accessories 81 ...
Page 84: ...84 5 Spare parts and accessories ...
Page 85: ...LUM Beverly Sport Touring Chap 06 Scheduled maintenance 85 ...
Page 90: ...90 6 Scheduled maintenance ...


