background image

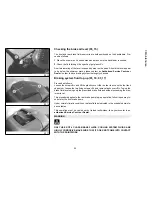
TYRES MUST BE REPLACED WHEN THE TREAD REACHES THE WEAR LIMITS
SET FORTH BY LAW.

Characteristic

Front tyre pressure (with passenger)

2.3 bar (-)

Rear tyre pressure (with passenger)

2.6 bar (-)

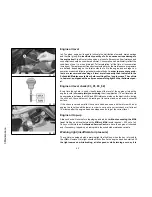
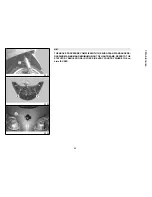
03_07

03_08

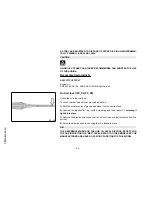
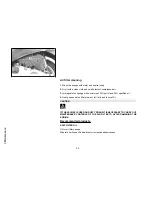
Spark plug dismantlement (03_07, 03_08)

Proceed as follows:

1.

 Remove the access cover over the spark plug on the right-hand side of the scooter

and reach into the spark plug with your hand;

2.

 Disconnect spark plug HV wire cap «

A

» ;

3.

 Unscrew the spark plug using the spark plug wrench supplied;

4.

 When refitting, place the spark plug into the hole at the required angle and tighten

by hand until it is finger tight;

5.

 Use the wrench only for final tightening of the spark plug;

6.

 Place hood 

"A

" fully over the spark plug.

N.B.

THE USE OF SPARK PLUGS OTHER THAN THE INDICATED TYPE OR OF
SHIELDLESS SPARK PLUG CAPS CAN CAUSE ELECTRICAL SYSTEM FAIL-
URES.

48

3 Maintenance

Summary of Contents for xevo 250IE

Page 1: ...information tips and precautions for using your scooter It also describes features details and devices to assure you that you have made the right choice We believe that if you follow our suggestions y...

Page 2: ...regular checks that should be carried out on the vehicle at an authorised Dealer or Service Centre The booklet also contains instructions for simple repairs Any operations not specifically described i...

Page 3: ...nt Vehicle intactness The incomplete or non observance of these regulations leads to the risk of serious damage to the vehicle and sometimes even the invalidity of the guarantee The signs that you see...

Page 4: ...4...

Page 5: ...Opening the saddle to access the helmet compartment in an emergency 24 Identification 24 Rear top box opening button 25 Bag clip 26 USE 27 Checks 28 Refuelling 28 Tyre pressure 29 Shock absorbers adj...

Page 6: ...ght 66 Helmet compartment lighting bulb 66 Rear view mirrors 67 Front and rear disc brake 68 Puncture 69 Periods of inactivity 70 Cleaning the vehicle 70 TECHNICAL DATA 75 Kit equipment 80 SPARE PARTS...

Page 7: ...XEVO 250ie Chap 01 Vehicle 7...

Page 8: ...01_01 8 1 Vehicle...

Page 9: ...ton E Turn indicator switch F Rear brake control lever G Light switch PASSING H Analogue instrument panel I Digital instrument panel L Warning light unit M Emergency cut off switch RUN OFF N Front bra...

Page 10: ...01_02 10 1 Vehicle...

Page 11: ...indicator warning light F SET switch G Rpm indicator H Fuel gauge I Warning light for helmet compartment courtesy light on L Engine control telltale light and injection system failure warning light M...

Page 12: ...LOCK button again and the month numbers start flashing Set the month with the SET button Push the CLOCK button again and the year numbers start flashing Set the year with the SET button Press the CLOC...

Page 13: ...ng belt needs replacing or checking In any case vehicle maintenance must be carried out at the kilometre serv ice intervals recommended in this booklet WARNING REFER TO THE SCHEDULED MAINTENANCE TABLE...

Page 14: ...the SET button M to confirm the selection Now the ambient temperature icon C or F starts flashing Pushing the MODE button R for less than a second the icons C and F are selected in sequential manner...

Page 15: ...steering wheel Reinsert the key and turn it to OFF CAUTION DO NOT TURN THE KEY TO LOCK OR OFF WHILE RIDING 01_08 Switch direction indicators 01_08 Move the switch E to the left to indicate a left turn...

Page 16: ...G is pressed when set to 2 the high beam light is activated The switch goes back to 0 automatically 01_11 Emergency flashing light button 01_11 It enables the activation of the 4 turn indicators simul...

Page 17: ...switch M is set to 0 OFF 01_14 The immobilizer system In order to enhance theft protection the scooter is equipped with a PIAGGIO IM MOBILIZER electronic engine locking device that is activated autom...

Page 18: ...ANY REPAIRS OF THE PIAGGIO IMMOBIL IZER SYSTEM AND THE ENGINE CONTROL UNIT WARNING KEEP THE CODE CARD AND THE RED HANDGRIP KEY IN A SAFE PLACE NOT ON YOUR VEHICLE Immobilizerdevice enabled indicator l...

Page 19: ...e new storage procedure are deleted from the memory Any lost keys will therefore not be enabled to start the engine WARNING EACH KEY HAS ITS OWN AND UNIQUE CODE WHICH MUST BE STORED BY THE SYSTEM CONT...

Page 20: ...TRANSPONDER OFF OR IN THE EVENT OF WRONG OPERATION DURING PROGRAMMING REPEAT THE PROCEDURE FROM THE BEGINNING 01_18 Saddle opening remote control 01_18 01_19 The scooter is fitted with a remote contro...

Page 21: ...nds 3 Wait 1 to 8 seconds 4 Repeat steps 2 and 3 for 4 times without removing the key The control unit confirms the programming has been successfully executed by open ing the saddle WARNING TO STORE T...

Page 22: ...THE LAST TIME THE VEHICLE WAS SHUT OFF JUST TURN THE KEY TO ON TO REACTIVATE THE RECEIVER 01_20 Power supply socket 01_20 There is a plug socket D inside the glove box The plug socket may be used for...

Page 23: ...g the saddle to access the helmet compartment by remote control The saddle can be opened with the remote control CAUTION OBJECTS INAPPROPRIATELY PLACED INSIDE THE HELMET COMPARTMENT MAY DEFORM THE SAD...

Page 24: ...the vehicle according to riding direction To carry out this operation you have to reach the inside of the glove box after having opened the rear cover WARNING OBJECTS INAPPROPRIATELY PLACED INSIDE THE...

Page 25: ...e helmet compartment Engine number The engine number B is stamped near the rear left shock absorber lower support 01_28 Rear top box opening button 01_28 01_29 If the key is in position ON or the engi...

Page 26: ...01_29 01_30 Bag clip 01_30 To use the retractile bag hook B mounted on the knee guard panel pull it slightly towards the back part of the vehicle 26 1 Vehicle...

Page 27: ...XEVO 250ie Chap 02 Use 27...

Page 28: ...ctioning of front and rear brakes 6 The oil level in the gearcase 7 The engine oil level 8 The coolant level 02_01 Refuelling 02_01 Reach the fuel tank and unscrew the cap A Use premium unleaded petro...

Page 29: ...FAILURE TO FOLLOW THESE GUIDELINES COULD DAMAGE THE FUEL PUMP AND OR THE CATALYTIC CONVERTER Characteristic Fuel tank reserve 12 l 2 5 l 02_02 Tyre pressure 02_02 Check the tyre pressure and wear peri...

Page 30: ...The preloading of the springs can be adjusted to 4 positions using the ring nut located in the lower part of the shock absorbers and the specific spanner supplied Position 1 minimum preload driver on...

Page 31: ...OUT THIS OPERA TION IN ORDER TO AVOID INJURIES WARNING WE STRONGLY RECOMMEND NOT TO ADJUST BOTH SHOCK ABSORBERS WITH DIFFERENT PRELOADING Running in DURING THE FIRST 1000 KM DO NOT RIDE THE VEHICLE OV...

Page 32: ...vated by the emergency cut off switch The engine cannot be started if the ignition cut off switch is in the OFF position A running engine automatically switches off when the ignition cut off switch is...

Page 33: ...WARNING THE AUTOMATIC TRANSMISSION MAKES THE REAR WHEEL TURN EVEN WHEN THE THROTTLE IS SLIGHTLY TWISTED RELEASE THE BRAKE CARE FULLY AFTER STARTING AND THEN ACCELERATE GRADUALLY CAUTION DO NOT START U...

Page 34: ...ESSIVE REVOLUTIONS THE REVOLUTION LIMITER WILL BE ACTIVATED IF THE ENGINE SPEED EXCEEDS THE ESTABLISHED THRESHOLD DO NOT AC TIVATE THE REVOLUTION LIMITER RECURRENTLY SO AS TO AVOID DAM AGING THE CATAL...

Page 35: ...TER CAN REACH ALWAYS TAKE CARE WHEN PARKING THE SCOOTER THAT THE EXHAUST DOES NOT COME INTO CONTACT WITH FLAMMABLE MATERIALS TO AVOID SERIOUS BURNS CAUTION DO NOT SWITCH OFF THE ENGINE WHILE THE VEHIC...

Page 36: ...and F while lifting the vehicle backwards holding onto the side handles SIDE Push the projection of the stand L with your foot maintain the stand fully extracted while simultaneously leaning the scoot...

Page 37: ...tips are provided below that will enable you to use your vehicle on a daily basis in greater safety and peace of mind Your skill and your mechanical knowledge are the basis of safe riding We recommend...

Page 38: ...ADDING ACCES SORIES AND LUGGAGE CAN REDUCE THE VEHICLE S STABILITY PERFORM ANCE AND SAFETY DURING USE WARNING NEVER RIDE THE SCOOTER EQUIPPED WITH ACCESSORIES TOP BOX AND OR WINDSHIELD AT A SPEED HIG...

Page 39: ...YOU TO LOOSE CONTROL OF THE VEHICLE CAUTION ANY CHANGES TO THE VEHICLE PERFORMANCE AS WELL AS ALTERATIONS TO ORIGINAL STRUCTURAL PARTS IS STRICTLY FORBIDDEN BY LAW AND RENDERS THE VEHICLE NO LONGER CO...

Page 40: ...40 2 Use...

Page 41: ...XEVO 250ie Chap 03 Maintenance 41...

Page 42: ...visually inspect the level of the engine oil when the engine is cold after completely unscrewing the oil cap dipstick The oil level should be somewhere between the MAX and MIN reference marks on the d...

Page 43: ...ntity of oil still remains in the circuit filling must be done with approx 950 1000 cm of oil through the cap A Then start up the engine leave it running for a few minutes and shut it off after five m...

Page 44: ...oil level proceed as follows 1 Park the scooter on level ground and place it on the centre stand 2 Unscrew the dipstick A dry it with a clean rag and then reinsert it screwing it tightly into place 3...

Page 45: ...L TO THE ENVIRONMENT FOR OIL REPLACEMENT CONTACT AN AUTHORISED SERVICE CENTRE WHICH IS EQUIPPED TO DISPOSE OF USED OILS IN AN ENVIRONMENTALLY FRIEND LY AND LEGAL WAY CAUTION UPON REPLACING HUB OIL AVO...

Page 46: ...vitare l asta verificandone il corretto bloccaggio N B The notches on the hub oil level dipstick except for the one indicating the MAX level refer to other models by the manufacturer and have no speci...

Page 47: ...03_06 Check tyre pressure frequently Tyres feature wear indicators replace tyres as soon as these indicators become visible on the tyre tread Also check that the tyres do not show signs of splitting...

Page 48: ...e scooter and reach into the spark plug with your hand 2 Disconnect spark plug HV wire cap A 3 Unscrew the spark plug using the spark plug wrench supplied 4 When refitting place the spark plug into th...

Page 49: ...ODED ENGINE EXCESSIVE FUEL EXPULSION IN THE SAFE RIDING SECTION KEEP THE TUBE CONNECTED TO THE SPARK PLUG AND THE LATTER IN CONTACT WITH A GROUND POINT FAR FROM THE SPARK PLUG HOLE ITSELF IN ORDER TO...

Page 50: ...petrol and 50 specified oil 4 Gently squeeze the filter element let it drip and then refit it CAUTION IF THE VEHICLE IS USED ON DUSTY ROADS IT IS NECESSARY TO CARRY OUT MAINTENANCE CONTROLS OF THE AIR...

Page 51: ...scheduled maintenance table a Rest the vehicle in vertical position on the stand and remove the screw of the ex pansion tank cap shown in the photo b Remove the expansion tank cover A turning in anti...

Page 52: ...E IS STILL HOT WARNING IN ORDER TO AVOID HARMFUL FLUID LEAKS WHILE RIDING IT IS IMPORTANT TO MAKE SURE THAT THE LEVEL NEVER EXCEEDS THE MAXIMUM VALUE IN ORDER TO GUARANTEE THE PROPER FUNCTION OF THE E...

Page 53: ...ollows Loosen the screw A and lift the plastic cover B in order to access the fuel tank cap below Loosen the two fixing screws C and remove tank cover D Top up the brake fluid level using only the pre...

Page 54: ...FMVSS DOT 4 Synthetic fluid 03_18 Battery 03_18 To access the battery proceed as follows 1 Place the scooter on its centre stand 2 Open the saddle following the previously described procedure 3 Remov...

Page 55: ...ase if the vehicle is not used for a long time This is the result of the natural phenomenon of battery discharging plus residual absorption by vehicle components with constant power consumption Poor b...

Page 56: ...CENTRE TO CARRY OUT THIS OPERA TION SAFELY WHEN REFITTING THE BATTERY MAKE SURE THE LEADS ARE CORRECTLY CONNECTED TO THE TERMINALS 03_21 03_22 Fuses 03_21 03_22 03_23 The electrical system is equippe...

Page 57: ...tion battery compartment on vehicle LHS Fusibile n 2 Capacit 15A Circuiti protetti Alimentazione dispositivo comando lampeggiatori fusibili n 8 9 10 11 12 sotto chiave Collocazione Vano portabatteria...

Page 58: ...A Protected circuits injection load power via relay Location battery compartment on vehicle LHS Fuse No 5 Capacity 10 A Protected circuits luggage light headlight via relay Location battery compartme...

Page 59: ...Fuse No 9 Capacity 7 5A Protected circuits stop light power supply start up button headlamp remote control Location battery compartment on vehicle RHS Fuse No 10 Capacity 7 5A Protected circuits horn...

Page 60: ...el wiring for antitheft device Location battery compartment on vehicle RHS LIGHT BULB TABLE High beam light bulb Type HALOGEN H7 Power 12V 55W Quantity 1 Low beam bulb Type HALOGEN H1 Power 12V 55W Qu...

Page 61: ...ulb Type CYLINDRIC Power 12V 5W Quantity 1 Rear turn indicator bulb Type ALL GLASS Power 12V 5W Quantity 2 RHS 2 LHS Rear tail light bulb Type ALL GLASS Power 12V 5W Quantity 2 Stop light bulb Type SP...

Page 62: ...lide off the light bulb WARNING HIGH AND LOW BEAM LIGHT ARE OF THE HALOGEN TYPE DO NOT TOUCH WITH YOUR FINGERS TO AVOID DAMAGING THEIR FUNCTION Headlight adjustment 03_29 03_30 Proceed as follows 1 Po...

Page 63: ...N B THE ABOVE PROCEDURE COMPLIES WITH THE EUROPEAN STANDARDS RE GARDING MAXIMUM AND MINIMUM HEIGHT OF LIGHT BEAMS REFER TO THE STATUTORY REGULATIONS IN FORCE IN EVERY COUNTRY WHERE THE ve hicle IS USE...

Page 64: ...ccess the light bulb 1 Remove screw A 2 Remove the glass B by lifting it as shown by the arrow 1 and then push it as shown by arrow 2 3 Remove screw C 4 Remove the orange glass D To replace the light...

Page 65: ...g screws A and remove the headlight assembly from its seat To replace the tail light bulbs B take out the rubber bulb holder hold the light bulb and slide it off To replace the stop light bulbs C Turn...

Page 66: ...f 03_37 Number plate light 03_37 To access the light bulb undo the two screws A remove the plastic bulb socket take out the rubber bulb holder hold the light bulb and slide it off 03_38 Helmet compart...

Page 67: ..._40 03_41 To remove the rear view mirrors Lift the rubber bellows Undo the two screws A and remove the plastic cover Undo the two screws B Adjustment The mirrors can be set to the desired position by...

Page 68: ...G ACTION SHOULD BEGIN AFTER ABOUT 1 3 OF THE BRAKE LEVER STROKE CAUTION HAVE THE BRAKE PADS CHECKED BY THE DEALER ACCORDING TO THE CHECKS SPECIFIED IN THE SCHEDULED MAINTENANCE TABLE HOWEVER IN THE EV...

Page 69: ...emergency repair using an inflate and repair spray can For a final repair take your vehicle to an Authorised Service Centre or Dealer The replacement of a tyre involves removing the wheel in question...

Page 70: ...low the instructions in the Battery section Recommended products AGIP CITY HI TEC 4T Oil to lubricate flexible transmissions throttle control Oil for 4 stroke engines Cleaning the vehicle In order to...

Page 71: ...ELETTRICI LE FERITOIE DI RAFFREDDAMENTO DEL COPERCHIO TRASMISSIONE E DEL COPERCHIO CHIOCCIOLA CAUTION NEVER WASH THE SCOOTER IN DIRECT SUNLIGHT ESPECIALLY IN SUMMER WHEN THE BODYWORK IS STILL HOT AS...

Page 72: ...tre Faulty ignition injection control unit Contact an Authorised Service Centre Faulty coil Due to the presence of high voltage this check should only be carried out by an expert Contact an Authorised...

Page 73: ...sence of air in the front and rear brake circuit Contact an Authorised Service Centre INEFFICIENT SUSPENSIONS Shock absorber fault oil leak end buffer damaged shock absorber preloading incorrectly set...

Page 74: ...74 3 Maintenance...

Page 75: ...XEVO 250ie Chap 04 Technical data 75...

Page 76: ...04_01 76 4 Technical data...

Page 77: ...00 rpm Transmission Automatic expandable pulley variator with torque server V belt dry self ventilating automatic centrifugal clutch and transmission housing with forced air circulation Final reductio...

Page 78: ...converter and lambda probe Emission regulations EURO 3 VEHICLE TECHNICAL DATA Chassis Tubular and sheet steel Front suspension Hydraulic telescopic fork with 35 mm stem Rear suspension Two double act...

Page 79: ...130 70 12 62P Front tyre pressure with passenger 2 3 bar Rear tyre pressure with passenger 2 6 bar Kerb weight 171 6 kg Maximum weight allowed 360 kg Battery 12V 12Ah CAPACITY Engine oil 1 3 l Transm...

Page 80: ...e saddle in the compartment provided To open it release the catch shown in the figure The tool kit includes One box spanner One twin screwdriver One special key for adjusting rear shock absorbers One...

Page 81: ...XEVO 250ie Chap 05 Spare parts and accessories 81...

Page 82: ...NTEE AS THOSE INITIALLY FITTED ON THE SCOOTER THE USE OF NON ORIGINAL SPARE PARTS RENDERS THE WARRANTY VOID WARNING PIAGGIO MARKETS ITS OWN LINE OF ACCESSORIES THAT ARE RECOG NISED AND GUARANTEED FOR...

Page 83: ...CON DITION OR WHENEVER WEATHER CONDITIONS DEMAND IT SPEED SHOULD BE REDUCED FURTHER WARNING BE EXTREMELY CAREFUL WHEN INSTALLING AND REMOVING THE MECHAN ICAL ANTITHEFT DEVICE ON THE VEHICLE U SHAPED P...

Page 84: ...84 5 Spare parts and accessories...

Page 85: ...XEVO 250ie Chap 06 Programmed maintenance 85...

Page 86: ...heduled service to solve it All scheduled maintenance services must be carried out at the specified times even if the stated mileage has not yet been reached Carrying out scheduled services on time is...

Page 87: ...000 KM Engine oil level check top up Brake pads check condition and wear AFTER 10 000 KM 50 000 KM 70 000 KM Driven pulley roller casing Greasing Safety locks check Driving belt Check Throttle lever a...

Page 88: ...AFTER 15 000 KM 45 000 KM 75 000 KM Engine oil level check top up Brake pads check condition and wear AFTER 20 000 KM 40 000 KM 80 000 KM Driven pulley roller casing Greasing Spark plug replacement Dr...

Page 89: ...and brake test road test Hub oil change Suspensions check Steering Check 30 000 KM Driven pulley roller casing Greasing Safety locks check Throttle lever adjustment Driving belt Check Air filter clean...

Page 90: ...en pulley roller casing Greasing Spark plug replacement Driving belt replacement Throttle lever adjustment Air filter clean Engine oil change Valve clearance check Electrical system and battery check...

Page 91: ...ns throttle control Oil for 4 stroke engines AGIP FILTER OIL Oil for air filter sponge Mineral oil with specific additives for increased adhesiveness AGIP GP 330 Calcium complex soap based grease with...

Page 92: ...92 6 Programmed maintenance...

Page 93: ...ight 62 Horn 16 Hub oil 44 I Identification 24 Immobilizer 17 19 Instrument panel 11 K Key switch 14 Keys 17 L Light switch 16 M Maintenance 13 41 85 86 Mirrors 67 S Saddle 20 23 24 Scheduled maintena...

Page 94: ...s or accessory supplies which it considers necessary to improve the product or which are required for manufacturing or construction reasons Not all versions shown in this publication are available in...

Reviews: