background image

Description of activity

Display

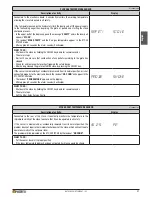
Select the value to be set for ignition temperature.

Press the SELECT MENU key and then select the temperature set point 2, 4 or 6 °F (1, 
2 or 3 °C) or disable the function by selecting OFF.
Confirm by pressing the SET key.

START

OFF

After confirmation using the SET key, the readout FUNCTION ENABLED is displayed and 
the readout ENS (ENERGY SAVING) appears on the main display.

12:30

ENS P2

When the desired temperature has been reached the alternate ENS and OK readout 
appears on the display and the stove operates at minimum power.

13:10

OK P2

Upon reaching the temperature set in the STOP function, the stove starts the shutdown 
stage.
The scrolling readout ENERGY SAVING OK appears on the display.

13:20

ENERGY 
SAVING OK

DT2011676-00

6.9  PARAMETERS MENU

The User can only interact with the TIME METER STORAGE in the parameter menu, as described in the table below: the other parameters can only 
be used by an authorised service centre.

Description of activity

Display

Press key 6 for a few seconds. Use key 5 or 6 to scroll the menu that appears on the 
display until the scrolling readout MENU PARAMETERS appears.
Confirm by pressing the SET key.

MENU

PARAMETERS

Use key 5 or 6 to scroll the menu that appears on the display until the scrolling readout 
MEMORY COUNTERS appears.
Confirm by pressing the SET key.

MEMORY

COUNTERS

The scrolling readout HOURS TOTAL appears and the total hours of operation on the 
display.
Use key 5 to go back within the time meter storage menu. Press key 6.

0000

HOURS TOTAL

The scrolling readout HOURS PARTIAL appears and the number of partial hours on the 
display.
Use key 5 to go back within the time meter storage menu. Press key 6.

0000

HOURS 
PARTIAL

The scrolling readout NUMBER START appears and the number of actual starts on the 
display.
Use key 5 to go back within the time meter storage menu. Press key 6.

0000

NUMBER 
START

The last 5 alarms (e.g.: ALL) appear and the readout MEM1, MEM2, MEM3, MEM4, 
MEM5 on the display.
Use key 5 to go back within the time meter storage menu.
Press the SET key to return to the initial display.

MEM1

ALF 1

TIME METER STORAGE

DT2011679-00

H07029330 / DT2001081 – 02

30

English

Summary of Contents for MARCELLA

Page 1: ...burning room heater Failure to follow these instructions could result in property damage bodily injiury or even death Save these Instructions Contact local building or fire officials about restrictio...

Page 2: ...at first time of cleaning The stove must be assembled by at least two persons See the guarantee certificate enclosed with the product for the terms limitations and exclusions In line with its policy...

Page 3: ...3 6 2 Control panel 24 6 3 Setting the language 24 6 4 Programming 25 6 5 Setting unit of temperature measurement 26 6 6 Programming the clock 26 6 7 Timer 26 6 8 Energy Saving 29 6 9 Parameters menu...

Page 4: ...APACITY LOAD OF THE FLOOR FRESH AIR INTAKE FLUEWAY ELECTRIC POWER SUPPLY Fig 1 1 0 GENERAL RULES We recommend that the flue must have a chamber for collecting solid matter and any condensate located b...

Page 5: ...e installation to determine if a permit and or inspection is required When locating your appliance consider the building structure to ensure the vent will not interfere with any ceiling joists roof ra...

Page 6: ...respect minimum safety distances from heat sensitive structural components or inflammable materials wood panelling beams or ceilings etc shown in figures a a The stove will become hot while in operat...

Page 7: ...rge vapours a a The very hot exhaust gases may cause skin burns keep a considerable distance away from the appliance a a The exhaust gases from the combustion of pellets fuel may dirty the outside of...

Page 8: ...3 union tee then use a 3 4 adaptor Fig 8 Union tee The use of this type of fitting must allow for the collection of condensate mixed with soot which builds up inside the pipe It must also permit perio...

Page 9: ...to a minimum as they reduce drafts capacity of a vent Continue the Vent up through the roof line Slide the Flashing over the Vent until it sits on the roof line Slip the upper side of the Flashing bas...

Page 10: ...if the existing chimney is in compliance Fig 13 When chimneys are relined a chimney chase cap that reduces the outlet of the chimney to the size of the liner is required Extend the exhaust vent above...

Page 11: ...under the houses eaves Fig 17 the following requirements shall be fulfilled in selecting locations for appliance and vent take into consideration the NPFA 211 6 3 5 rule for distance of exit terminal...

Page 12: ...1 2 m below 4 1 2 m horizontally 1 305 mm above The clearance to fresh air intake for combustion of the pellet stove or any other appliance or the non mechanical air supply inlet to the building must...

Page 13: ...rofessional standards PUBLIC WALKWAY 1 3 7 1 COMBUSTIBLES CLEARANCE TO PUBLIC WALKWAY CLEARANCE TO WALL PENETRATION POINT CLEARANCE TO COMBUSTIBLES CLEARANCE TO GROUND TEE VENT 90 ELBOW THIMBLE 45 ELB...

Page 14: ...t venting Single wall vent is not allowed Follow PL Vent manufacturer s installation directions and observe all listed clearances to combustibles Check any other local buildings codes or other codes t...

Page 15: ...rated power P1 at minimum power Heat input BTU H kW 47081 13 79 11151 3 27 Pellet consumption per hour lb h kg h 5 70 2 59 1 35 0 54 Overall efficiency 88 6 87 7 Rated current during ignition A 3 0 Ma...

Page 16: ...el of the stove while the plate with the serial number is located on the underside of the hopper lid A label bearing the serial number is also applied on the cover last page of the Installation operat...

Page 17: ...acitor N O Pressure switch normally open N C 85 Thermostat normally closed Igniter plug Power supply with fuse Smoke sensor Room sensor Outside thermostat Serial port DB9 Motherboard N O Hopper lid sw...

Page 18: ...to avoid toppling never stand in the vicinity of loading unloading equipment forklift trucks cranes etc before proceeding with installation remove the securing brackets A having removed the relative...

Page 19: ...fter installation of the stove a a In Canada the electrical installation must meet the appliance requirements for CSA C22 2 Room sensor connection 5 When installing the stove firebox it is necessary t...

Page 20: ...sition 4 Fig 26 Clamp the thermostat cable with the PG7 cable gland and insert the gland into the hole in the rear panel Fig 30 Connect the thermostat terminal to the two pin terminal of the electroni...

Page 21: ...ft side of the stove Proceed as follows to install the kit Remove the left side panel see the paragraph REMOVING THE CLADDING Remove the rear stove panel A Fig 35 Remove the smoke sensor after having...

Page 22: ...ed in the kit around the edge of the hole made in the panel Cut off any excess gasket Fig 39 a a It is advisable to secure the gasket with a few drops of high heatresistant silicone Refit the left sid...

Page 23: ...o may result in emission of products of combustion from the hopper under certain conditions Maintain hopper seal in good condition DT2010035 06 Fig 41 DT2010730 00 6 1 Loading the pellets When lightin...

Page 24: ...e room temperature between 44 F and 86 F 7 C and 30 C to read the temperature and actual time key 1 In the stove programming stage they are used to select the language to select the day and time for c...

Page 25: ...display The stove now returns to the initial display Repeat the above steps for each menu to be programmed See the appropriate table to programme each function Press key 4 once to return to the previo...

Page 26: ...week that appear on the display until the required day appears Confirm by pressing the SET key 32 MINUTES The display automatically returns to its initial status 10 32 oFF DT2011643 00 6 6 Programming...

Page 27: ...y pressed down for a few seconds Confirm the set time by pressing the SET key 14 20 START DAY PROGRAM 1 Use key 1 or 2 to set the stop time of the first operating cycle Each time the key is pressed th...

Page 28: ...the first operating cycle Confirm the temperature by pressing the SET key 25 SET TEMP ROOM 1 Programming automatically passes to the second operating cycle To continue programming for the second cycl...

Page 29: ...6 F 1 2 or 3 C defines the value from which the Energy Saving mode will either increment or deduct from the room temperature set The operating principle is as follows When the room temperature measure...

Page 30: ...tivity Display Press key 6 for a few seconds Use key 5 or 6 to scroll the menu that appears on the display until the scrolling readout MENU PARAMETERS appears Confirm by pressing the SET key MENU PARA...

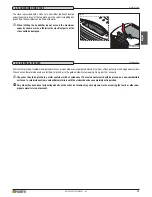
Page 31: ...shed towards the left There will be odours when lighting the first few times due to the evaporation of paints and oils used during the manufacturing process During this stage air the room well where t...

Page 32: ...II Description of activity Display If the readout NO LIGHTING appears on the display during the startup stage and the buzzer activates if set it means that the sensor installed on the flue gas outlet...

Page 33: ...ing press the SET key The scrolling readout SET ROOM TEMP appears on the display Use key 1 or 2 to select the required temperature from a scale between 44 F and 86 F 7 C and 30 C which will appear in...

Page 34: ...ase activates The fan operates at full speed to allow the stove to cool The automatic stove restart cycle starts the steps detailed in the STARTUP phase are repeated automatically Once the ignition cy...

Page 35: ...work carried out by unauthorised personnel can jeopardise this function d d IN CASE OF ANY ALARM SIGNALS DO NOT UNPLUG THE STOVE JUST TURN THE UNIT OFF Possible warnings of problems Simple operating p...

Page 36: ...ph WIRING DIAGRAM momentarily or accidentally removed from its normal position or is not connected properly to the electronic board or the speed of the smoke fan is greater or lower than the set value...

Page 37: ...ily or accidentally removed from its normal position or is not connected properly to the electronic board the readout NO CONN will appear in the STOVE STATUS mode The readout PROBE SMOKE appears on th...

Page 38: ...F 1 Pressure switch activated Fuel hopper lid open ALF 2 Anomaly in the pressure switch ALF 3 Anomaly in combustion fan speed greater than set value ALF 4 Anomaly in combustion fan speed lower than se...

Page 39: ...stoves or open fireboxes is composed mainly of calcium silicon potassium and magnesium oxides The ashes can therefore be used as a fertiliser for plants or in the garden albeit not exceeding 2 6 kg pe...

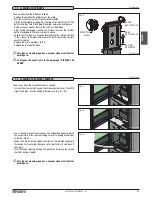
Page 40: ...shes refer to the paragraph DISPOSAL OF ASHES DT2010057 02 DT2011673 00 7 1 Cleaning the grate and the grate support DT2010100 03 7 2 Cleaning the ash tray Clean the grate area every day and whenever...

Page 41: ...eplace the grate baffle plate a a This type of cleaning requires a vacuum cleaner suitable for holding ash a a To dispose the ashes refer to the paragraph DISPOSAL OF ASHES DT2011674 00 7 4 Cleaning t...

Page 42: ...ing any detergent even mild detergent Products are available on the market which are suitable for cleaning ceramics as well as concentrated products for cleaning porcelain These will remove oil ink co...

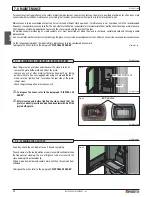
Page 43: ...en not in use a a Any cleaning or maintenance work must be carried out after the CURRENT HAS BEEN SWITCHED OFF The stove is fitted with fans smoke extractor and heating positioned at the bottom rear o...

Page 44: ...n the grate see CLEANING THE GRATE Clean the firebox see CLEANING THE FIREBOX Clean the flue system see CLEANING THE FLUE SYSTEM Clean the painted metal parts see CLEANING THE PAINTED METAL PARTS Clea...

Page 45: ...the wall socket and connected to the appliance Faulty power cable Replace the power cable use only original spares Fuses blown Check the fuses in both the plug and the electronic board replacing them...

Page 46: ...erminal of the black red white cable of the flue gas fan and the electronic board Check correct insertion position of the connector see wiring diagram Faulty electronic board Badly positioned black re...

Page 47: ...e electronic board use only original spares Faulty limit temperature control sensor Replace the control sensor use only original spares Badly positioned smoke sensor Check that the sensor is correctly...

Page 48: ...the wiring and connections Blocked flue Clean flue system Failed ignition See NO ACC Faulty electronic board Replace the electronic board use only original spares Pellet charging system blocked Empty...

Page 49: ...es UL 181 Factory made air ducts and connectots UL 641 Low temperature venting system type L ULC S609 Low temperature vents type L Manufactured home and safety standard HUD cfr 3280 part 24 Mobile hom...

Page 50: ...H07029330 DT2001081 02 50 English...

Page 51: ......

Page 52: ...a piazzetta it FOR ANY SERVICE OR QUESTIONS PLEASE CONTACT YOUR DEALER FIRST Distribuite by Pacific Energy Fireplace Products Ltd 2975 Allenby Rd Duncan BC Canada V9L 6V8 Tel 1 250 748 1184 email supp...

Reviews: