60
REMOVING AND REPLACEMENT THE HEATING
UNIT
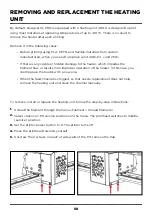
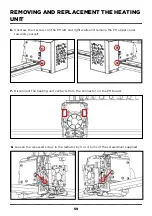
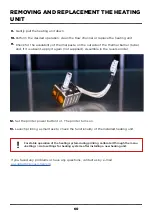
Gently pull the heating unit down.
Perform the desired operation: clean the flow channel or replace the heating unit.
Check for the availability of thermal paste on the outside of the thermal barrier (tube)
and, if it is absent, apply it again (not supplied). Assemble in the reverse order.
9.
10.
11.
If you faced any problems or have any questions, contact us by e-mail
Set the printer power button to 1. The printer turns on.
Launch printing a small task to check the functionality of the installed heating unit.
12.
13.
For stable operation of the heating system during printing calibrate it through the menu
«Settings > Auto settings for heating system» after installing a new heating unit.
Summary of Contents for Designer XL PRO
Page 1: ......
Page 12: ...UNPACKING ...
Page 19: ...PRINTER MANAGEMENT ...
Page 27: ...BASICS OF WORKING WITH DESIGNER XL PRO ...
Page 42: ...SERVICE FUNCTIONS ...

