background image


Caution


Electrical current from power, telephone, and signal cables is potentially hazardous. When 
installing, moving, or opening your computer, disconnect signal cables in accordance with 
national and local laws. To prevent electrostatic damage to the board, do not disconnect the 
power cable from the computer.  

Do not connect or disconnect LiveLAN components when your computer is on, as you might 
damage the LiveLAN hardware.  
  

1.  Ensure that your PC is powered off. 


2.  Disconnect the audio and video cables from the Logitech MovieMan board. 


3.  Remove the Logitech MovieMan board from the ISA slot. 


4.  If you are installing the LiveLAN 3.1 hardware at this time, refer to 

Installing the LiveLAN 3.1 

Hardware and Software

. If you wish to install the hardware at a later time, refer to Step 5. 


5.  Replace the chassis cover, reconnect all signal cables, and power on your PC. 


Installing the LiveLAN 3.1 Hardware and Software 

Refer to the LiveLAN 3.1 Installation Guide for the hardware and software install instructions. Once you have 
installed the hardware and software, return to this guide for instructions on how to connect your LiveLAN 2.0 
video camera, speakers, and microphone to the LiveLAN Multimedia Accelerator board.  

When the LiveLAN 3.1 application software is installed, it will detect that LiveLAN version 2.0 is installed on 
your machine. A warning message will appear informing you that installing LiveLAN 3.1 will overwrite and 
replace the existing version of LiveLAN on your system. Click Yes to continue with the LiveLAN 3.1 
Installation.  

You will also be asked by the system if you want to save your existing LiveLAN 2.0 phone book file. Click Yes 
to save the file.  


Attaching the LiveLAN 2.0 Peripherals 

This section provides instructions for attaching your LiveLAN 2.0 video camera, microphone, and speakers to 
the LiveLAN Multimedia Accelerator board.  
   

Connecting the Video Camera 

Summary of Contents for LIVELAN 2

Page 1: ...r in which you follow instructions in either this guide or in the LiveLAN 3 1 Installation Guide Upgrading with LiveLAN 2 0 installed Start with this upgrade guide for instructions about replacing the...

Page 2: ...LiveLAN 2 0 installed If you purchased LiveLAN 2 0 but did not install it Install the LiveLAN Multimedia Accelerator board Install the LiveLAN 3 1 software Attach the camera microphone and speakers i...

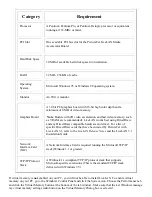
Page 3: ...are and driver For a list of specific DirectDraw cards that have been tested by PictureTel with LiveLAN 3 1 refer to the LiveLAN Release Notes and the LiveLAN 3 1 Installation Guide Network Interface...

Page 4: ...TCP IP stack Reinstall the FTP Software InterDrive NFS client if required Recording Configuration Information Before removing the FTP Software OnNet16 TCP IP stack you need to record configuration inf...

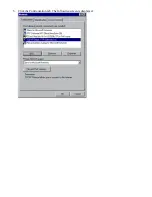
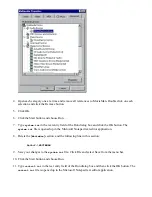
Page 5: ...3 Click the Configuration tab The following screen is displayed...

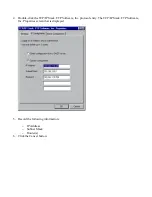
Page 6: ...he TCP IP Stack FTP Software Inc protocol entry The TCP IP Stack FTP Software Inc Properties screen that is displayed 5 Record the following information o IP Address o Subnet Mask o Router s 6 Click t...

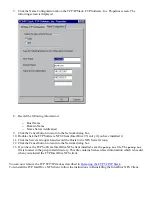
Page 7: ...ers Group tab and record the Hosts in the NFS Server Group 12 Click the Cancel button to return to the Network dialog box 13 If you have the FTP Software InterDrive NFS client installed save the pctcp...

Page 8: ...the TCP IP Stack FTP Software Inc entry on the Configuration tab of the Network Control Panel Window and click the Remove button 2 Highlight the FTP Software NFS Client InterDrive 95 entry if installe...

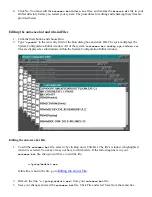
Page 9: ...em s autoexec bat config sys and win ini files are displayed as subwindows within the System Configuration Editor window Editing the autoexec bat File 1 To edit the autoexec bat file select it by clic...

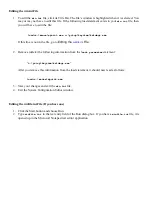
Page 10: ...file ini File 2 Remove delete the following information from the load parameter statement c pctcp keyview kwldmgr exe After you remove this information from the load statement it should now read as fo...

Page 11: ...e If the following line exists in your winfile ini file then you will have to edit the file keyview c pctcp keyview kvfm dll If this line is not in the file go to Renaming the winsock dll File in the...

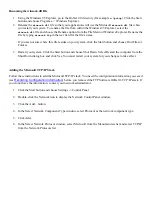
Page 12: ...tart button and choose Shut Down Select Restart the computer from the Shut Down dialog box and click Yes You must restart your system for your changes to take effect Adding the Microsoft TCP IP Stack...

Page 13: ...cted They should match the information that you recorded from the Name Configuration tab before removing the FTP stack Verify the Primary and Secondary WINS servers and the Scope ID 11 Click the Gatew...

Page 14: ...ve the diskette contact your System Administrator 9 Enter the drive letter from which the files should be copied 10 Click OK 11 Restart your PC when prompted Deinstalling Logitech MovieMan optional Th...

Page 15: ...he system ini file is opened up in the Microsoft Notepad text editor application 8 Delete the MovieMan section and the following line in this section Path C MOVIEMAN 9 Save your changes to the system...

Page 16: ...io Driver V1 0 livelanv drv MCI PictureTel LiveLAN DigitalVideo Driver 13 Save your changes to the control ini file Click File and select Save from the menu bar 14 Restart your system Click the Start...

Page 17: ...power on your PC Installing the LiveLAN 3 1 Hardware and Software Refer to the LiveLAN 3 1 Installation Guide for the hardware and software install instructions Once you have installed the hardware a...

Page 18: ...ply Connecting the Microphone To connect your LiveLAN 2 0 microphone to the LiveLAN Multimedia Accelerator board 1 Plug the microphone into the socket labeled on the LiveLAN Multimedia Accelerator boa...

Reviews: