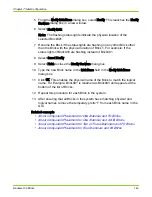
5 From the Modify Brick Name dialog box, select Identify. This launches the Identify
Hardware dialog box in a new window.
6 Select Identify Brick.
Note: The flashing status lights indicate the physical location of the
selected Brick001.
7 Rename the Brick if the status lights are flashing on any other Brick other
than the Brick with the physical location of Brick 1. For example: If the
status lights of Brick003 are flashing instead of Brick001.
8 Select Cancel Identify.
9 Select Finish to close the Identify Hardware dialog box.
10 Type the new Brick name in the Brick Name field in the Modify Brick Name
dialog box.
11 Click OK. This enables the physical name of the Brick to match the logical
name. For Example: Brick001 is renamed as Brick003 and appears at the
bottom of the list of Bricks.
12 Repeat this procedure for each Brick in the system.
13 After ensuring that all Bricks in the system have matching physical and
logical names, remove the temporary prefix “t” from each Brick name in the
GUI.
Related concepts
•
About Component Placement for One Slammer and FC Bricks
•
About Component Placement for One Slammer and SATA Bricks
•
About Component Placement for Two or Three Slammers and FC Bricks
•
About Component Placement for Four Slammers and 64 Bricks
Chapter 7 Initial Configuration
Rename the Bricks
142

