background image

17/01/2020 / DC1 / Version2


Make sure to always follow your current IET Wiring regulations.


The Pilot EV Plus+ installation should only be carried out by a certified installer.


The below instructions are a guideline and provided for reference only. You are solely  


responsible for following all applicable electrical safety procedures, codes, methods, 


and materials provided as per the instructions below.


Verify external power cables that are visible from beneath the installation area.


Prior to installation, make sure to disconnect the main circuit breaker (CB).


Carry out a visual inspection to verify that none of the parts are damaged.

Prerequisites


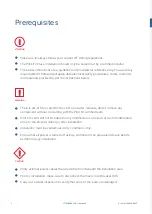
There is risk of fire or electric shock. Do not alter, relocate, drill or remove any 


component without consulting with the Pilot EV certified team.


Pilot EV is and will not be liable for any modifications or results of such modifications 


done to the product during or after installation.


Installation must be carried out in dry conditions only.


Ensure that all power is turned off using a voltmeter or an equivalent device before 


performing any installation.

ATTENTION

!!

WARNING

!!

CAUTION

!!

4


+44 (0) 1606 59 66 22    

Summary of Contents for EV Plus+

Page 1: ...Pilot EV Plus Quick Installation Guide...

Page 2: ...bit preferred 2 Hex M5 screwdriver Electric with bit preferred 3 Level 4 Stainless steel anchors Size M10 5 Stainless steel bolts M10 to fit the anchors 6 Drill When the anchors are not pre inserted 7...

Page 3: ...a visual check to confirm that none of the parts are damaged or broken Prior to installation make sure to disconnect the main circuit breaker CB Locate the serial number S N of the device on the stand...

Page 4: ...area Prior to installation make sure to disconnect the main circuit breaker CB Carry out a visual inspection to verify that none of the parts are damaged Prerequisites There is risk of fire or electr...

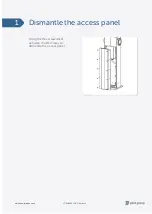
Page 5: ...17 01 2020 DC1 Version2 Using the Hex screwdriver unfasten the 10 screws to dismantle the access panel Dismantle the access panel 1 www thepilotgroup co uk...

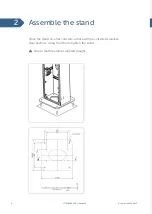
Page 6: ...Version2 Place the stand on a flat concrete surface with pre inserted stainless steel anchors Using the 4 bolts tighten the stand Assemble the stand 2 Ensure that the stand is aligned straight 6 44 0...

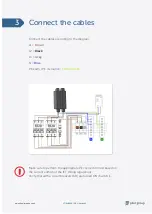
Page 7: ...2 Black L3 Grey N Blue PE Earth PE Ground Yellow Green Make sure to perform the appropriate PE connection test based on the current edition of the IET Wiring regulations Verify that all the circuit br...

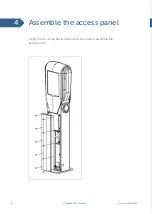
Page 8: ...17 01 2020 DC1 Version2 Using the Hex screwdriver fasten the 10 screws to assemble the access panel Assemble the access panel 4 8 44 0 1606 59 66 22...

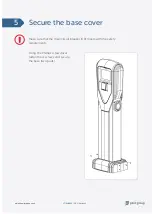
Page 9: ...Version2 Using the Phillips screwdriver fasten the 4 screws and secure the base two parts Secure the base cover 5 Make sure that the main circuit breaker CB meets with the safety requirements www thep...

Page 10: ...Version2 Switch on the main CB Circuit Breaker Switch I Make sure that both the Pilot EV Plus screen and VPOS Touch device are turned on and functional in the idle mode Power up the device 6 10 44 0...

Page 11: ...from our base in Manchester we believe in working closely with our customers to form long lasting and mutually beneficial partnerships At Pilot Group we believe in using technology to make the places...

Reviews: