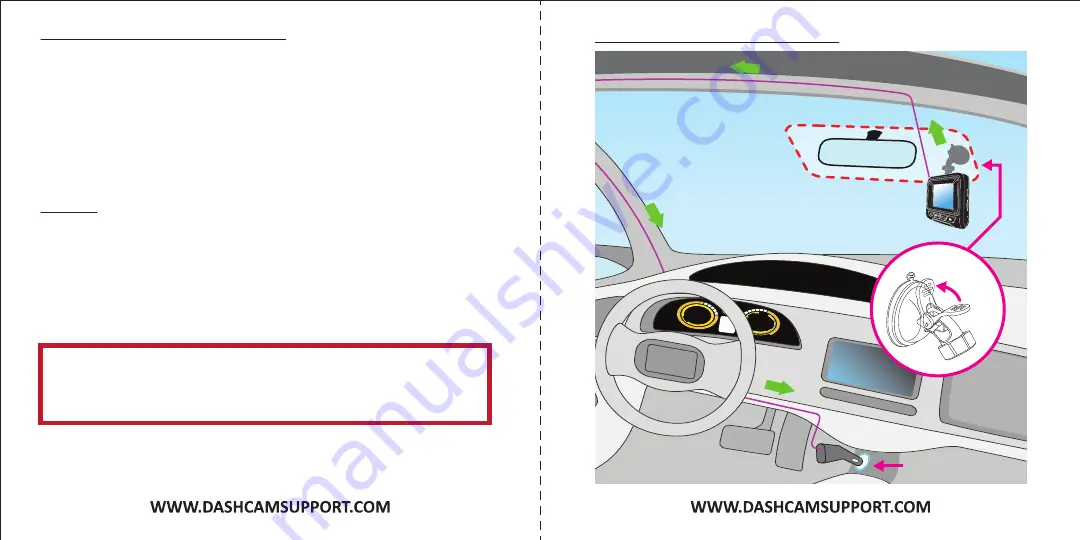
MOUNT TO WINDSHIELD (FIG. A)
1. Carefully clean area on windshield with alcohol where you intend to
mount dashcam.
2. Press suc�on cup FIRMLY onto the windshield.
3. Engage locking lever (see diagram on Fig. A, Sec. 1) to secure suc�on cup
in place. The suc�on cup can be moved freely by disengaging and
re-engaging the locking lever.
4. Slide dashcam moun�ng port onto suc�on cup mount. Once dashcam is
posi�oned correctly, �ghten thumbwheel nut to secure in place.
POWER
1. Plug 12V power adapter into vehicle’s 12V power (cigare�e lighter) port.
2. Plug mini-USB cable end into dashcam’s port. The unit will automa�cally
turn on and start recording (when a micro SD card is installed); press
OK
bu�on to stop recording.
3. To manually power on the device,
PRESS AND HOLD
the
POWER
bu�on
un�l the display ac�vates.
12V Outlet
FIG. A - MOUNT TO WINDSHIELD
NOTE:
Some vehicle’s 12V ports provide power even a�er vehicle’s
igni�on is turned
OFF
. In this case, you will have to manually turn the
camera
ON/OFF
by pressing the
POWER
bu�on.
Lock
Sec. 1


