Operating instructions (translation from original IT)
Cod. OQ7_5ARG078EN
Emiss. 18-07-08 Rev. 5 - Agg. 20-04-16
52
25.11
CHECKING AND CHANGING THE TRANSMISSION COUPLING (Only versions with DIRECT transmission)
The motor and the compressor are directly connected with a coupling fitted with an elastic element. The coupling must not be
lubricated.
Use the following procedure to change the elastic element and the joints if necessary.
1.
Switch off the compressor by pressing the stop pushbutton on the electronic board.
2.
Switch off the power: turn the disconnecting switch to position “0” and block it with a padlock.
3.
Turn on the automatic differential supply switch.
4.
Unscrew the fastening screws of the coupling flange; shift the motor.
5.
Check the state of the semi-couplings.
6.
If there are any breaks or excessive wear, remove the two semi-couplings using an extractor.
7.
Assemble the 2 new semi-couplings on the shaft, one on the screw side and the other on the motor.
8.
Insert the elastic element between the 2 semi-couplings.
9.
Couple the motor to the compressor.
10.
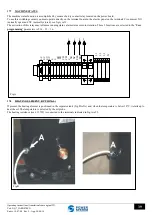
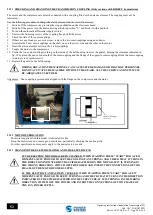
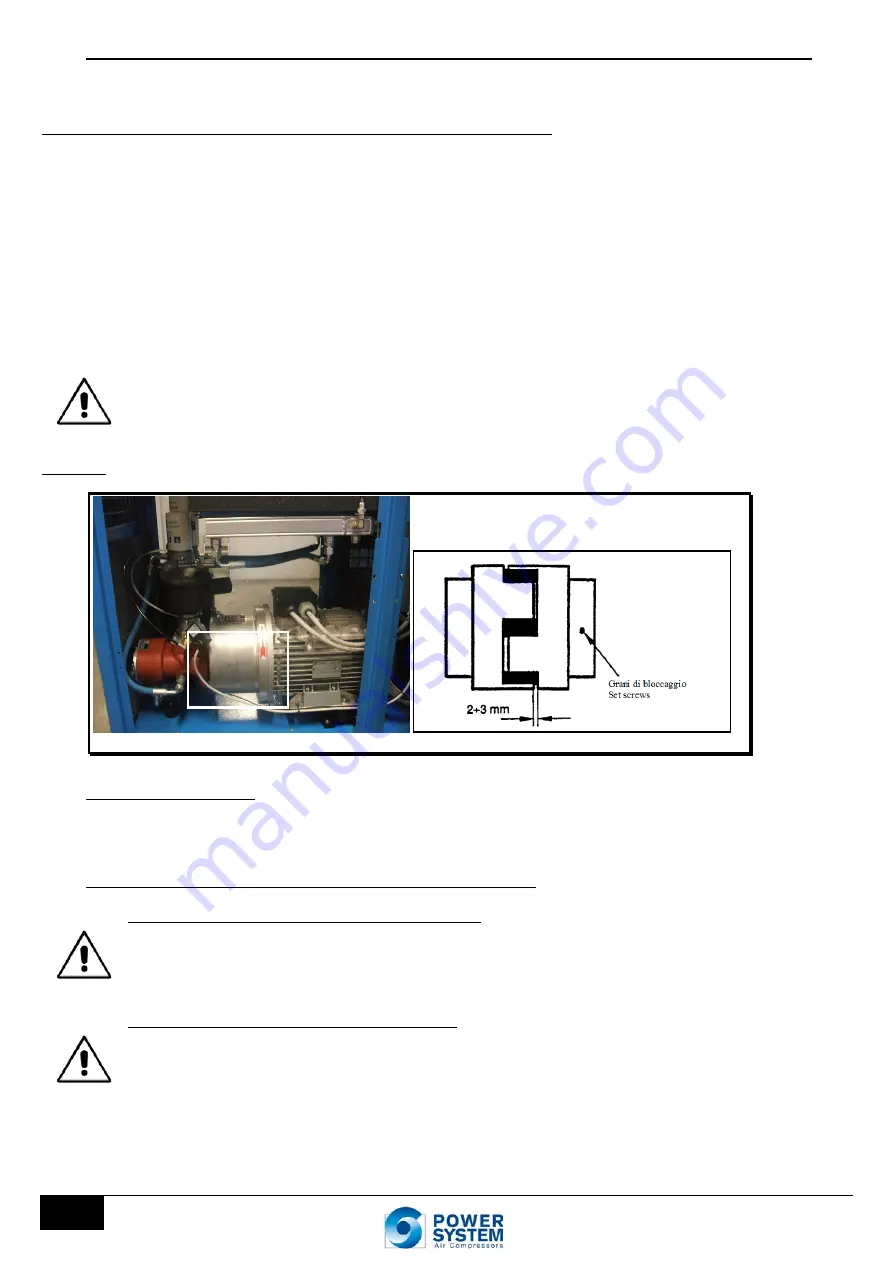
Centre the two semi-couplings working on the inside of the bell housing (remove the guard), keeping the clearance indicated in
fig. 18 between the ends of one tooth of the semi-coupling and the flange of the opposite semi-coupling. Block the semi-coupling
retaining screws (grub screws).
11.
Replace the guard on the bell housing.
DURING ROTATION THE MACHINES CAN CAUSE SEVERE DAMAGE OR DEATH OF PERSONNEL.
DO NOT ACTIVATE THE MACHINE WITHOUT THE GUARD. ALL THE SCREWS AND NUTS MUST
BE ADEQUATELY SECURED.
Alignment – The coupling is permanently aligned with the flange on the compressor and the motor.
25.12
MOTOR LUBRICATION
The motor supplied with this model is lubricated for life.
Keep the motor clean and ensure good ventilation, periodically checking the suction grille.
For other specifications or requests, apply to the nearest service centre.
25.13
CHANGING THE ELECTRIC MOTOR AND THE ELECTRIC FAN
IF THE ELECTRIC MOTOR HAS BEEN CHANGED, WHEN STARTING PRESS “START” FOR A FEW
MOMENTS (JUST ENOUGH TO SEE THE COOLING FAN TURNING) AND CHECK THAT IT TURNS IN
THE DIRECTION INDICATED BY THE STICKER APPLIED ON THE MOTOR. IF IT IS TURNING IN
THE WRONG DIRECTION, SWITCH OFF THE POWER AND INVERT THE CONNECTIONS OF TWO
PHASES OF THE MOTOR POWER SUPPLY.
IF THE ELECTRIC FAN HAS BEEN CHANGED, WHEN STARTING PRESS “START” FOR A FEW
MOMENTS (JUST ENOUGH TO SEE IT TURNING) AND CHECK THAT IT TURNS IN THE DIRECTION
INDICATED BY THE STICKER APPLIED ON THE STRUCTURE. IF IT IS TURNING IN THE WRONG
DIRECTION, SWITCH OFF THE POWER AND INVERT THE CONNECTIONS OF TWO PHASES OF
THE FAN POWER SUPPLY.
Fig. 17


