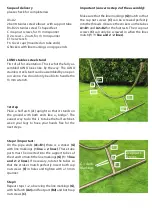
Scope of delivery
please check for completeness
A1+A2
2 bent stainless steel elbows with support tube
B1+B2 2 stainless steel T-shaped feet
C 4 cap nut screws, for 13 mm spanner
D 2 2 nuts, for 13 mm spanner
E 13 er wrench
F 6 Cover caps (mounted on tube ends)
G Stickers with line markings on 4 pipe ends
Important (concerns step 2 of the assembly):
Make sure that the line markings (G) match so that
the cap nut screws (C) can be screwed perfectly
into the threads. Observe the stickers on the tubes
A1+B1 and A2+B2 for the footrests. The 4 cap nut
screws (C) can only be screwed in when the lines
match (1 : 1 line and 2 : 2 lines).
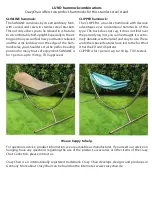
LUNO stainless steel stand
First of all for orientation: This is what the fully as-
sembled LUNO looks like. By the way: The LUNO
stainless steel stand can be assembled by one per-
son alone. You should only be able to handle the
13 mm wrench.
1st step
Place a half arch (A1) upright so that it stands on
the ground with both ends like a „bridge“. The
easiest way to do this is to take the half arch bet-
ween your legs to have your hands free for the
next steps.
Step 2 / Important:
On the pipe ends (A1+B1) there is a sticker (G)
with line markings (1 line + 2 lines). These tube
parts must be inserted into the support tubes of
the stand to match the line markings (G) (1 : 1 line
and 2 : 2 lines). If necessary, rotate the tubes so
that the strokes match perfectly. Insert both cap
nut screws (C) in holes and tighten with a 13 mm
spanner.
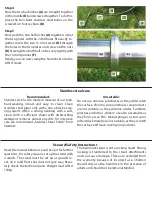
Step 3
Repeat steps 1+2, observing the line markings (G),
with half arch (A2) and foot part (B2) and both cap
nut screws (C).
A2
A1
C
C
B2
B1
B1
2 cap nuts
Screws
G = dash-
markings
A1


