FLUSH WALL MOUNTING INSTRUCTIONS:
Please note: The hanging methodology employed with this product is intended for mounting on walls of
standard construction, which includes most residential and business office environments. Such
environments are constructed with wooden studs behind the walls that will securely accept the enclosed
screw. If you do not notice resistance behind the wall when drilling the pilot hole you probably do not have a
stud in that location and will then need to use the enclosed wall anchor.
TOOLS REQUIRED:
#2 Philips head screwdriver bit or hand screwdriver.
Drill - electric or cordless, with 3/32” & 1/4" bits.
WALL MOUNTING INSTRUCTIONS:
1)
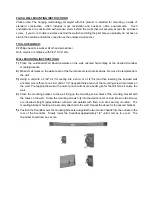
Place the cardboard Wall Mount template on the wall, oriented horizontally, at the desired Soundbar
mounting location.
2)
Make small marks on the wall at each of the four bracket screw hole locations. Remove the template from
the wall.
3)
Using a drill with a 3/32" bit if mounting into a stud, or a 1/4" bit (and then inserting the included wall
anchors)
where there is no stud, drill a 1 1/2" deep pilot hole at each of the mounting screw hole marks on
the wall. Pre-tapping the wall with a nail or punch will ensure a better grip for the drill bit as it enters the
wall.
4)
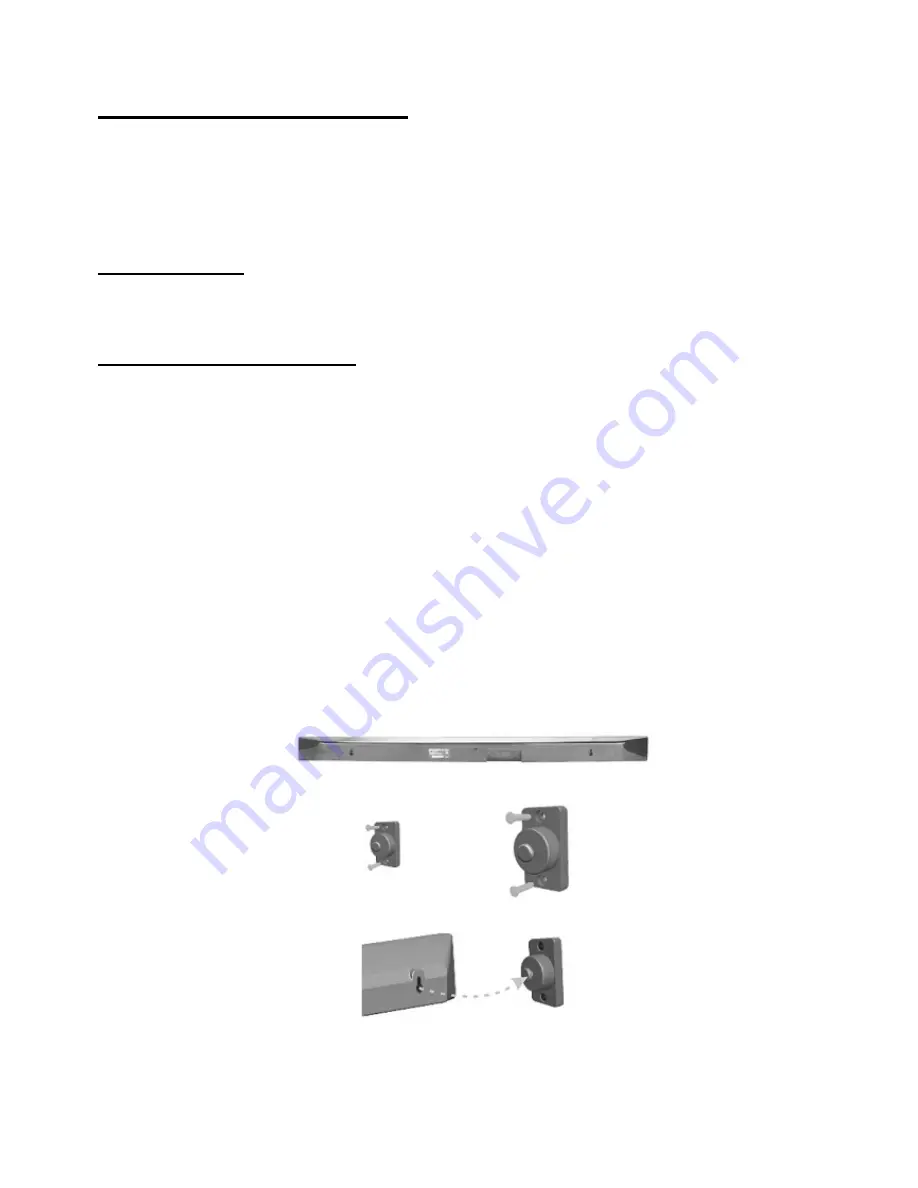
Place the mounting bracket on the wall lining up the mounting screw holes of the mounting bracket with
the holes on the wall. Screw the mounting screws fully into the wall anchors or stud. Be sure the screws
are inserted straight (perpendicular with wall and parallel with floor) and are securely mounted. The
mounting bracket should now be securely attached to the wall. Repeat the above for the second bracket.
5)
Position the Soundbar over the mounting brackets and guide the two bracket 'heads' into the cutouts in the
rear of the Soundbar. Slowly lower the Soundbar approximately 1/2" until it comes to a rest. The
Soundbar should now be secure.

