background image

8

Montage


• Assembly • Montage

  1

  2

1 x 

G

2 x 

WBE

1 x 

C

2 x 

WBE

4 x 

WDH 8/35

4 x 

WDH 8/35

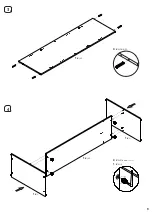
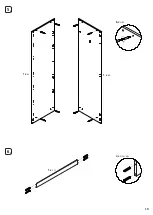
• Bitte bauen Sie den Artikel nummerisch, nach Reihenfolge auf. Bitte Dübel in das richtige Loch einstecken! Beachten Sie bitte, dass alle Dübel bis zum 
Anschlag zuerst in das tiefere Loch einzutreiben sind.
• 

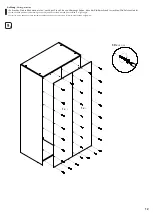
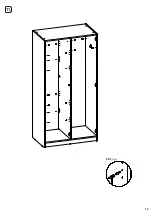
Please set up the article in numerical order. Please, insert the dowels in the correct position! Please note that all dowels should be at first advanced in the deeper hole up to marking. 

• 

Veuillez monter l'article en tenant compte de l'ordre numérique des composants. Assurez-vous que les chevilles en bois sont introduites dans les trous indiqués! Faites attention que tous les 

goujons en bois sont introduits jusqu'au fond, dans les trous les plus profonds.

!

Summary of Contents for 14 00 25

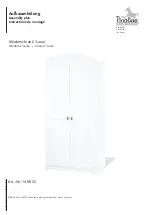
Page 1: ...rdrobe Laura Armoire Laura Aufbauanleitung Assembly plan Instructions de montage Serien Nr Serial No No s rie Art Nr 14 00 25 Dekor Uni wei Wood efect plain coloured white D cor uni blanc STAND UPDATE...

Page 2: ...sschlie lich Materialien le Lacke und Lasuren verarbeitet die gesundheitlich unbedenklich und speziell f r Kinderm bel geeignet sind Manchmal kann es produktionsbedingt zu Geruchsentwicklungen durch d...

Page 3: ...nderlayduringtheassembly Maintenance Ifnecessary cleanthewardrobewithadampclothanddrythesurfaceafterwards Whatelseyoushouldknow n producing our furniture and toys we only use materials oils varnishes...

Page 4: ...rement pour meubles d enfants Parfois il se peut qu en raison du mode de production les meubles neufs d gagent une odeur En ce cas pour contrecarrer cette odeur inoffensive nous vous conseillons d a r...

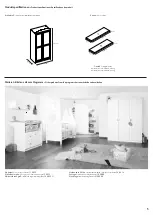
Page 5: ...rton B 37 7 kg Karton Pack Carton Artikelma Product size Dimensions de l article Kinderbett Cot Lit pour enfants 11 00 25 Wickelkommode Changing unit Commode langer 13 00 25 Kleiderschrank gro Wardrob...

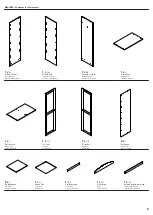
Page 6: ...eil links Left side panel Panneau lat ral gauche 1 x T Kleiderstange Clothes rail Tringle v tements 2 x I R ckwand Back panel Panneau arri re 5 x L Einlegeboden Loose shelf tag re amovible 1 x HR T r...

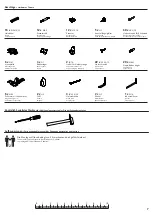
Page 7: ...cruciforme 6 x WSS Scharnier Hinge with high arm Charni re avec haut mit hohem Arm bras 5 x N3 Nail on glide Patin de protection en plastique Kunstoffnagelgleiter 12 x WBE Exzenterstift Eccentric rod...

Page 8: ...in dastiefere Loch einzutreiben sind Pleasesetupthearticleinnumericalorder Please insertthedowelsinthecorrectposition Pleasenotethatalldowelsshouldbeatfirstadvancedinthedeeperholeuptomarking Veuillez...

Page 9: ...9 4 4 x WDH 8 35 3 1 x JM 1 x JM 1 x C 1 x G 4 x WE 16 und and et 1 x WI 4...

Page 10: ...10 1 x BL 5 6 1 x BR 1 x KU 4 x WDH 8 35 8 x WBE...

Page 11: ...11 7 1 x BL 1 x BR 1 x KU 8 5 x N3 8 x WE 16 und and et 1 x WI 4...

Page 12: ...n berzeugt haben dass der Kleiderschrank im rechten Winkel montiert ist Screw the back panel only after having convinced yourself that the wardrobe is assembled in a right angle Serrer les vis du pann...

Page 13: ...13 10 6 x WKT 2 x TA 2 x VS 3 5 15 und and et 4 x N1...

Page 14: ...14 11 20 x WBM...

Page 15: ...15 12 6 12 x VS 3 5 15 x WSS und and et 1 x HL 1 x HR 2 4 x VS 4 30 x HK und and et...

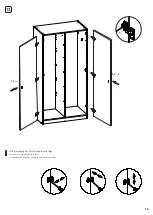
Page 16: ...16 13 Die Einstellung der T r funktioniert wie folgt The door must be adjusted as follows L installation de la porte doit tre faite de la mani re suivante 1 x HR 1 x HL...

Page 17: ...a es sonst zu einer berdehnung der Scharniere kommen k nnte Do not open the doors to more than 95 as the hinge could be overstretched N ouvrir pas les portes plus de 95 car sinon cela pourrait conduir...

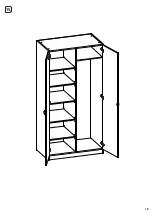
Page 18: ...18 15...

Page 19: ...19 16 1 x KO 17 1 x KO 4 x VS 3 5 15 2 x N2 und and et 4 x VS 3 5 15...

Page 20: ...20 18...

Reviews: