background image

S001_En

Selecting fine audio equipment such as the unit 

you’ve just purchased is only the start of your 
musical enjoyment. Now it’s time to consider how 
you can maximize the fun and excitement your 
equipment  offers. This manufacturer and the 
Electronic Industries Association’s Consumer 
Electronics Group want you to get the most out of 
your equipment by playing it at a safe level. One that 
lets the sound come through loud and clear without 
annoying blaring or distortion-and, most importantly, 
without affecting your sensitive hearing.

Sound can be deceiving. Over time your hearing 

“comfort level” adapts to higher volumes of sound. 
So what sounds  “normal” can actually be loud and 
harmful to your hearing. Guard against this by 
setting your equipment at a safe level BEFORE your 
hearing adapts.

To establish a safe level: 

•  Start your volume control at a low setting.
•  Slowly increase the sound until you can hear it 

comfortably and   clearly, and without distortion.

Once you have established a comfortable sound 
level:

•  Set the dial and leave it there.

Taking a minute to do this now will help to prevent 

hearing damage or loss in the future. After all, we 
want you listening for a lifetime.

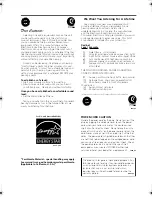
We Want You Listening For A Lifetime 

Used wisely, your new sound equipment will 

provide a lifetime of fun and enjoyment. Since 
hearing damage from loud noise is often 
undetectable until it is too late, this manufacturer 
and the Electronic Industries Association’s
Consumer Electronics Group recommend you avoid 
prolonged exposure to excessive noise. This list of 
sound levels is included for your protection.

Decibel
Level Example

  30 

Quiet library, soft whispers

 40  Living room, refrigerator, bedroom away from traffic
  50 

Light traffic, normal conversation, quiet office

  60 

Air conditioner at 20 feet, sewing machine

  70 

Vacuum cleaner, hair dryer, noisy restaurant

 80  Average city traffic, garbage disposals, alarm clock 


at two feet.

THE FOLLOWING NOISES CAN BE DANGEROUS  
UNDER CONSTANT EXPOSURE

 90  Subway, motorcycle, truck traffic, lawn mower
  100  Garbage truck, chain saw, pneumatic drill
  120  Rock band concert in front of speakers, 
thunderclap
  140  Gunshot blast, jet plane
  180  Rocket launching pad

Information courtesy of the Deafness Research Foundation. 

For U.S. and Australia Model

C67-7-3_En

POWER-CORD CAUTION

Handle the power cord by the plug. Do not pull out the 
plug by tugging the cord and never touch the power 
cord when your hands are wet as this could cause a 
short circuit or electric shock. Do not place the unit, a 
piece of furniture, etc., on the power cord, or pinch the 
cord. Never make a knot in the cord or tie it with other 
cords. The power cords should be routed such that they 
are not likely to be stepped on. A damaged power cord 
can cause a fire or give you an electrical shock. Check 
the power cord once in a while. When you find it 
damaged, ask your nearest PIONEER authorized 
service center or your dealer for a replacement.

S002_En

This product is for general household purposes. Any 
failure due to use for other than household purposes 
(such as long-term use for business purposes in a 
restaurant or use in a car or ship) and which 
requires repair will be charged for even during the 
warranty period. 

K041_En

" Perchlorate Material – special handling may apply.
See www.dtsc.ca.gov/hazardouswaste/perchlorate.
(Applicable to California, U.S.A.) "

A9_KU.book  4 ページ  2006年11月6日 月曜日 午後3時34分

Summary of Contents for A9

Page 1: ...l be on file for reference in the event of an insurance claim such as loss or theft Improve product development Your input helps us continue to design products that meet your needs Receive a free Pioneer newsletter Registered customers can opt in to receive a monthly newsletter Receive free tips updates and service bulletins on your new product SX A9 J Stereo Receiver A9 ...

Page 2: ... correct the interference by one or more of the following measures Reorient or relocate the receiving antenna Increase the separation between the equipment and receiver Connect the equipment into an outlet on a circuit different from that to which the receiver is connected Consult the dealer or an experienced radio TV technician for help D8 10 1 2_En This Class B digital apparatus complies with Ca...

Page 3: ...able system is grounded so as to provide some protection against voltage surges and built up static charges Article 810 of the National Electrical Code ANSI NFPA 70 provides information with regard to proper grounding of the mast and supporting structure grounding of the lead in wire to an antenna discharge unit size of grounding conductors location of antenna discharge unit connection to groundin...

Page 4: ...ncluded for your protection Decibel Level Example 30 Quiet library soft whispers 40 Living room refrigerator bedroom away from traffic 50 Light traffic normal conversation quiet office 60 Air conditioner at 20 feet sewing machine 70 Vacuum cleaner hair dryer noisy restaurant 80 Average city traffic garbage disposals alarm clock at two feet THE FOLLOWING NOISES CAN BE DANGEROUS UNDER CONSTANT EXPOS...

Page 5: ...he remote control 13 Display 14 04 Listening to your system Using Direct listening 15 Using the Sound Retriever 15 Using the balance and tone controls 15 Playing other sources 15 Making an audio recording 16 05 Using the tuner Listening to the radio 17 Saving station presets 17 Naming station presets 17 Listening to station presets 17 06 Other connections Using XM Radio 19 Connecting your XM Radio...

Page 6: ...se over the widest possible frequency range is delivered to your speakers Sound Retriever The analog Sound Retriever feature employs new technology that helps remove the adverse effects of compression on audio files by restoring bandwidth and smoothing jagged artifacts left over after they have been compressed resulting in a wider sound stage USB interface The USB interface allows you to listen to...

Page 7: ...p away from children If swallowed please contact a doctor immediately Lithium batteries may present a fire or chemical burn hazard if misused Do not disassemble heat above 100 C 212 F or incinerate Remove the battery if the unit isn t going to be used for a month or more When disposing of used batteries please comply with governmental regulations or environmental public instruction s rules that ap...

Page 8: ...ting audio components The number and kind of connections depends on the kind of component you re connecting Follow the steps below to connect a CD player tape recorder turntable or other audio component 1 Connect the analog audio outputs of your CD player or other component to the CD inputs on this receiver Use a stereo RCA phono cable as shown MM MC PRE OUT AUX1 AUX2 CD PHONO L R GND L R FM UNBAL...

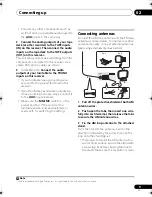
Page 9: ...C switch is in the proper position If the sound of the turntable seems loud and distorted or overly soft try switching the setting Connecting antennas Connect the AM loop antenna and the FM wire antenna as shown below To improve reception and sound quality connect external antennas see Using external antennas below 1 Pull off the protective shields of both AM antenna wires 2 Push open the tabs the...

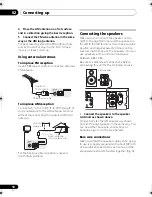
Page 10: ... left to the left terminal Also make sure the positive and negative terminals on the receiver match those on the speakers You can use speakers with a nominal impedance between 4 Ω 16 Ω Be sure to complete all connections before connecting this unit to the AC power source Connect the speakers to the speaker terminals as shown above Connections for the left speaker are shown Connect the right speake...

Page 11: ...o your speakers Caution These speaker terminals carry HAZARDOUS live voltage To prevent the risk of electric shock when connecting or disconnecting the speaker cables disconnect the power cord before touching any uninsulated parts Make sure no exposed speaker wire is touching the rear panel this may cause the receiver to turn off automatically Plugging in Make sure to complete all connections befo...

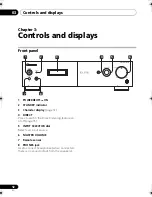
Page 12: ...RECT Press to switch the Direct listening feature on or off page 15 5 INPUT SELECTOR dial Selects an input source 6 MASTER VOLUME 7 Remote sensor 8 PHONES jack Use to connect headphones when connected there is no sound output from the speakers ON OFF VOLUME INPUT SELECTOR DIRECT POWER STANDBY PHONES MIN MAX STEREO RECEIVER A9 3 1 7 2 5 6 4 8 ...

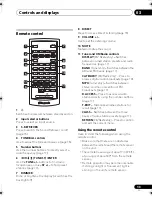
Page 13: ...page 17 CATEGORY XM Radio only Press to browse digital radio broadcasts page 19 MPX Tuner only Switches between stereo and mono reception of FM broadcasts page 17 D ACCESS Press to access a radio station directly using the number buttons page 17 T EDIT Memorizes names stations for recall page 17 CLASS Switches between the three banks of radio station presets page 17 RETURN XM Radio only Press to c...

Page 14: ...elect mono mode 2 Tone control indicators TREBLE Lights when high range tone adjustment is applied BASS Lights when low range tone adjustment is applied 3 Sound Retriever indicator Lights when the Sound Retriever function is enabled 4 Master volume level 5 FM Lights when FM broadcasts are received AM Lights when AM broadcasts are received 6 XM Lights when XM radio broadcasts are received 7 Charact...

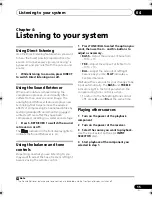
Page 15: ...the Sound Retriever is on Using the balance and tone controls Depending on what you are listening to you may want to adjust the bass treble or left right balance using the remote control 1 Press TONE BAL to select the option you want then use the L and R buttons to adjust as necessary BASS Adjust the amount of bass from 10 to 10 TRE Adjust the amount of treble from 10 to 10 BAL Adjust the amount o...

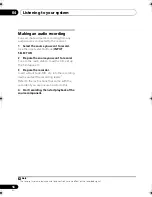
Page 16: ... source you want to record Tune to the radio station load the CD set up the turntable etc 3 Prepare the recorder Insert a blank tape MD etc into the recording device and set the recording levels 1 Refer to the instructions that came with the recorder if you are unsure how to do this 4 Start recording then start playback of the source component Note 1 The receiver s volume balance and tone controls...

Page 17: ...DIT The display shows ST MEMORY then a blinking memory class 2 Press CLASS to select one of the three classes then press ST to select the station preset you want 3 Press ENTER to store the station Naming station presets You can your station presets for easy recall 1 Choose the preset you want to name See Listening to station presets below 2 Press T EDIT A cursor appears at the first character posi...

Page 18: ...Using the tuner 05 18 En 2 Press CLASS to select the class in which the station is stored Press repeatedly to cycle through classes A B and C 3 Press ST to select the station preset you want ...

Page 19: ...best reception you may need to move the Connect and Play antenna near a window the southernmost window should produce the best results If after pressing XM the display shows ANTENNA try disconnecting the antenna and reconnecting 2 Listening to XM Radio After connecting you will be able to use this receiver to select channels and navigate categories using the front panel display Selecting channels ...

Page 20: ...of the three classes then press to select the channel preset you want You can also use the number buttons to select a preset The default for all presets is CH001 4 Press ENTER After pressing ENTER the preset class and number stop blinking and the receiver stores the XM channel Listening to channel presets You will need to have some presets stored to do this 1 Press CLASS to select the class in whi...

Page 21: ... receiver You may want to start with a fairly low volume on this receiver and turn it up as necessary after you ve checked your levels 7 Start playback of a source on your computer Important If you have followed the steps above and still can t hear any audio output try the following Switch the receiver off then on again Selecting another input source like CD or TAPE then back to USB Note 1 Windows...

Page 22: ...registered trademarks or trademarks of Microsoft Corporation in the United States and or other countries Connecting an additional amplifier This receiver has more than enough power for any home use but it s possible to add an additional amplifier using the pre outs Make the connections shown below to add an amplifier to power your speakers Before making or changing the connections switch off the p...

Page 23: ...gnal is passed along the chain to the appropriate component Note that if you use this feature make sure that you also have at least one set of analog audio jacks connected to another component for grounding purposes 1 Connect the CONTROL OUT of this receiver to the CONTROL IN jack of another Pioneer component Use a cable with a mono mini plug on each end for the connection 2 If the Pioneer compone...

Page 24: ...receiver will not turn on if you turn a connected component off while this receiver is currently off 1 Connect the 12V TRIGGER jack of this receiver to the 12V trigger of another component Use a cable with a mono mini plug on each end for the connection Note 1 When this system is already on switching the connected component on will have no effect switching the connected compo nent off will have no...

Page 25: ...ront panel POWER button is switched on first If the power shuts off automatically take the unit to your nearest Pioneer authorized service center or your dealer for servicing No sound is output when a function is selected Make sure the component is connected correctly refer to Connecting up on page 8 Press MUTE on the remote control to turn muting off Considerable noise in radio broadcasts Connect...

Page 26: ...default Problem Remedy Message Cause Action ANTENNA The XM antenna is not connected Check that the XM antenna cable is attached securely ANT ERR A short circuit occurring in the antenna or surrounding antenna cable Make sure that there is nothing unusual with the antenna or antenna cable Switch the power off then back on again UPDATING The radio is being updated with the latest encryption code Wai...

Page 27: ...cy Response 30 Hz to 15 kHz 1 dB Antenna Input FTC 75 Ω unbalanced AM Tuner Section Frequency Range 530 kHz to 1700 kHz Sensitivity IHF Loop antenna 350 µV m Signal to Noise Ratio 50 dB Antenna Loop antenna Miscellaneous Power requirements AC 120 V 60 Hz Power consumption 200 W In standby 0 6 W Dimensions 420 mm W x 113 mm H x 369 mm D 16 9 16 in W x 47 16 in H x 14 17 32 in D Weight without packa...

Page 28: ...vision at the above listed number for assistance Pioneer Electronics USA Inc Customer Support Division P O BOX 1760 Long Beach CA 90801 1760 U S A For warranty information please see the Limited Warranty sheet included with your product Should this product require service in Canada please contact a Pioneer Canadian Authorized Dealer to locate the nearest Pioneer Authorized Service Company in Canad...

Reviews: