5
En
En
g
lis
h
•
When using a mobile phone, keep the aerial of the mobile phone away from the LCD
screen to prevent disruption of the video in the form of spots, coloured stripes, etc.
•
To protect the LCD screen from damage, be sure to touch the touch panel keys only
with your finger and do so gently.
•
The information will be erased by disconnecting the yellow lead from the battery (or
removing the battery itself ).
•
Some of the settings and recorded contents will not be reset.
This manual uses diagrams of actual screens to describe operations. However, the
screens on some units may not match those shown in this manual depending on the
model used.
The front panel can be detached to deter theft.
Important
•
Handle the front panel with care when removing or attaching it.
•
Avoid subjecting the front panel to excessive shock.
•
Keep the front panel out of direct sunlight and high temperatures.
•
If removed, replace the front panel on the unit before starting up your vehicle.
•
To avoid damaging the device or vehicle interior, remove any cables and devices attached to the front
panel before detaching it.
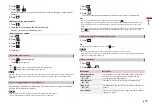
1
Pinch the top and bottom of its right side and pull the front panel out.
Take care not pinch it too tightly or to drop it, and also avoid contact with water or
other fluids to prevent permanent damage.
Notes on internal memory
About this manual
Meanings of symbols used in this manual
This indicates to touch the appropriate soft key on the touch screen.
This indicates to touch and hold the appropriate soft key on the touch screen.
Protecting your unit from theft
Removing the front panel
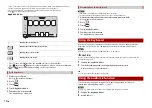
1
Slide the front panel to the left.
The front panel and the head unit are connected on the left side. Make sure that the
front panel has been properly connected to the head unit.
2
Press the right side of the front panel until it is firmly seated.
If you can’t attach the front panel to the head unit successfully, try again. Forcing the
front panel into place may result in damage.
Re-attaching the front panel


