background image

13

Other source

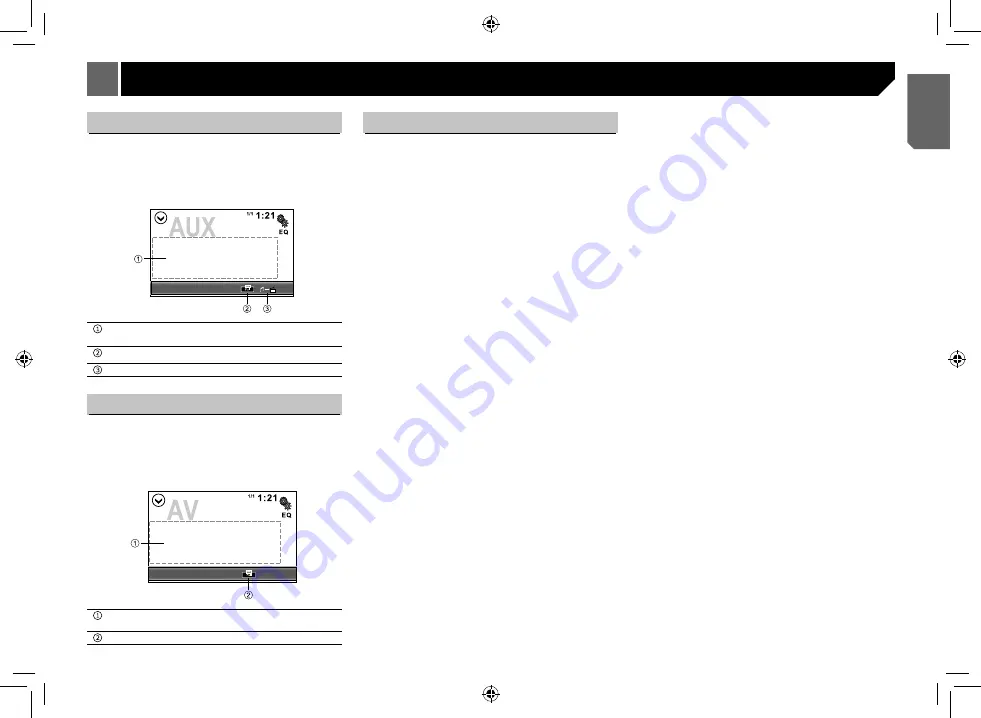
AUX source

You can connect an external audio/video device to the unit.

•   Connect the external audio/video device to the 

AUX input 

jack

.

•   Turn on the AV input setting. Refer to the System setting 

page 14.

Hides the touch panel keys. Touch anywhere on the 

screen to display the touch panel keys again.
Changes the wide screen model.

Switch the operation screen.

AV source

You can connect an external audio/video device to the unit.

•   Connect  the  external  audio/video  device  to  the 

VIDEO 

INPUT/AUDIO INPUT

.

•   Turn on the AV input setting. Refer to the System setting 

page 14.

Hides the touch panel keys. Touch anywhere on the 

screen to display the touch panel keys again.
Changes the wide screen model.

Camera

This unit is "camera ready". Before accessing any camera 

features, you must purchase and install a rear video camera. 

Once the rear camera is connected and operating properly, the 

CAMERA source mode will become active. 

Refer to "System settings" on page 14.

The playing source will change to "CAMERA" mode 

automatically when you reverse your car.

Summary of Contents for AVH3850DVD

Page 1: ...AVH 3850DVD DVD AV RECEIVER Owner s Manual English ...

Page 2: ...tations 8 Manual store 8 Search Stations Automatically 8 Recalling a station 8 Displays the preset channel list 8 Local Distance 8 Setting the FM tuning step 8 Setting the AM tuning step 8 Disc 9 DVD title chapter select 9 VCD track select 9 CD track select 9 Compressed files 11 Selecting file category 11 Selecting a folder 11 Selecting file 11 Selecting a file of other folder 11 Playing audio fil...

Page 3: ...ing 21 Common 21 Error messages 21 Handling guidelines 22 Discs and player 22 DVD R RW discs 22 CD R RW discs 22 DualDisc 22 USB storage device 22 DivX video files 23 MPEG 1 MPEG 2 MPEG 4 video files 23 Compressed audio compatibility disc USB 23 DivX compatibility 23 MPEG 1 MPEG 2 MPEG 4 video 23 Supplemental information 24 Disc 24 External storage device USB 24 Sequence of audio files 24 Using th...

Page 4: ...and this unit s video features should not be used When you attempt to watch a video image while driving the warning Viewing of front seat video source while driving is strictly prohibited will appear on the front display To watch a video image on the front display park your vehicle in a safe place and apply the parking brake When using a displayconnected to rear monitor output The rear monitor out...

Page 5: ...ck Thumb pad Use to select a menu on the DVD menu RETURN Press to display the PBC playback control menu during PBC playback Press to pause or resume playback Press to perform fast reverse Press to change the fast reverse speed Press to perform fast forward Press to change the fast forward speed Press to return to the previous track chapter Press to go to the next track chapter Press to stop playba...

Page 6: ...me USB storage devices Connection via a USB hub is not possible 1 Slip the USB cover from left to right 2 Plug in the USB storage device using an appropriate cable Check that no data is being accessed before pulling out the USB storage device Use and care of the remote control Using the remote control Point the remote control in the direction of the front panel to operate When using for the first ...

Page 7: ...screen Setting menu screen Time and date setting screen Top menu screen Touch on the upper right of the screen to exit Refer to System settings on page 14 Touch on the upper right of the screen to exit Refer to Audio settings on page 15 Selecting a source using the touch panel keys Touch the source icon and then touch the desired source name Radio radio Disc Built in DVD player USB USB AUX AUX AV ...

Page 8: ...ouch FM Step in Radio settings menu of System setup to select the FM tuning step How to enter Radio Setting please refer to the System setting page 14 2 Touching FM step will switch the FM tuning step between 50 kHz and 100 kHz default The selected FM tuning step will appear Setting the AM tuning step You can switch the seek tuning step for AM band 1 Touch AM Step in Radio settings menu of System ...

Page 9: ... start the playback from the very beginning the Title page of the DVD or the first track of VCD CD Changing the wide screen mode DVD VCD Selecting the appropriate screen ratio for the playback video Touch to select the Full Normal Touch the desired wide mode setting FULL full screen The 4 3 picture is enlarged in the horizontal direction only granting viewers a 4 3 TV picture normal picture withou...

Page 10: ... from the number you registered Angle adjustment DVD Disc 5 Repeat During playback press icon on the screen to select repeat playback as below DVD Repeat all Repeat title Repeat chapter VCD Repeat all Repeat one CD Repeat all Repeat Single 6 Operating the DVD menu using touch panel keys DVD If items on the DVD menu appear the touch panel keys may overlay them If so select an item using those touch...

Page 11: ...ng file category During playback touch to enter the list menu of file category Music Video Photo touch it to select Selecting a folder Touch to enter the folder list if there are folders in the disc USB storage device touch it to select Selecting file In file list menu touch or on screen to select file type touch it and the unit will load the file and start playback Selecting a file of other folde...

Page 12: ...nction same to the DVD Subtitle select Touch to select the subtitle language to show if the video file has multiple language subtitles Audio select Touch to select audio language to listen if the DVD has multiple audio languages Repeat Repeat one Repeat folder Repeat all Enter to the playback list Playing photo files Track information Previous next folder Zoom Playback pause Previous next file Ran...

Page 13: ...evice to the unit Connect the external audio video device to the VIDEO INPUT AUDIO INPUT Turn on the AV input setting Refer to the System setting page 14 Hides the touch panel keys Touch anywhere on the screen to display the touch panel keys again Changes the wide screen model Camera This unit is camera ready Before accessing any camera features you must purchase and install a rear video camera On...

Page 14: ...em Settings Audio settings Video settings to reset Beep Tone On default Select beep sound On or Off Off Touch Panel Calibration Refer to Touch Panel Calibration on page 14 Dimmer Settings Dimmer Trigger Auto default You can set Auto Manual Time if you need Manual Time Day Night Day default Select Day or Night Night Dimmer Duration Refer to Dimmer Duration on page 14 Picture Adjustment Brightness A...

Page 15: ...t subwoofer On or Off Off Level Adjust level value from 24 to 6 Frequency 80 Hz default Select a crossover frequency to set a cutoff frequency for the subwoofer s LPF low pass filter 120 Hz 160 Hz Source Level Adjuster Refer to Source Level Adjuster on page 15 DRC On defailt Set the DRC Dynamic Range Control On or off Off Graphic EQ Select Preset Equalizer 1 Enter the EQ setup mode Touch the Graph...

Page 16: ...iented discs 1 Enables only playback of discs for children 3 Touch set the parental lock level while the input number is displayed Notes We recommend that you keep a record of your code number in case you forget it The parental lock level is recorder on the disc You can confirm it by looking at the disc package the included literature or the disc itself You cannot use parental lock with discs that...

Page 17: ...arts of car s body POWERE AMP Important This unit cannot be installed in a vehicle without ACC accessory position on the ignition switch ACC position No ACC position Use this unit with a 12 volt battery and negative grounding only Failure to do so may result in a fire or malfunction To prevent a short circuit overheating or malfunction be sure to follow the directions below Disconnect the negative...

Page 18: ...PUT REAR MONITOR OUTPUT REAR VIEW CAMERA IN PARKING BRAKE PARKING BRAKE WIRED REMOTE INPUT VIDEO INPUT AUDIO INPUT VIDEO INPUT WIRED REMOTE INPUT AUDIO INPUT LIGHT GREEN ANTENNA BATTERY GND REVERSE REAR VIEW CAMERA IN SUBWOOFER OUTPUT SUBWOOFER OUTPUT REAR OUTPUT SYSTEM REMOTE CONTROL BLACK STRIPE ON GRAY BLACK STRIPE ON VIOLET BLACK STRIPE ON WHITE BLACK STRIPE ON GREEN GRAY VIOLET WHITE GREEN IL...

Page 19: ... CAMERA automatically when you start reverse driving As the reverse driving is done the playing source switches to the previous Parking Brake 1 If PARKING BRAKE cable is connected to hand brake switch video display on the TFT monitor will be controlled by this function Parking cable function ceases when the playing source is CAMERA 2 The monitor displays the black screen with warning information t...

Page 20: ...d tip out the unit from the mounting bracket 3 Pull out the unit from the mounting bracket with both hands Connection Installation Installation Notes of installation Before installation please make sure proper connections are conducted and the unit operates normally Improper connection may result in damage to the unit Use only accessories designed and manufactured for this unit and other unauthori...

Page 21: ... Adjust the volume level The sound and video skip The unit is not firmly secured Firmly secure the unit Sub folders cannot be played back Folder repeat play has been selected Select the repeat range again The repeat range changes automatically Another folder was selected during repeat play Select the repeat range again Track search or fast forward reverse was performed during file repeat play Sele...

Page 22: ...sc or dirt condensation etc on the lens of this unit Depending on the application settings and the environment playback of discs recorded on a personal computer may not be possible For details contact the manufacturer of the application CD R RW discs When CD R RW discs are used playback is possible only for discs which have been finalized Playback of CD R RW discs recorded on a music CD recorder o...

Page 23: ...r accepts no responsibility for data lost on the USB memory USB portable audio player even if that data is lost while using this unit DivX video files Depending on the composition of the file information such as the number of audio streams or file size there may be a slight delay when playing back discs Some special operations may be prohibited due to the composition of the DivX files Only DivX fi...

Page 24: ...mmediately and consult your dealer or the nearest authorized PIONEER Service Station Do not use the unit in this condition because doing so may result in fire electric shock or other failure If you notice smoke a strange noise or smell or any other abnormal signs from the display turn off the power immediately and consult your dealer or the nearest authorized PIONEER Service Station Using this uni...

Page 25: ...estrial satellite cable and or any other media broadcasting streaming via internet intranets and or other networks or in other electronic content distribution systems such as pay audio or audio on demand applications An independent license for such use is required For details please visit http www mp3licensing com WMA Windows Media is either a registered trademark or trademark of Microsoft Corpora...

Page 26: ...els 2 stereo MP3 decoding format MPEG 1 2 Audio Layer 3 WMA decoding format Ver 7 8 9 CBR VBR Support 353 format AAC decoding format Support AAC LC 2ch MPEG video decoding format MPEG 1 MPEG 2 MPEG 4 video DivX decoding format Home Theater Ver 3 4 5 6 avi divx DVD video output NTSC Audio Maximum power output 50 W 4 Continuous power output 22 W 4 50 Hz to 15 000 Hz 10 THD 4 Ω load both channels dri...

Page 27: ...2015 P N 127075006446 http www pioneer mea com ...

Reviews: