background image


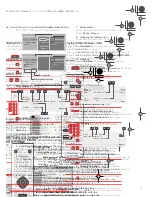
Getting started

04


27


En


Use the 


 buttons to choose your country, 

then press ENTER.

Auto-tuning channels


The 


Auto Scan


 option automatically scans and sets the 

channel presets.


Downloading channels from your TV


Use the 


Download from TV


 option to download all the 

channels that your TV is tuned to.


6

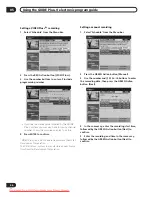
Select ‘Auto’ for automatic time setting, or 

‘Manual’ to set the clock manually, then press 
ENTER.

Auto clock setting


Some TV channels broadcast time signals together 
with the program. This recorder can use these 
signals to set the clock automatically.


Set ‘Clock Set CH‘ to the channel preset number 
that broadcasts a time signal, then move the 
cursor down to ‘Start’ and press ENTER.


The recorder takes a short while to set the time. After 
you see that the time has been set, select 


Next


 to 

proceed.

If the time could not be set automatically, press 


RETURN


 to go back to the previous screen and select 


Manual


.


Manual clock setting


If no stations in your area are broadcasting time 
signals, you can set the clock manually.


Use the 


 buttons to set your time zone.


You can set this by selecting a city or a time relative 
to GMT.


Press 


 then use the 


 buttons to select ‘On’ 

or ‘Off’ for summer time, then press ENTER.


Select 


On


 if you are currently using summer time.


Set the date (day/month/year) and time, then 
press ENTER to make all the settings.


Use the 


 buttons to change the value in the 

highlighted field.

DVRRT601HS_WV_EN.book 27 ページ 2005年8月3日 水曜日 午後3時31分

Downloaded From DvDPlayer-Manual.com Pioneer Manuals

29


En


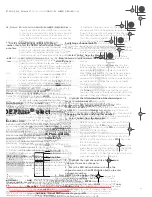
1

Press GUIDE to display the GUIDE Plus+ setup 

menu.


The language and country settings are already set to 
whatever you selected in the Setup Navigator.


2

Use the 


 buttons to select Postal Code.

3

Use the number and cursor buttons to enter your 

postal code.


The system uses your postal code to identify which TV 
listings data is correct for the area in which you live, so it 
is important that you enter it correctly.


4

If you are using an external receiver (such as a 

satellite receiver) with the supplied G-LINK cable, 
complete this step, otherwise jump to step 5 below.


• See 


Connecting to a cable box, satellite receiver or 

digital terrestrial receiver


 on page 17 for more on using 

the supplied G-LINK cable.

• Select 


External Receiver 1


2


 or 


3


, then press 


ENTER


. (If you have just one external receiver, use 


External Receiver 1


. You can add further receivers in 


2


 and 


3


 if you need to.)

After pressing 


ENTER


:

• Select your reception method (


Terrestrial


Cable


 or 


Satellite


).

• Select your provider (if applicable).

• Select the brand of your external receiver.

• Identify which input your external receiver is 

connected to.

After completing these steps the recorder will try and 
communicate with your external receiver and change the 
channel via the G-LINK cable. If the channel was 
successfully changed, select 


Yes


 to confirm.

If the channel did not change, select 


No


. The GUIDE 

Plus+ system will try other codes assigned to your 
external receiver. If none of the codes changes the 
channel successfully, tune your external receiver to the 
host channel for your country (refer to step 


5


 below) and 

leave it on overnight. The recorder needs to be in standby. 
It will wake up automatically and download new codes 
from the host channel. The next day, try this setup 
process again:

• Press 


GUIDE


 to display the GUIDE Plus+ setup 

menu.

• Press 


 to highlight the Menu bar, then use 


 to 

reach the Setup area and select Setup.

• Continue setting up from the start of this step again.

If your external receiver still doesn’t respond to the 
G-LINK controller, please call customer support and 
report the brand and model of your external receiver.

See also 


FAQ and troubleshooting


 on page 48.

DVRRT601HS_WV_EN.book 29 ページ 2005年8月3日 水曜日 午後3時31分

Downloaded From DvDPlayer-Manual.com Pioneer Manuals

31


En


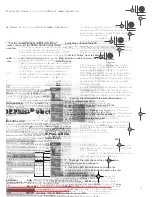
2

Use the number buttons to change the program 

numbers as you like.

3

When you’re done, press the BLUE Action button 

(Home) to get back to the GUIDE Plus+ home screen.


• You can find detailed information on using the GUIDE 

Plus+ system in the following chapter.


Selecting the VHS, hard disk or DVD 
for playback and recording


The 


VHS


HDD


 and 


DVD


 buttons (remote control and 

front panel) are used to select the VHS video recorder, 
hard disk (HDD) or DVD for playback and recording. The 
indicator in the front panel display shows which is 
currently selected. See 


VHS playback and recording


 on 

page 71 for more on using the built-in VCR.


Making your first HDD or DVD 
recording


This quick guide shows you how to make a basic 
recording of a TV program on either the HDD, or to a 
recordable DVD.

Recording is covered in much more detail in chapter 6 
(


HDD and DVD Recording


).


1

If they aren’t already on, switch on your TV and 

this recorder.


Press 


 STANDBY/ON


 to switch on.

• Make sure that the video input on your TV is set to this 

recorder.


2

Press HDD to record to the HDD, or DVD to record 

to a recordable DVD.


If you choose to record to the HDD, skip to step 


5


 now. 


3

Press 


 OPEN/CLOSE to open the disc tray.

4

Load a blank DVD-R or DVD-RW disc with the 

label side face-up, using the disc guide to align the 
disc.


• When you load a new, blank DVD-RW disc, the 

recorder will take a moment to initialize it for 
recording.

• Blank DVD-R discs are ready for Video mode 

recording out of the box.


5

Use the CH +/– buttons to select the TV channel 

you want to record from.


• You can also use the 


+/–


 buttons on the front panel if 

the recorder is stopped.

• Channel presets are numbered 1–99.

DVD

HDD

VHS

STANDBY / ON

DVD  OPEN / CLOSE

CH

REC

STOP REC

STOP

PAUSE

PLAY

DVD

HDD

VHS

DVRRT601HS_WV_EN.book 31 ページ 2005年8月3日 水曜日 午後3時31分

Downloaded From DvDPlayer-Manual.com Pioneer Manuals

33


En


Switching between TV and DVD


When the recorder is stopped or recording you can 
choose whether to have the audio/video from the built-in 
TV tuner (or external input) play on your TV (‘DVD mode’), 
or watch the channel that the TV is currently set to (‘TV 
mode’).

During playback or when a menu is being displayed on-
screen, the sound and video is always routed to your TV 
and is unaffected by the 


TV/DVD


 mode setting.

Note that the recorder must be connected to your TV 
using a SCART cable to be able to use this feature.


Press TV/DVD to switch between TV mode and 

DVD mode.


Basic playback


This section shows you how to use your recorder for 
playback of discs (DVD, CD, etc.), and for playback of 
video from the HDD. More playback features, such as 
repeat and program play, are covered in 


HDD and DVD 

playback


 on page 61. VHS video playback is covered in 


VHS playback and recording


 on page 71.


 Important


• Throughout this manual, the term ‘DVD’ means 

playback-only DVD-Video discs and DVD-R/RW. If a 
function is specific to a particular kind of DVD disc, it 
is specified.

• Some DVD-Video discs don’t allow certain playback 

controls to operate at certain points in the disc. This 
is not a malfunction.


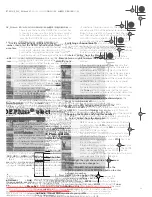
1

Press 


 STANDBY/ON to switch on.


Also turn on your TV and make sure that it is set to the 
correct video input.


2

Press HDD to playback from the HDD, or DVD to 

play a DVD.


If playing video from the HDD, skip to step 


5


 below.


3

Press 


 OPEN/CLOSE to open the disc tray.

4

Load a disc.


Load a disc with the label side facing up, using the disc 
tray guide to align the disc (if you’re loading a double-
sided DVD-Video disc, load it with the side you want to 
play face down).

• If you want to play a DTS audio CD, please first read 

the note on page 35.


5

Press 


 PLAY to start playback.


• If you’re playing a DVD-Video or Video CD, a disc 

menu may appear when you start playback. Use the 


 buttons and 


ENTER


 to navigate DVD disc 

menus, and the number buttons and 


ENTER


 for 

Video CD menus.

• When playing video from the HDD, playback will 

automatically stop after the end of a title is reached.

• See the following sections for more details on playing 

specific kinds of discs.


6

To stop playback, press 


 STOP.

7

When you’ve finished using the recorder, eject 

the disc and switch the recorder back into standby.


• To open/close the disc tray, press 


 OPEN/CLOSE


Remove the disc before putting the recorder into 
standby.

• Press 


 STANDBY/ON


 to switch the recorder into 

standby.

TV/DVD

STANDBY / ON

DVD  OPEN / CLOSE

STOP

PLAY

ENTER

DVRRT601HS_WV_EN.book 33 ページ 2005年8月3日 水曜日 午後3時31分

Downloaded From DvDPlayer-Manual.com Pioneer Manuals

35


En


Playing CDs and WMA/MP3 discs


The table below shows the basic playback controls for 

audio CDs


1


, and WMA/MP3 files.


Playing Video CD/Super VCDs


The table below shows the basic playback controls for 
Video CD/Super VCDs.

Some discs feature Playback Control (PBC for short) 
menus. These discs show PBC in the display when you 
load them and display a menu on-screen from where you 

can select what to watch.


2


Press to start playback.

Press to stop playback.

Pauses playback, or restarts playback 
when paused.

Press to start scanning. Press again to 
increase the scanning speed. (There are 
two scan speeds; the current scan speed 
is shown on-screen.)

Press to skip to previous/next track (or 
folder for WMA/MP3 disc). (During play-
back you can also use the front panel 


+/–


buttons.)

During playback, enter a track number 
then press 


ENTER


 to skip directly to that 

track.
Press 


CLEAR


 to clear a number entry and 

start again.

Note


1. If you want to play a DTS audio CD, make sure the recorder is connected to a DTS-compatible amp/receiver with a digital connection. Noise 

will be output through the analog outputs. Also make sure that 


STEREO


 is selected using the 


AUDIO


 button (see 


Switching audio channels


on page 69).

PLAY

STOP

PAUSE

REV SCAN

FWD SCAN

PREV

NEXT

CLEAR

CLEAR

ENTER


Press to start playback.


Video CD only:


 If 


RESUME


 is displayed on-

screen, playback starts from the place last 
stopped.

Press to stop playback.


Video CD only:


 You can resume playback 

from the same point by pressing 


 PLAY


(Press 


 STOP


 again to cancel the resume 

function.)

Pauses playback, or restarts playback 
when paused.

Press to start scanning. Press repeatedly 
to increase the scanning speed.

Press to skip to previous/next track.
When a PBC menu is displayed, press to 
display the previous/next page. (During 
playback you can also use the front panel 


+/–


 buttons.)

During playback, enter a track number 
then press 


ENTER


 to skip directly to that 

track.
Press 


CLEAR


 to clear a number entry and 

start again.
While a PBC menu screen is displayed, 
use to select numbered menu items.


Video CD only:


 Each press skips backward/

forward progressively up to a maximum of 
ten minutes forward or three minutes 
back. Note that this function doesn’t work 
when playing in PBC mode.

During playback, press to start slow-
motion playback. Press repeatedly to 
change the playback speed (forward only).
While paused, press to advance a single 
frame (forward only).

Press to display the disc menu of a Video 
CD/Super VCD playing in PBC mode.


2. When playing in PBC mode, some playback features, such as search, repeat and program play are not available. You can play a PBC Video 

CD/Super VCD in non-PBC mode by pressing 


 to start playback instead of 


 PLAY


.

PLAY

STOP

PAUSE

REV SCAN

FWD SCAN

PREV

NEXT

CLEAR

CLEAR

ENTER

SKIP

CM

BACK

STEP/SLOW

RETURN

DVRRT601HS_WV_EN.book 35 ページ 2005年8月3日 水曜日 午後3時31分

Downloaded From DvDPlayer-Manual.com Pioneer Manuals

37


En


The example displays below show high-speed copying 
from HDD to DVD, and HDD chase playback.


Stop display 1


1

DVD-RW Original / Play List


If a VR mode disc is loaded, this shows whether playback 
is currently set to 


Original


 or 


Play List


During preview playback of the Copy List, this shows 


Copy List


.


2

Disc type and mode


Shows the disc type (


HDD


DVD-R


DVD-RW


CD


, etc.), 

and the disc mode for recordable DVD, if applicable (


VR


or 


Video


).


3

Recording mode and time


Shows the current recording mode (


XP


SP


LP


, etc.), and 

the total recording time of the disc.


4

Resume


Shows 


Resume


 if playback can be resumed from the last 

place stopped.


5

Recording time remaining


Shows the approximate recording time left on the disc in 
the current recording mode.


6

Preset name and number


Shows the preset name and preset number for the 
currently selected channel.


7

Audio mode


Shows the broadcast audio mode for the current channel 
preset (


Mono


Stereo


, etc.).


8

Copy control information


Shows recording restrictions of the current channel 
program.


9

Disc name


Shows the disc name.
(For CDs, this area shows playable files other than CD 
audio tracks; for example, 


Multi-format: WMA/MP3


.)


10 Finalized


Shows 


Finalized


 if a recordable DVD is finalized.


11 TV/DVD mode


Shows the current mode of the recorder (see 


Switching 

between TV and DVD


 on page 33).


Stop display 2


1

Date and time

2

Number of titles/tracks on disc


For a VR mode DVD-RW, the number of Original and Play 
List titles are shown separately.


Play display 1


1

Number of chapters in title

2

Current title and chapter number


(For CD/Video CD/Super VCD, shows current track; for 
WMA/MP3, shows current folder and track; for JPEG 
disc, shows current folder and file.)


3

Elapsed title time


(For CD, WMA, MP3, Super VCD, shows elapsed track 
time; for Video CD, shows elapsed disc time.)

Rec Mode   SP(2h00m/DVD)

HDD

Remain  10h35m
Stop

Remain  –h––m
Stop

Hi-Speed Copy

0h08m left

DVD-RW Video

Rec Mode   SP(2h00m/DVD)

HDD

Remain  10h35m
Chase Play
Rec

Remain  0h52m
Stop

DVD-RW Video

Relative playback position

Recording time 

 Stop

DVD-RW   VR
Original

Disc Name

: Comedy shows

DVD Mode

Finalized

Resume
XP (1h00m/DVD)

Rem.

0h35m

Copy Once

Stereo

ABC  Pr 1

1 2

8

7

10

9

11

3

6

4

5

 Stop

DVD-RW   VR
Original

Titles

TV Mode

: Original   99

Lock Disc

: On

Play List   15

14:52     MON     15/11/2004

Copy Once

Stereo

ABC  Pr 1

1

2

 Play

DVD-R    Video

DVD Mode

Title Total

Chapters   15

3–2

0. 00. 15

0h11m 52s

5

1

2

3

4

DVRRT601HS_WV_EN.book 37 ページ 2005年8月3日 水曜日 午後3時31分

Downloaded From DvDPlayer-Manual.com Pioneer Manuals

Summary of Contents for DVR-RT604H-S

Page 1: ... RT601H S VHS HDD DVD RECORDER Operating Instructions Discover the benefits of registering your product online at www pioneer co uk www pioneer eur com Downloaded From DvDPlayer Manual com Pioneer Manuals ...

Page 2: ...lable power supply differs according to country or region Be sure that the power supply voltage of the area where this unit will be used meets the required voltage e g 230V or 120V written on the rear panel D3 4 2 1 4_A_En Before plugging in for the first time read the following section carefully This product complies with the Low Voltage Directive 73 23 EEC amended by 93 68 EEC EMC Directives 89 ...

Page 3: ...g the mains plug from the wall socket when not left unused for a long period of time for example when on vacation D3 4 2 2 1a_A_En Do not connect either wire to the earth terminal of a three pin plug NOTE After replacing or changing a fuse the fuse cover in the plug must be replaced with a fuse cover which corresponds to the colour of the insert in the base of the plug or the word that is embossed...

Page 4: ... 39 Areas 41 FAQ and troubleshooting 48 06 HDD and DVD recording About DVD recording 50 About HDD recording 50 Recording time and picture quality 51 Recorded audio 51 Restrictions on video recording 51 Setting the picture quality recording time 52 Basic recording from the TV 52 Setting a timer recording 54 Timer recording FAQ 57 Simultaneous recording and playback 57 Recording from an external com...

Page 5: ...nitialize HDD 105 15 The Video Audio Adjust menu Setting the picture quality for HDD DVD recording sources 106 Setting the picture quality for HDD DVD playback 107 Audio DRC 108 16 The Initial Setup menu Using the Initial Setup menu 109 17 Additional information Resetting the recorder 118 Setting up the remote to control your TV 118 Screen sizes and disc formats 119 Minimum copying times 120 Troub...

Page 6: ......

Page 7: ...awful unless permitted by a legal exception or consented to by the rightowners Video mode HDD HDD DVRRT601HS_WV_EN book 7 ページ 2005年8月3日 水曜日 午後3時31分 En This recorder will play DVD RAM DVD R RW discs Also compatible with KODAK Picture CD is a trademark of DVD Format Logo Licensing Corporation is a trademark of Fuji Photo Film Co Ltd This recorder also supports the IEC s Super VCD standard Compared t...

Page 8: ......

Page 9: ...l unless permitted by a legal exception or consented to by the rightowners Video mode HDD HDD DVRRT601HS_WV_EN book 7 ページ 2005年8月3日 水曜日 午後3時31分 En This recorder will play DVD RAM DVD R RW discs Also compatible with KODAK Picture CD is a trademark of DVD Format Logo Licensing Corporation is a trademark of Fuji Photo Film Co Ltd This recorder also supports the IEC s Super VCD standard Compared to th...

Page 10: ......

Page 11: ...e medium while DVD RW is a re recordable erasable medium You can re record erase a DVD RW disc approximately 1 000 times For more information see About DVD recording on page 50 What s VR mode VR Video Recording mode is a special mode designed for home DVD recording It allows flexible editing of recorded material compared to Video mode On the other hand Video mode discs are more compatible with oth...

Page 12: ......

Page 13: ...NK jack This enables you to control the tuner in the external receiver using the GUIDE Plus system Position the IR transmitter end of the G LINK cable so that the IR receiver on your cable satellite digital terrestrial receiver will pick up the control signals see diagram See the manual that came with your cable satellite digital terrestrial receiver if you re not sure where the IR receiver is on ...

Page 14: ......

Page 15: ...R AV connector to a SCART AV 4 Plug the supplied G LINK cable to the G LINK jack This enables you to control the tuner in the external receiver using the GUIDE Plus system Position the IR transmitter end of the G LINK cable so that the IR receiver on your cable satellite digital terrestrial receiver will pick up the control signals see diagram See the manual that came with your cable satellite dig...

Page 16: ......

Page 17: ...R AV connector to a SCART AV 4 Plug the supplied G LINK cable to the G LINK jack This enables you to control the tuner in the external receiver using the GUIDE Plus system Position the IR transmitter end of the G LINK cable so that the IR receiver on your cable satellite digital terrestrial receiver will pick up the control signals see diagram See the manual that came with your cable satellite dig...

Page 18: ......

Page 19: ...R AV connector to a SCART AV 4 Plug the supplied G LINK cable to the G LINK jack This enables you to control the tuner in the external receiver using the GUIDE Plus system Position the IR transmitter end of the G LINK cable so that the IR receiver on your cable satellite digital terrestrial receiver will pick up the control signals see diagram See the manual that came with your cable satellite dig...

Page 20: ......

Page 21: ...l the tuner in the external receiver using the GUIDE Plus system Position the IR transmitter end of the G LINK cable so that the IR receiver on your cable satellite digital terrestrial receiver will pick up the control signals see diagram See the manual that came with your cable satellite digital terrestrial receiver if you re not sure where the IR receiver is on the front panel Alternatively expe...

Page 22: ......

Page 23: ...o the Menu bar 13 and ENTER Used to navigate all on screen displays Press ENTER to select the currently highlighted option 14 HOME MENU page 36 Press to display the Home Menu from which you can STANDBY ON ONETOUCH COPY DVD OPEN CLOSE INPUT SELECT DEF ABC JKL TUV GHI PQRS MNO WXYZ CLEAR CLEAR TRK ZERORETURN CH PLAYMODE ANGLE SUBTITLE AUDIO DISCNAVIGATOR TOPMENU GUIDE INFO HELP DISPLAY SKIP BACK OK ...

Page 24: ......

Page 25: ...o the Menu bar 13 and ENTER Used to navigate all on screen displays Press ENTER to select the currently highlighted option 14 HOME MENU page 36 Press to display the Home Menu from which you can STANDBY ON ONETOUCH COPY DVD OPEN CLOSE INPUT SELECT DEF ABC JKL TUV GHI PQRS MNO WXYZ CLEAR CLEAR TRK ZERORETURN CH PLAYMODE ANGLE SUBTITLE AUDIO DISCNAVIGATOR TOPMENU GUIDE INFO HELP DISPLAY SKIP BACK OK ...

Page 26: ......

Page 27: ...ttons and ENTER to navigate DVD disc menus and the number buttons and ENTER for Video CD menus When playing video from the HDD playback will automatically stop after the end of a title is reached See the following sections for more details on playing specific kinds of discs 6 To stop playback press STOP 7 When you ve finished using the recorder eject the disc and switch the recorder back into stan...

Page 28: ......

Page 29: ...ds of discs 6 To stop playback press STOP 7 When you ve finished using the recorder eject the disc and switch the recorder back into standby To open close the disc tray press OPEN CLOSE Remove the disc before putting the recorder into standby Press STANDBY ON to switch the recorder into standby 01HS_WV_EN book 33 ページ 2005年8月3日 水曜日 午後3時31分 Playing CDs and WMA MP3 discs The table below shows the bas...

Page 30: ......

Page 31: ...ndby Press STANDBY ON to switch the recorder into standby TV DVD STANDBY ON DVD OPEN CLOSE PLAY ENTER 01HS_WV_EN book 33 ページ 2005年8月3日 水曜日 午後3時31分 Playing CDs and WMA MP3 discs The table below shows the basic playback controls for audio CDs1 and WMA MP3 files Playing Video CD Super VCDs The table below shows the basic playback controls for Video CD Super VCDs Some discs feature Playback Control PB...

Page 32: ......

Page 33: ...ndby Press STANDBY ON to switch the recorder into standby TV DVD STANDBY ON DVD OPEN CLOSE PLAY ENTER 01HS_WV_EN book 33 ページ 2005年8月3日 水曜日 午後3時31分 Playing CDs and WMA MP3 discs The table below shows the basic playback controls for audio CDs1 and WMA MP3 files Playing Video CD Super VCDs The table below shows the basic playback controls for Video CD Super VCDs Some discs feature Playback Control PB...

Page 34: ......

Page 35: ...ndby Press STANDBY ON to switch the recorder into standby TV DVD STANDBY ON DVD OPEN CLOSE PLAY ENTER 01HS_WV_EN book 33 ページ 2005年8月3日 水曜日 午後3時31分 Playing CDs and WMA MP3 discs The table below shows the basic playback controls for audio CDs1 and WMA MP3 files Playing Video CD Super VCDs The table below shows the basic playback controls for Video CD Super VCDs Some discs feature Playback Control PB...

Page 36: ......

Page 37: ...ndby Press STANDBY ON to switch the recorder into standby TV DVD STANDBY ON DVD OPEN CLOSE PLAY ENTER 01HS_WV_EN book 33 ページ 2005年8月3日 水曜日 午後3時31分 Playing CDs and WMA MP3 discs The table below shows the basic playback controls for audio CDs1 and WMA MP3 files Playing Video CD Super VCDs The table below shows the basic playback controls for Video CD Super VCDs Some discs feature Playback Control PB...

Page 38: ......

Page 39: ...Any changes you make here will affect what is displayed in the Grid Area The Editor Area is mainly used when setting up the GUIDE Plus system to make any manual changes as necessary You can also use the Editor Area if new channels become available in your area or if you change from cable to satellite say or move house From the Editor Area you can Display hide channels in the grid switch the channe...

Page 40: ......

Page 41: ...t what is displayed in the Grid Area The Editor Area is mainly used when setting up the GUIDE Plus system to make any manual changes as necessary You can also use the Editor Area if new channels become available in your area or if you change from cable to satellite say or move house From the Editor Area you can Display hide channels in the grid switch the channel on off Select a channel source Tun...

Page 42: ......

Page 43: ...er buttons to enter a channel number then press the GREEN Action button Next to confirm Alternatively you can press the YELLOW Action button Mosaic and use the buttons to select a channel from the mosaic followed by ENTER The Info Area This area is reserved for additional information such as news weather reports stock quotes and so on and varies by region Note that this feature is not available in...

Page 44: ......

Page 45: ...t what is displayed in the Grid Area The Editor Area is mainly used when setting up the GUIDE Plus system to make any manual changes as necessary You can also use the Editor Area if new channels become available in your area or if you change from cable to satellite say or move house From the Editor Area you can Display hide channels in the grid switch the channel on off Select a channel source Tun...

Page 46: ...re trademarks of Gemstar Development Corporation The VIDEO Plus system is manufactured under license from Gemstar Development Corporation Setting a manual recording 1 Select Schedule from the Menu bar 2 Press the GREEN Action button Manual 3 Use the number and buttons to enter the recording date then press the GREEN Action button Next 4 In the same way enter the recording start time followed by th...

Page 47: ...er buttons to enter a channel number then press the GREEN Action button Next to confirm Alternatively you can press the YELLOW Action button Mosaic and use the buttons to select a channel from the mosaic followed by ENTER The Info Area This area is reserved for additional information such as news weather reports stock quotes and so on and varies by region Note that this feature is not available in...

Page 48: ......

Page 49: ...t what is displayed in the Grid Area The Editor Area is mainly used when setting up the GUIDE Plus system to make any manual changes as necessary You can also use the Editor Area if new channels become available in your area or if you change from cable to satellite say or move house From the Editor Area you can Display hide channels in the grid switch the channel on off Select a channel source Tun...

Page 50: ......

Page 51: ...ank DVD disc Press DVD to record to DVD disc or HDD if you want to record to the hard disk drive 3 Use to move the cursor to the recording start date and time on the grid You can move the cursor forward or back an hour at a time using the and buttons Each row of the grid is one day you can set the timer recording for up to a month in advance Each column is a 15 minute interval The darker area repr...

Page 52: ......

Page 53: ...sc or HDD if you want to record to the hard disk drive 3 Use to move the cursor to the recording start date and time on the grid You can move the cursor forward or back an hour at a time using the and buttons Each row of the grid is one day you can set the timer recording for up to a month in advance Each column is a 15 minute interval The darker area represents time that has already passed and ca...

Page 54: ......

Page 55: ...you can set the timer recording for up to a month in advance Each column is a 15 minute interval The darker area represents time that has already passed and can t therefore be selected The lighter area is time that s available 4 Press ENTER to set the start time The start date and time is displayed in the middle of the CH FWDSCAN RECMODE REVSCAN ENTER HOME MENU RETURN DVD HDD Easy Timer Photo View...

Page 56: ......

Page 57: ...sc or HDD if you want to record to the hard disk drive 3 Use to move the cursor to the recording start date and time on the grid You can move the cursor forward or back an hour at a time using the and buttons Each row of the grid is one day you can set the timer recording for up to a month in advance Each column is a 15 minute interval The darker area represents time that has already passed and ca...

Page 58: ......

Page 59: ...you can set the timer recording for up to a month in advance Each column is a 15 minute interval The darker area represents time that has already passed and can t therefore be selected The lighter area is time that s available 4 Press ENTER to set the start time The start date and time is displayed in the middle of the CH FWDSCAN RECMODE REVSCAN ENTER HOME MENU RETURN DVD HDD Easy Timer Photo View...

Page 60: ......

Page 61: ...f disc loaded On the left side is the program list then to the right is a list of titles DVD HDD folders WMA MP3 or tracks CD Video CD Super VCDs On the far right is a list of chapters DVD HDD or tracks WMA MP3 3 Select a title chapter folder or track for the current step in the program list DVD or HDD You can add a whole title or a chapter within a title to the program list To add a title select ...

Page 62: ......

Page 63: ...re lets you program the play order of titles chapters1 folders tracks on a disc or the HDD 1 Select Program from the Play Mode menu 2 Select Input Edit Program from the list of program options The Program edit screen that appears depends on the kind of disc loaded On the left side is the program list then to the right is a list of titles DVD HDD folders WMA MP3 or tracks CD Video CD Super VCDs On ...

Page 64: ......

Page 65: ... lets you program the play order of titles chapters1 folders tracks on a disc or the HDD 1 Select Program from the Play Mode menu 2 Select Input Edit Program from the list of program options The Program edit screen that appears depends on the kind of disc loaded On the left side is the program list then to the right is a list of titles DVD HDD folders WMA MP3 or tracks CD Video CD Super VCDs On th...

Page 66: ......

Page 67: ... a disc or the HDD 1 Select Program from the Play Mode menu 2 Select Input Edit Program from the list of program options The Program edit screen that appears depends on the kind of disc loaded On the left side is the program list then to the right is a list of titles DVD HDD folders WMA MP3 or tracks CD Video CD Super VCDs On the far right is a list of chapters DVD HDD or tracks WMA MP3 3 Select a...

Page 68: ......

Page 69: ...n the left side is the program list then to the right is a list of titles DVD HDD folders WMA MP3 or tracks CD Video CD Super VCDs On the far right is a list of chapters DVD HDD or tracks WMA MP3 3 Select a title chapter folder or track for the current step in the program list DVD or HDD You can add a whole title or a chapter within a title to the program list To add a title select the title To ad...

Page 70: ......

Page 71: ...op the recording anytime by pressing STOP REC Recording will stop automatically at the end of the tape Tip You can press TV DIRECT REC while the recorder is in standby to switch on and immediately start recording Please note that you can t record from another component VCR etc that is connected by a SCART cable to the AV2 INPUT 1 DECODER connector using the TV Direct Recording feature Other VHS pl...

Page 72: ......

Page 73: ...cording anytime by pressing STOP REC Recording will stop automatically at the end of the tape Tip You can press TV DIRECT REC while the recorder is in standby to switch on and immediately start recording Please note that you can t record from another component VCR etc that is connected by a SCART cable to the AV2 INPUT 1 DECODER connector using the TV Direct Recording feature Other VHS playback fe...

Page 74: ......

Page 75: ...P REC Recording will stop automatically at the end of the tape Tip You can press TV DIRECT REC while the recorder is in standby to switch on and immediately start recording Please note that you can t record from another component VCR etc that is connected by a SCART cable to the AV2 INPUT 1 DECODER connector using the TV Direct Recording feature Other VHS playback features The table below shows ad...

Page 76: ......

Page 77: ...ype of edit Video Mode Compatible Editing Edit points cannot be set with absolute precision but high speed copying to Video mode DVD will be possible Frame Accurate Editing Exact edit points are preserved but high speed copying to Video mode DVD will not be possible For more information about these options see Editing accuracy on page 91 4 Highlight From then use the playback controls etc to find ...

Page 78: ......

Page 79: ... Video mode DVD will be possible Frame Accurate Editing Exact edit points are preserved but high speed copying to Video mode DVD will not be possible For more information about these options see Editing accuracy on page 91 4 Highlight From then use the playback controls etc to find the start of the section to erase then press ENTER The bar at the bottom of the screen indicates the current play pos...

Page 80: ......

Page 81: ...ssible Frame Accurate Editing Exact edit points are preserved but high speed copying to Video mode DVD will not be possible For more information about these options see Editing accuracy on page 91 4 Highlight From then use the playback controls etc to find the start of the section to erase then press ENTER The bar at the bottom of the screen indicates the current play position in the title After p...

Page 82: ......

Page 83: ...ossible Frame Accurate Editing Exact edit points are preserved but high speed copying to Video mode DVD will not be possible For more information about these options see Editing accuracy on page 91 4 Highlight From then use the playback controls etc to find the start of the section to erase then press ENTER The bar at the bottom of the screen indicates the current play position in the title After ...

Page 84: ......

Page 85: ...DVD will be possible Frame Accurate Editing Exact edit points are preserved but high speed copying to Video mode DVD will not be possible For more information about these options see Editing accuracy on page 91 4 Highlight From then use the playback controls etc to find the start of the section to erase then press ENTER The bar at the bottom of the screen indicates the current play position in the...

Page 86: ......

Page 87: ... copying press ONE TOUCH COPY Copy Select VHS HDD DVD This feature lets you record from any point in the tape to the end to either HDD or DVD assuming there is enough space on the HDD DVD 1 Press VHS to switch to VHS 2 Load the tape you want to copy 3 Find the point on the tape that you want to copy from 4 Select HDD or DVD depending on where you want to copy to Note 1 Regardless of the setting fo...

Page 88: ......

Page 89: ...elect VHS HDD DVD This feature lets you record from any point in the tape to the end to either HDD or DVD assuming there is enough space on the HDD DVD 1 Press VHS to switch to VHS 2 Load the tape you want to copy 3 Find the point on the tape that you want to copy from 4 Select HDD or DVD depending on where you want to copy to Note 1 Regardless of the setting for on page 109 copying will pause if ...

Page 90: ......

Page 91: ...rols etc to find the place you want to divide the title 5 Press ENTER to divide the title at the current playback position 6 Select Yes to confirm you want to divide the title or No to cancel Chapter Edit When editing a VR mode DVD or video on the HDD you can edit individual chapters within a title with commands for erasing combining and dividing 1 Highlight the title that contains the chapters yo...

Page 92: ......

Page 93: ...tle Erase1 Move2 Erase or move chapters Select the chapter you want to erase move and press ENTER Select whether you want to erase or move the chapter Move command only Select the destination for the chapter and press ENTER Combine3 Combine two adjacent chapters into one Highlight the bar divider between two adjacent chapters and press ENTER 5 Select Exit to get back to the main Disc Navigator scr...

Page 94: ......

Page 95: ...tle Erase1 Move2 Erase or move chapters Select the chapter you want to erase move and press ENTER Select whether you want to erase or move the chapter Move command only Select the destination for the chapter and press ENTER Combine3 Combine two adjacent chapters into one Highlight the bar divider between two adjacent chapters and press ENTER 5 Select Exit to get back to the main Disc Navigator scr...

Page 96: ......

Page 97: ...DD title Erase1 Move2 Erase or move chapters Select the chapter you want to erase move and press ENTER Select whether you want to erase or move the chapter Move command only Select the destination for the chapter and press ENTER Combine3 Combine two adjacent chapters into one Highlight the bar divider between two adjacent chapters and press ENTER 5 Select Exit to get back to the main Disc Navigato...

Page 98: ......

Page 99: ...67 for how to do this Note that once copied to the HDD audio tracks cannot be recorded back to a DVD R RW disc Important During copying no other recorder operation is possible Scheduled timer recordings will not start until copying is complete Copy protected CDs may not copy successfully 1 Press DVD 2 Load the CD you want to copy to the HDD If you want to copy the CD with a different track order s...

Page 100: ......

Page 101: ...DD New First 21 00 FRI 25 03 Total 12 1 14 58 Repeat Off 10Albums Jukebox 60h30m Remain 2 Album2 3 Album3 4 Album4 5 Album5 6 Album6 7 Album7 8 Album8 1 Album1 All Genres 1 10 0 03 58 Sort order Recent First Genre All Genres Play Erase Edit Play Mode Genre Name ALL 1 2 3 4 5 6 7 Recent first By rec date By favorite Cancel By album 12 1 1 HDD New First 21 00 FRI 25 03 Total 12 1 14 58 Repeat Off 10...

Page 102: ......

Page 103: ...displayed 1 During a slideshow use the CHANNEL button to zoom the picture Repeated presses cycle between zoom off 2x zoom and 4x zoom The zoom factor is displayed on screen 2 Use the to move the zoomed area within the picture Rotating an image You can rotate the displayed picture during a slideshow so you can always view pictures the right way up whichever way they were taken During a slideshow pr...

Page 104: ......

Page 105: ...t Finalize then Undo Finalize from the finalize options 2 Select Start Optimize HDD You ll see a message appear on screen recommending you optimize the HDD As you record erase and edit recordings the HDD file system gradually becomes fragmented Periodically the HDD will need optimizing to clean up all the fragmented files Important Optimizing the HDD can take as long as eight hours During optimiza...

Page 106: ......

Page 107: ...e the preset for any other input or the built in TV tuner Tip To see more of the picture as you adjust different settings press ENTER after selecting the setting you want to adjust Setting the picture quality for HDD DVD playback This setting determines how the picture will look when playing video from the HDD or from DVD It will also affect the recorded picture when copying from HDD DVD to VHS Ch...

Page 108: ......

Page 109: ...age of DVD Video menus to the same as that set for the subtitle language English Sets the language of DVD Video menus to English available languages Choose from the displayed languages to set the default language for DVD Video menus Other Select to set the DVD menu language to something other than the ones listed See Selecting other languages for language options on page 117 do not necessarily hav...

Page 110: ......

Page 111: ...age of DVD Video menus to the same as that set for the subtitle language English Sets the language of DVD Video menus to English available languages Choose from the displayed languages to set the default language for DVD Video menus Other Select to set the DVD menu language to something other than the ones listed See Selecting other languages for language options on page 117 do not necessarily hav...

Page 112: ......

Page 113: ...age of DVD Video menus to the same as that set for the subtitle language English Sets the language of DVD Video menus to English available languages Choose from the displayed languages to set the default language for DVD Video menus Other Select to set the DVD menu language to something other than the ones listed See Selecting other languages for language options on page 117 do not necessarily hav...

Page 114: ......

Page 115: ...age of DVD Video menus to the same as that set for the subtitle language English Sets the language of DVD Video menus to English available languages Choose from the displayed languages to set the default language for DVD Video menus Other Select to set the DVD menu language to something other than the ones listed See Selecting other languages for language options on page 117 do not necessarily hav...

Page 116: ......

Page 117: ...ish available languages Choose from the displayed languages to set the default language for DVD Video menus Other Select to set the DVD menu language to something other than the ones listed See Selecting other languages for language options on page 117 do not necessarily have menus in your selected menu language itle Display On Select to have discs display subtitles according to your Subtitle Lan ...

Page 118: ......

Page 119: ...h has been broken then repaired ape which has become unwound from the spools in he cassette long length video tapes use thinner tape that can e problems such as uneven playback We don t mmend using tapes longer then E180 re using a new video tape fast forward it to the end then back to the beginning d dropping video tapes or exposing them to severe tion ing video tapes using a video tape rewind it...

Page 120: ......

Page 121: ...h has been broken then repaired ape which has become unwound from the spools in he cassette long length video tapes use thinner tape that can e problems such as uneven playback We don t mmend using tapes longer then E180 re using a new video tape fast forward it to the end then back to the beginning d dropping video tapes or exposing them to severe tion ing video tapes using a video tape rewind it...

Page 122: ......

Page 123: ...use thinner tape that can e problems such as uneven playback We don t mmend using tapes longer then E180 re using a new video tape fast forward it to the end then back to the beginning d dropping video tapes or exposing them to severe tion ing video tapes using a video tape rewind it to the start and return ts case ot store tapes n excessively hot humid or dusty places n direct sunlight ear air co...

Page 124: ......

Page 125: ...use thinner tape that can e problems such as uneven playback We don t mmend using tapes longer then E180 re using a new video tape fast forward it to the end then back to the beginning d dropping video tapes or exposing them to severe tion ing video tapes using a video tape rewind it to the start and return ts case ot store tapes n excessively hot humid or dusty places n direct sunlight ear air co...

Page 126: ......

Page 127: ...h has been broken then repaired ape which has become unwound from the spools in he cassette long length video tapes use thinner tape that can e problems such as uneven playback We don t mmend using tapes longer then E180 re using a new video tape fast forward it to the end then back to the beginning d dropping video tapes or exposing them to severe tion ing video tapes using a video tape rewind it...

Page 128: ......

Page 129: ...use thinner tape that can e problems such as uneven playback We don t mmend using tapes longer then E180 re using a new video tape fast forward it to the end then back to the beginning d dropping video tapes or exposing them to severe tion ing video tapes using a video tape rewind it to the start and return ts case ot store tapes n excessively hot humid or dusty places n direct sunlight ear air co...

Page 130: ......

Page 131: ...turn ts case ot store tapes n excessively hot humid or dusty places n direct sunlight ear air conditioners or heaters ear strong magnetic fields aning the tape heads use the video tape heads will become dirty ting in degraded playback and recording rmance When you notice the playback picture ring from the snow effect it s time to clean the s Use a good quality non abrasive chemical wet cleaning ta...

Page 132: ......
Page 133: ...thinner tape that can e problems such as uneven playback We don t mmend using tapes longer then E180 re using a new video tape fast forward it to the end then back to the beginning d dropping video tapes or exposing them to severe tion ing video tapes using a video tape rewind it to the start and return ts case ot store tapes n excessively hot humid or dusty places n direct sunlight ear air condit...

Page 134: ...al explained 130 output setting 112 Downloading channel presets from the TV 14 26 DTS CD audio encoded with 35 explained 130 output setting 112 DVD activity display 36 aspect ratios 114 119 backing up 84 compatibility 8 50 120 DVD R vs DVD RW 9 11 50 120 finalizing 11 58 105 initializing 50 105 playback controls for 34 61 70 selecting for playback recording 31 Video mode vs VR mode 9 11 50 91 105 ...

Page 135: ...s 38 optimized 113 settings 113 simultaneous playback and 57 time and picture quality 51 71 125 TV programs 31 52 72 Video mode vs VR mode 50 Recovery recording 54 Remote control buttons explained 23 24 changing the batteries 8 operating range 8 setting the remote ID 115 setting up for TV control 118 S Subtitles setting preferences for 113 switching during playback 68 T Timer recording 54 57 Title...

Page 136: ...Markham Ontario L3R OP2 Canada TEL 1 877 283 5901 PIONEER EUROPE NV Haven 1087 Keetberglaan 1 B 9120 Melsele Belgium TEL 03 570 05 11 PIONEER ELECTRONICS ASIACENTRE PTE LTD 253 Alexandra Road 04 01 Singapore 159936 TEL 65 6472 7555 PIONEER ELECTRONICS AUSTRALIA PTY LTD 178 184 Boundary Road Braeside Victoria 3195 Australia TEL 03 9586 6300 PIONEER ELECTRONICS DE MEXICO S A DE C V Blvd Manuel Avila...

Reviews: