SYSTEM RESET THROUGH SERVICE MODE
After Replacing Main Assy in G-6 Media Receiver or G-7 panel
TV Guide option must be turned off
TO TURN OFF TV GUIDE
In order to enter Service Mode, TV guide must be turned off
In order to do this procedure you must
have and use
the correct remote. The full function remote that
came with the set has a TV Guide Logo in a red box. This is the remote you should use.
NOTE: If TV guide has not yet been setup,
then the 1st step is to follow instructions to set TV guide up.
Enter ZIP code, cable or ant. etc.
Then:
1.
press and release the “
TV Guide
”. TV guide will appear on the screen.
2.
Navigate to the TV Guide tool bar and use the “
>
” button to select “
setup
” in the menu and press
and release the “
enter
” button
3.
use the “
arrow down
” button to select “
default options
”
4.
press and release the “
enter
” button and select “
general defaults
”
5.
press and release the “
enter
” button (opens menu on lower left side)
6.
use the “
arrow down
” button to select “
auto guide
”
7.
use the “>” button to select “
off
”
8.
use the “
arrow down
” button to select “
done
”
9.
press and release the “
enter
”
10.
press and release the “
TV Guide
” button to turn the display off
System Reset Using Service Mode:
1.
Enter Service Mode
2.
Use the “
muting
” button to select “
initialize
” screen
3.
While on the “
initialize
” screen
4.
Use the “
down arrow
” button to select “
final setup
”
5.
Press and release the “
enter
” button to select “
data reset
”
6.
Use the “
>
” button on the remote to select “
yes
”
7.
Press and hold the “
enter
” button until the screen goes black release “
enter
” button on remote.
8.
Power the unit off using the remote control
9.
Unplug the power cord from the media receiver to complete the reset
10.
Plug in the media receiver; turn the system on and reset is complete.
Method Using Integrator mode:
When Replacing Main Assy in G-6 Media Receiver or G-7 panel
Press and release “
HOME MENU”
and
“POWER”
buttons in sequence on the remote control. Unit will power up
in
“INTERGRATOR”
mode.
Hold the
DISPLAY
button on the remote until “
data reset or all reset”
appears then release button.
Press
Right “>”
button to select
“yes”
then release button
Press and hold
ENTER
button on remote until test screen disappears. Release button.
Unplug power cord from media receiver to complete reset. Wait 30sec.
Plug in media receiver power cord, turn system on and reset is now complete
97
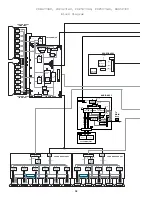
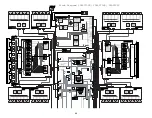
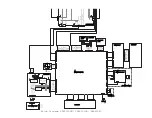
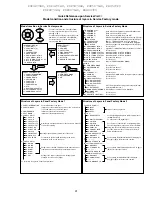
PDP4270HD, PDP4271HD, PDP5070HD, PDP5071HD, PRO507PU
PDP6070HD, PDP6071HD, PRO607PU
How to enter the Factory Mode by Remote
control.
①
Turn off the TV Guide feature
②
Set unit to Standby Mode
③
Press and release the
DISPLAY
Button
④
Wait 4 seconds
⑤
LEFT
Button
(
ß
)
⑥
UP
Button
(
á
)
⑦
LEFT
Button
(
ß
) - Within 5 seconds
⑧
RIGHT
Button
(
à
)
⑧
POWER
Button
Summary of Contents for Elite PRO-506PU
Page 2: ......
Page 8: ... 2 4 SI PG06003 A Warranty Claim Example 8 ...
Page 14: ...14 Quick Reference G 3 to G 8 Power Down Shut Down Trap Switch Reset Service Remotes ...
Page 23: ...23 Models PDP433PU PDP503PU Block Diagrams Shut Down Power Down Diagnosis ...
Page 30: ...30 Models PDP433CMX PDP503CMX PDP4300 PRO800HD HDI PRO1000HD HDI ...
Page 31: ...31 Block Diagrams Basic Service Factory Mode Shut Down Power Down Diagnosis ...
Page 48: ...48 Models PDP434CMX PDP504CMX PDP505CMX PDP4304 PDP4314 PDP5004 PDP5014 PRO810HD PRO1010HD ...
Page 49: ...49 Block Diagrams Operation LED Statuses Power Down Shut Down Diagnosis ...
Page 72: ...72 Models PDP436PU PDP506PU PRO436PU PRO506PU ...
Page 73: ...73 Block Diagrams Operation LED Statuses Shut Down Power Down Diagnosis System Reset ...
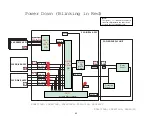
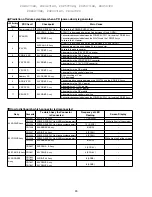
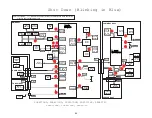
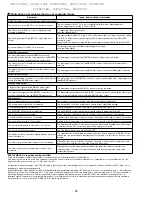
Page 82: ...82 Models PDP4270HD PDP4271HD PDP5070HD PDP5071HD PDP6070HD PDP6071HD PRO507PU PRO607PU ...
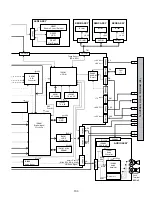
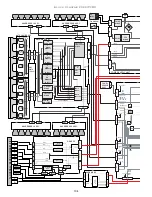
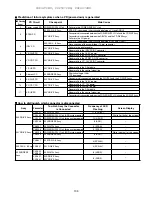
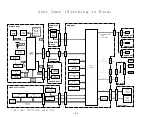
Page 87: ...87 Models PDP6070HD PDP6071HD PRO607PU Block Diagrams on the next two pages ...
Page 120: ...120 Scan IC Troubleshooting Blue Glue Removal IC Removal ...
Page 121: ......
Page 142: ...142 ...


