background image

•  Thank you for buying this Pioneer

®

 Elite

®

 product.

•  To assure maximum performance from your new speakers, 

please read through this operating guide before you install 

or use them. After you have finished reading this operating 

guide, store it in a safe place for future reference.

•  The nominal impedance of this speaker system is 4 

ohms. It must be connected only to an amplifier or 

receiver designed to drive 4-ohm loads. Connect the 

speaker system to an amplifier with a load impedance 

rating ranging from 4 to 16 ohms (a model with “4-16Ω” 

displayed on the speaker output terminals).

•  In order to prevent damage to the speaker resulting from 

input overload, please observe the following precautions:
–  Do not supply power to the speakers in excess of the 

maximum rated power.

–  When connecting or disconnecting cables, be sure 

amplifier power is OFF. 

–  Do not use excessive amplifier volume if using a graphic 

equalizer to emphasize high or low frequencies.

IMPORTANT NOTICE:

 The serial number for the equipment is located on the rear of the product. Please write this 

serial number on the warranty sheet and keep it in a secure area for future reference.

BEFORE USE

CONNECTING YOUR SPEAKERS

IMPORTANT:

 Make sure all equipment is turned OFF before 

making any connections. Correct wiring of your speakers is 

essential for achieving the best sound quality. Be careful to 

ensure proper polarity ( +/- ) of connection. We recommend 

a minimum of 18 gauge for runs up to 25 feet, and thicker 

for longer runs.
Most speakers cable is coded to ease this task. Typically the 

ribbed or striped side, or the side with the connector marked 

in red or white, is connected to the positive (red) terminal. Make 

sure that the amplifier positive (red) terminal is connected to 

the loudspeaker positive (red) terminal, and that the amplifier 

negative (black) terminal is connected to the loudspeaker 

negative (black) terminal.
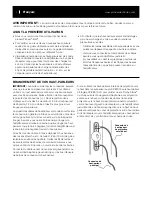
If the wires you’re using are not already terminated with banana 

plugs, spade lugs, etc., strip off ½” of insulation from the ends 

of the cable, twist the bare strands and insert into the binding 

posts. Take care that no stray strands of wire short across 

between the terminals.
Connect the cable from the front left or right channel, or the 

rear left or right surround channel, to the bottom set of binding 

posts on the speaker.
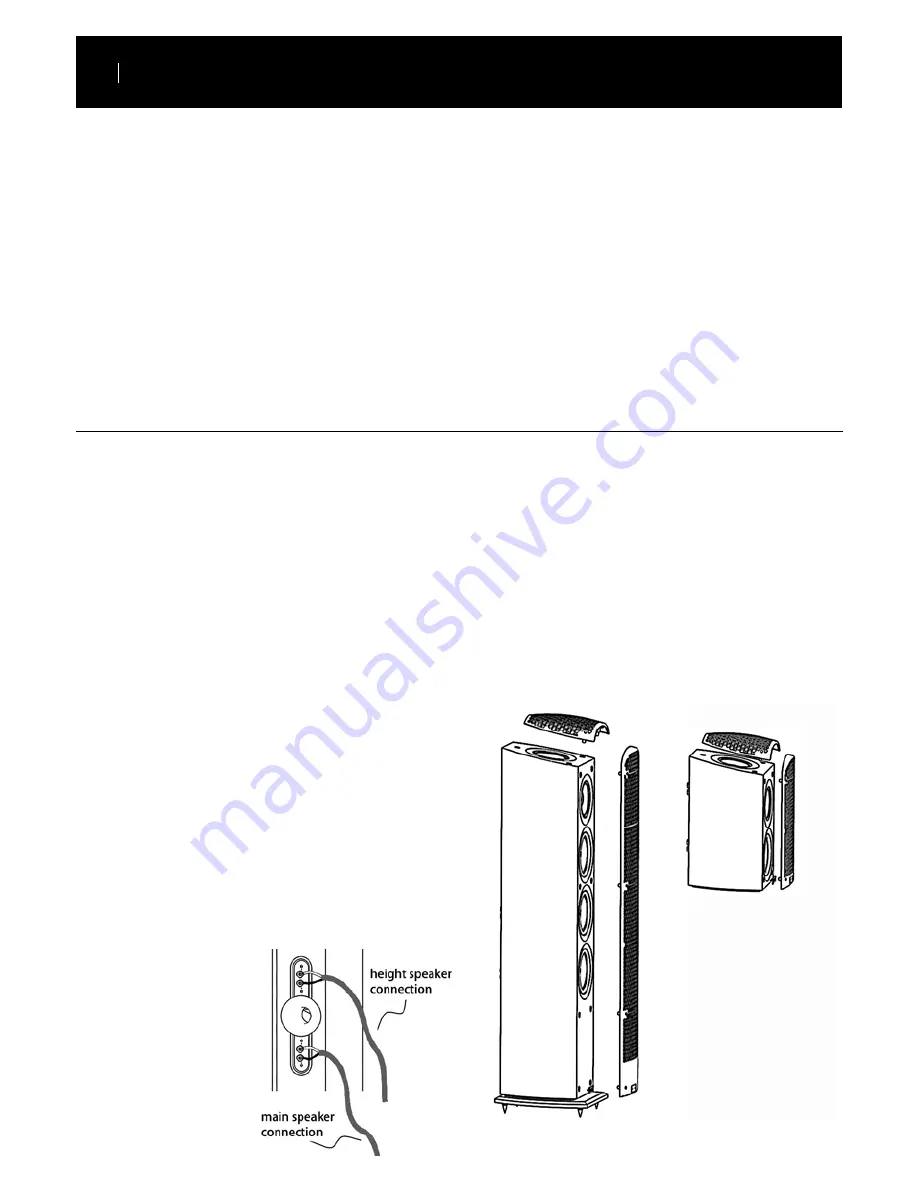
If you are using the height channel drivers in the SP-EFS73 

floorstanding speaker or SP-EBS73-LR bookshelf speaker 

for Dolby Atmos

®

 or another surround sound technology with 

height channels, connect the cables for the corresponding 

height channel (left front height 

channel of the receiver or amp 

to the left front speaker’s 

height channel input, right 

rear height channel of the 

receiver or amp to the right 

rear speaker, etc.) as seen  

to the right.

INSTALLING AND REMOVING THE GRILLES

With both the SP-EFS73 floorstanding speaker and the  

SP-EBS73-LR bookshelf speaker, the grilles covering the 

front drivers and the height drivers may be removed if 

desired, as seen below.
To remove either or both grilles, pull gently on the grille near 

one of its mounting points. You don’t need to pull the grille 

all the way out of its grommet at first. Work your way around 

the grille, gently working it loose around each mounting point. 

Once the grille is completely loosened, you can remove it. 

To reattach it, align the pegs on the grille with the holes in 

the speaker and press in slowly around the mounting points 

until the grill is pushed in all the way.

www.pioneerelectronics.com

2

English

Summary of Contents for Elite SP-EBS73-LR

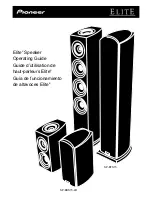
Page 1: ...Elite Speaker Operating Guide Guide d utilisation de haut parleurs Elite Guía de funcionamiento de altavoces Elite SP EBS73 LR SP EFS73 ...

Page 2: ...he positive red terminal Make sure that the amplifier positive red terminal is connected to the loudspeaker positive red terminal and that the amplifier negative black terminal is connected to the loudspeaker negative black terminal If the wires you re using are not already terminated with banana plugs spade lugs etc strip off of insulation from the ends of the cable twist the bare strands and ins...

Page 3: ...rs Close proximity to a side or rear wall will enhance the bass performance although too close particularly a corner location and the bass may be unnaturally high and image performance may be degraded Best results will be obtained when the loudspeaker is placed approximately 2 feet from the wall If a corner location is unavoidable try to position the loudspeaker so that the distance to the rear wa...

Page 4: ...tand of the appropriate height Once your SP EFS73 or SP EBS73 LR speakers have been attached to a Dolby Atmos enabled receiver follow the included instructions to ensure the most optimal setting for you to enjoy your Dolby Atmos encoded content BASS MANAGEMENT SETTINGS If you are using an A V receiver or surround sound processor with your speakers you will need to set the bass management appropria...

Page 5: ...x 220mm Dimensions with grille spikes and feet W x H x D 187 5 mm x 398 mm x 238 mm 237 mm x 1008 mm x 265 mm Weight each 15 8 lbs 35 2 lbs Woofer 5 1 4 Aluminum 3 x 5 1 4 Aluminum Midrange 4 Aluminum 4 Aluminum Tweeter 1 Soft Dome 1 Soft Dome Complies with California Code of Regulations CCR 93120 2 a Phase 2 Specifications and design subject to modification without notice PIONEER ELITE the Pionee...

Page 6: ...ITNESS FOR A PARTICULAR PURPOSE TO A PERIOD NOT TO EXCEED THE WARRANTY PERIOD NO WARRANTIES SHALL APPLY AFTER THE WARRANTY PERIOD SOME STATES DO NOT ALLOW LIMITATIONS ON HOW LONG AN IMPLIED WARRANTY LASTS AND SOME STATES DO NOT ALLOW THE EXCLUSIONS OR LIMITATIONS OF INCIDENTAL OR CONSEQUENTIAL DAMAGES SO THE ABOVE LIMITATIONS OR EXCLUSIONS MAY NOT APPLY TO YOU THIS WARRANTY GIVES YOU SPECIFIC LEGA...

Page 7: ...til you can hear it comfortably and clearly without distortion Once you have established a comfortable sound level set the dial and leave it there BE SURE TO OBSERVE THE FOLLOWING GUIDELINES Do not turn up the volume so high that you can t hear what s around you Use caution or temporarily discontinue use in potentially hazardous situations PIONEER ELECTRONICS USA INC 1925 E Dominguez Street Long B...

Page 8: ...est essentiel de connecter vos haut parleurs avec des fils appropriés Faites attention de bien respecter la polarité des connexions Nous recommandons d utiliser au moins des fils de calibre 18 si leur longueur est de 25 pieds 7 5 m ou moins et des fils plus gros si leur longueur est supérieure La plupart des câbles de haut parleur sont codés pour faciliter la connexion En général le fil rayé ou ce...

Page 9: ...rière ou d un mur latéral augmentera la sonorité des basses mais si un haut parleur est trop près d un mur particulièrement dans un coin les basses risquent d être exagérées et la qualité d image sonore sera dégradée Vous aurez de meilleurs résultats si les haut parleurs sont placés à environ 60 cm 2 pieds du mur S il est difficile d éviter de placer un haut parleur près d un coin essayez de place...

Page 10: ...ment optimiser la position des haut parleurs internes de projection vers le haut en choisissant un support de hauteur appropriée Lorsque vos haut parleurs SP EFS73 ou SP EBS73 LR ont été connectés à un récepteur compatible Dolby Atmos suivez les instructions incluses afin d avoir les réglages parfaits pour profiter au maximum du contenu sonore Dolby Atmos RÉGLAGES DE GESTION DES BASSES Si vous uti...

Page 11: ...5 mm x 220 mm Dimensions avec grille base et pics L x H x P 237 mm x 1008 mm x 265 mm Poids chacun 7 15 kg 16 kg Graves 13 cm Aluminium 3 x 13 cm Aluminium Gamme moyenne 10 cm Aluminium 10 cm Aluminium Aigus 2 5 cm Dôme souple 2 5 cm Dôme souple Respecte la réglementation CCR Californfia Code of Regulations 93120 2 a phase 2 Les spécications et la conception technique sont sujettes à modication sa...

Page 12: ... GARANTIES IMPLICITES DE QUALITÉ MARCHANDE OU D ADAPTATION À UN USAGE PARTICULIER À UNE PÉRIODE N EXCÉDANT PAS LA PÉRIODE DE GARANTIE AUCUNE GARANTIE NE S APPLIQUE APRÈS LA PÉRIODE DE GARANTIE CERTAINS ÉTATS NE PERMETTENT PAS LA LIMITATION DE LA DURÉE D UNE GARANTIE IMPLICITE ET CERTAINS NE PERMETTENT PAS L EXCLUSION OU LA LIMITATION DES DOMMAGES CONSÉCUTIFS OU INDIRECTS LES LIMITATIONS ET EXCLUSI...

Page 13: ... que le son de certaines musiques soit décevant Avec le temps votre niveau d écoute confortable peut s adapter à un volume de plus en plus élevé Ainsi ce qui peut paraître normal est alors trop fort et dommageable pour votre ouïe Protégez vous contre ce risque en en réglant votre matériel à un niveau de volume sécuritaire AVANT que votre ouïe s adapte RÉGLAGE D UN VOLUME SÉCURITAIRE Réglez d abord...

Page 14: ...la mejor calidad de sonido Tenga cuidado para garantizar la polaridad correcta de la conexión Recomendamos un mínimo de calibre 18 para tendidos de hasta 25 pies y calibres más gruesos para tendidos más largos La mayoría de cables para altavoces está codificada para facilitar esta tarea Por lo general el lado nervado o con rayas o el lado con el conector marcado en rojo o blanco se conecta con el ...

Page 15: ...te a la mitad de la clavija Ahora enrosque una clavija en cada uno de los orificios roscados en la base con las clavijas apuntando hacia arriba según se muestra arriba a la derecha Estas quedarán apuntando hacia abajo cuando se voltee el altavoz Ajuste la altura de las clavijas de manera que las cuatro clavijas hagan contacto firme con el piso debajo de la alfombra y utilice las tuercas para bloqu...

Page 16: ...ra a continuación Si está usando el altavoz para estantería SP EBS73 LR puede optimizar fácilmente la posición de los transductores del canal de altura mediante la selección de un pedestal de la altura apropiada Una vez que los altavoces SP EFS73 o SP EBS73 LR se hayan conect ado a un receptor compatible con Dolby Atmos siga las instrucciones incluidas para garantizar el ajuste óptimo que le permi...

Page 17: ...ancia nominal 4 Ohms 4 Ohms Sensibilidad 2 83 V 85 dB 86 dB Frecuencia de intercambio 260Hz 2 6 kHz 260Hz 2 6 kHz Acabado Vinyle Noir Vinyle Noir Blindaje magnético Non Non Dimensions sin rejilla A x Alt x Prof 187 5 mm x 375 mm x 220 mm Dimensions con rejilla A x Alt x Prof 187 5 mm x 398 mm x 238 mm Dimensions sin rejilla sin base ni clavijas de apoyo A x Alt x Prof 187 5 mm x 945 mm x 220 mm Di...

Page 18: ...RIE ALTERADOS ESTROPEADOS O RETIRADOS ANULAN ESTA GARANTÍA EN SU TOTALIDAD NINGUNA OTRA GARANTÍA EN LOS ESTADOS UNIDOS PIONEER LIMITA SUS OBLIGACIONES BAJO CUALQUIER GARANTÍA IMPLÍCITA INCLUYENDO EN FORMA NO EXHAUSTIVA LAS GARANTÍAS IMPLÍCITAS DE COMERCIABILIDAD Y ADECUACIÓN A UN FIN DETERMINADO A UN PERÍODO NO SUPERIOR AL PERÍODO DE GARANTÍA UNA VEZ TRANSCURRIDO EL PERÍODO DE GARANTÍA NO SE APLIC...

Page 19: ... en un valor bajo Aumente poco a poco el sonido hasta poder oírlo de manera cómoda y clara sin distorsión Después de establecer un nivel cómodo de sonido ajuste el cuadrante y déjelo ahí ASEGÚRESE DE RESPETAR LAS SIGUIENTES PAUTAS No suba el volumen a niveles tan elevados que no pueda escuchar lo que le rodea Tenga precaución o interrumpa temporalmente el uso en situaciones potencialmente peligros...

Page 20: ...This Page Intentionally Left Blank ...

Reviews: