background image

Before You Start

About this unit  

5

About this manual  

5

After-sales service for Pioneer Products  

5

Precautions  

5

Use and care of the remote control  

6

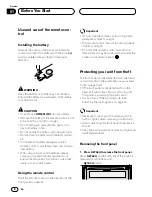
• Installing the battery  

6

• Using the remote control  

6

Protecting your unit from theft  

6

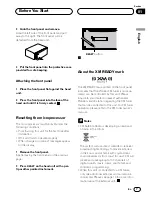
• Removing the front panel  

6

• Attaching the front panel  

7

Resetting the microprocessor  

7

About the XM READY mark  

7

What’s What

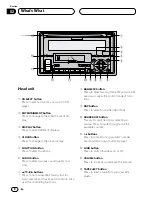
Head unit  

8

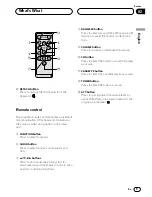
Remote control  

9

Power ON/OFF

Turning the unit on  

10

Selecting a source  

10

Turning the unit off  

10

Tuner

Listening to the radio  

11

Introduction of advanced tuner 

operation  

12

Storing and recalling broadcast 

frequencies  

13

Tuning in strong signals  

13

Storing the strongest broadcast 

frequencies  

14

Cassette Player

Playing a tape  

15

Introduction of advanced cassette player

operation  

17

Repeating play  

17

Skipping blank tape sections  

18

Using Dolby noise reduction  

18

Built-in CD Player

Playing a CD  

19

Introduction of advanced built-in CD player

operation  

20

Repeating play  

21

Playing tracks in a random order  

21

Scanning tracks of a CD  

21

Pausing CD playback  

22

Using disc title functions  

22

• Entering disc titles  

22

• Displaying disc titles  

23

Using CD TEXT functions  

23

• Displaying titles on CD TEXT discs  

23

• Scrolling titles in the display  

23

Multi-CD Player

Playing a CD  

24

Introduction of advanced multi-CD player

operation  

25

Repeating play  

26

Playing tracks in a random order  

26

Scanning CDs and tracks  

27

Pausing CD playback  

27

Using ITS playlists  

27

• Creating a playlist with ITS program-

ming  

27

• Playback from your ITS playlist  

28

• Erasing a track from your ITS 

playlist  

28

• Erasing a CD from your ITS playlist  

28

Using disc title functions  

29

• Entering disc titles  

29

• Displaying disc titles  

29

• Selecting discs from the disc 

title list  

30

Using CD TEXT functions  

30

• Displaying titles on CD TEXT discs  

30

Thank you

for buying this Pioneer product.

Please read through these operating instructions so you will know how to oper-
ate your model properly. 

After you have finished reading the instructions, put them

away in a safe place for future reference.

Contents

En

2

00

Section

Summary of Contents for FH-P4000

Page 1: ...wer CD Cassette player with FM AM tuner Syntoniseur FM AM CD cassette puissante amplification contrôleur DSP pour lecteur CD à chargeur Operation Manual FH P4000 Mode d emploi English Français Deutsch Français Italiano Nederlands ...

Page 2: ...tion 20 Repeating play 21 Playing tracks in a random order 21 Scanning tracks of a CD 21 Pausing CD playback 22 Using disc title functions 22 Entering disc titles 22 Displaying disc titles 23 Using CD TEXT functions 23 Displaying titles on CD TEXT discs 23 Scrolling titles in the display 23 Multi CD Player Playing a CD 24 Introduction of advanced multi CD player operation 25 Repeating play 26 Play...

Page 3: ...igh pass filter 38 Initial Settings Adjusting initial settings 39 Setting the time 40 Setting the warning tone 40 Switching the auxiliary setting 40 Switching the dimmer setting 40 Switching the rear output setting 40 Selecting the digital attenuator 41 Adjusting display contrast 41 Other Functions Introduction of other functions 42 Using the demonstration 42 Using different entertainment displays...

Page 4: ...vel Set the dial and leave it there Taking a minute to do this now will help to prevent hearing damage or loss in the future After all we want you listening for a lifetime We Want You Listening For A Lifetime Used wisely your new sound equipment will provide a lifetime of fun and enjoyment Since hear ing damage from loud noise is often undetectable until it is too late this manufacturer and the El...

Page 5: ...d this unit for after sales service including warranty condtions or any other information In case the necessary infor mation is not available please contact the com panies listed below Please do not ship your unit to the companies at the addresses listed below for repair without advance contact For warranty information please see the Limited Warranty sheet included with this unit Precautions Keep ...

Page 6: ...te control Point the remote control in the direction of the front panel to operate Important Do not store the remote control in high tem peratures or direct sunlight The remote control may not function properly in direct sunlight Do not let the remote control fall onto the floor where it may become jammed under the brake or accelerator pedals Protecting your unit from theft The front panel can be ...

Page 7: ...pen tip or other pointed instrument RESET button About the XM READY mark The XM READY mark printed on the front panel indicates that the Pioneer XM tuner sold sepa rately can be controlled by this unit Please inquire to your dealer or nearest authorized Pioneer service station regarding the XM tuner that can be connected to this unit For XM tuner operation please refer to the XM tuner owner s manu...

Page 8: ... for controlling functions 8 BAND ESC button Press to select among three FM and one AM band and cancel the control mode of func tions 9 DSP button Press to select sound field functions 0 SOURCE OFF button This unit is switched on by selecting a source Press to cycle through all of the available sources 1 6 buttons Press for preset tuning and disc number search when using a multi CD player LOUD but...

Page 9: ... fast for ward reverse and track search controls Also used for controlling functions 8 BAND ESC button Press to select among three FM and one AM band and cancel the control mode of func tions VOLUME button Press to increase or decrease the volume CD button Press to select the built in or multi CD player as source CASSETTE button Press to select the cassette player as source TUNER button Press to s...

Page 10: ...r Sources off Notes In the following cases the sound source will not change When a product corresponding to each source is not connected to this unit When no disc is set in this unit When no cassette is set in this unit When no magazine is set in the multi CD player When the AUX external input is set to off refer to page 40 External unit refers to a Pioneer product such as one available in the fut...

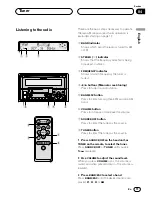
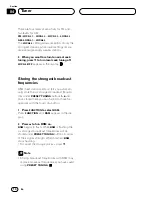
Page 11: ...one AM band 6 VOLUME button Press to increase or decrease the volume 7 SOURCE OFF button Press to select the tuner as the source 8 TUNER button Press to select the tuner as the source 1 Press SOURCE OFF on the head unit or TUNER on the remote to select the tuner Press SOURCE OFF or TUNER until you see Tuner displayed 2 Use VOLUME to adjust the sound level When you press VOLUME up the volume is rai...

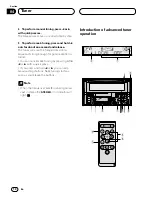
Page 12: ...od reception is found You can cancel seek tuning by pressing either 2 or 3 with a quick press If you press and hold 2 or 3 you can skip broadcasting stations Seek tuning starts as soon as you release the buttons Note When the frequency selected is being broad cast in stereo the STEREO indicator will light Introduction of advanced tuner operation 6 3 5 7 ENT ENT DISP DISP CLOCK CLOCK LOUD LOUD SOUR...

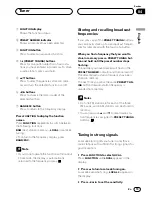
Page 13: ...you press any of the PRESET TUNING buttons you can easily store up to six broadcast frequen cies for later recall with the touch of a button When you find a frequency that you want to store in memory press a PRESET TUNING but ton and hold until the preset number stops flashing The number you have pressed will flash in the PRESET NUMBER indicator and then remain lit The selected radio station frequ...

Page 14: ...ts you automati cally store the six strongest broadcast frequen cies under PRESET TUNING buttons 1 6 and once stored there you can tune in to those fre quencies with the touch of a button 1 Press FUNCTION to select BSM Press FUNCTION until BSM appears in the dis play 2 Press 5 to turn BSM on BSM begins to flash While BSM is flashing the six strongest broadcast frequencies will be stored under PRES...

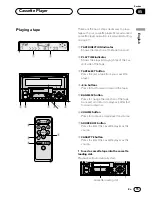
Page 15: ...e tape 5 BAND ESC button Press to change the direction of the tape transport and return to playback after fast forward or rewind 6 VOLUME button Press to increase or decrease the volume 7 SOURCE OFF button Press to select the cassette player as the source 8 CASSETTE button Press to select the cassette player as the source 1 Insert a cassette tape into the cassette loading slot Playback will automa...

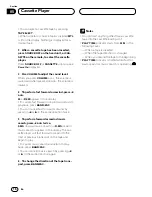
Page 16: ... forward or rewind by pressing 2 or 3 in the same direction twice 5 To perform forward or rewind music search press 2 or 3 twice F MS forward music search or R MS rewind music search appears in the display The cas sette player will fast forward or rewind to the next or previous blank spot on the tape and begin to play To cancel music search and return to play back press BAND ESC You can cancel mus...

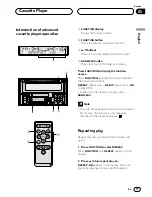
Page 17: ...ay B SKIP blank skip NR Dolby B NR To return to the playback display press BAND ESC Note If you do not operate the function within about 30 seconds the display is automatically returned to the playback display Repeating play Repeat play lets you hear the same track over again 1 Press FUNCTION to select REPEAT Press FUNCTION until REPEAT appears in the display 2 Press 5 to turn repeat play on REPEA...

Page 18: ...gs will be skipped 3 Press to turn blank skip off B SKIP OFF appears in the display The com plete cassette tape will play Using Dolby noise reduction When you listen to tapes that have been recorded with Dolby B NR turn Dolby B NR on 1 Press FUNCTION to select NR Press FUNCTION until NR appears in the dis play 2 Press 5 to turn Dolby B NR on B NR ON appears in the display The tape will play with D...

Page 19: ...r fast forward and reverse 5 VOLUME button Press to increase or decrease the volume 6 SOURCE OFF button Press to select the built in CD player as the source 7 CD button Press to select the built in CD player as the source 1 Insert a CD into the CD loading slot Playback will automatically start CD loading slot You can eject a CD by pressing CD EJECT 2 After a CD has been inserted press SOURCE OFF o...

Page 20: ... a time Do not use an adapter when playing 8 cm CDs Do not insert anything other than a CD into the CD loading slot If you cannot insert a disc completely or if after you insert a disc the disc does not play check that the label side of the disc is up Press CD EJECT to eject the disc and check the disc for damage before inserting the disc again If the built in CD player does not operate prop erly ...

Page 21: ...r the same track over again 1 Press FUNCTION to select REPEAT Press FUNCTION until REPEAT appears in the display 2 Press 5 to turn repeat play on REPEAT ON appears in the display The track presently playing will play and then repeat 3 Press to turn repeat play off REPEAT OFF appears in the display The track presently playing will continue to play and then play the next track Note If you perform tr...

Page 22: ...the title The next time you insert a CD for which you have entered a title the title of that CD will be dis played Entering disc titles Disc title input lets you input CD titles up to 10 letters long and up to 48 disc titles into the built in CD player 1 Play a CD that you want to enter the title 2 Press FUNCTION and hold until TITLE IN appears in the display When playing a CD TEXT disc you cannot...

Page 23: ... currently playing disc NO TITLE is displayed Using CD TEXT functions Some discs have certain information encoded on the disc during manufacture These discs may contain such information as the CD title track title artist s name and playback time and are called CD TEXT discs Only these specially encoded CD TEXT discs support the functions listed below Displaying titles on CD TEXT discs Press DISPLA...

Page 24: ...isc from the multi CD player 5 2 3 buttons Track search and FF REV Press to select a track from the current CD and for fast forward and reverse 6 VOLUME button Press to increase or decrease the volume 7 1 6 buttons Disc number search Press to select a disc from the multi CD player 8 SOURCE OFF button Press to select the multi CD player as the source 9 CD button Press to select the multi CD player ...

Page 25: ...press and hold 2 or 3 5 To skip back or forward to another track press 2 or 3 Pressing 3 skips to the start of the next track Pressing 2 once skips to the start of the current track Pressing again will skip to the previous track Notes When the multi CD player performs the preparatory operations READY is displayed If the multi CD player does not operate prop erly an error message such as CD ERR 14 ...

Page 26: ...lay Repeating play There are three repeat play ranges for the multi CD player MCD multi CD player repeat TRK one track repeat and DSC disc repeat 1 Press FUNCTION to select REPEAT Press FUNCTION until REPEAT appears in the display 2 Press 2 or 3 to select the repeat range Press 2 or 3 until the desired repeat range appears in the display MCD Repeat all discs in the multi CD player TRK Repeat just ...

Page 27: ... returned to the playback display select SCAN again by pressing FUNCTION Note After track or disc scanning is finished nor mal playback of the tracks will begin again Pausing CD playback Pause lets you temporarily stop playback of the CD 1 Press FUNCTION to select PAUSE Press FUNCTION until PAUSE appears in the display 2 Press 5 to turn pause on PAUSE ON appears in the display Play of the current ...

Page 28: ...en ITS EMPTY is displayed 4 Press to turn ITS play off ITS P OFF appears in the display Playback will continue in normal order from the currently playing track and CD Erasing a track from your ITS playlist When you want to delete a track from your ITS playlist you can if ITS play is on If ITS play is already on skip to step 2 If ITS play is not already on press FUNCTION 1 Play a CD you want to del...

Page 29: ...witch to TITLE IN The disc title will have already been recorded on a CD TEXT disc 3 Press 5 or to select a letter of the alpha bet Each press of 5 will display a letter of the alpha bet in A B C X Y Z numbers and symbols in 1 2 3 order Each press of will display a letter in the reverse order such as Z Y X C B A order To change between upper case and lower case letters e g a b c x y z press the 1 ...

Page 30: ...s listed below Displaying titles on CD TEXT discs Press DISPLAY when playing a CD TEXT disc from the multi CD player Press DISPLAY repeatedly to switch between the following settings PLAY TIME playback time DISC TITLE disc title D ARTIST disc artist TRK TITLE track title T ARTIST track artist If specific information has not been recorded on a CD TEXT disc NO XXXX will be displayed e g NO D TITLE S...

Page 31: ... COMP is displayed when you attempt to select it 2 Press 5 or to select your favorite setting Press 5 or repeatedly to switch between the following settings COMP OFF COMP 1 COMP 2 COMP OFF DBE 1 DBE 2 50 disc multi CD player Only those functions described in this manual are supported for 50 disc multi CD players English Español Deutsch Français Italiano Nederlands ...

Page 32: ... button Press to return to the display of each source Press AUDIO to display the audio function names Press AUDIO repeatedly to switch between the following audio functions FADER balance adjustment LOUD loud ness SLA source level adjustment When selecting the FM tuner as the source you cannot switch to SLA To return to the display of each source press BAND ESC Note If you do not operate the audio ...

Page 33: ...ciencies in the low and high sound ranges at low volume 1 Press AUDIO to select LOUD Press AUDIO until LOUD appears in the display 2 Press 5 to turn loudness on LOUD ON appears in the display 3 Press to turn loudness off LOUD OFF appears in the display Note You can also turn loudness on or off by press ing LOUD Adjusting source levels SLA Source level adjustment lets you adjust the volume level of...

Page 34: ...nal processor func tions 5 1 6 buttons Press to recall equalization curves and sound field programs 6 2 3 buttons Press to choose the item mode of the selected function 7 5 buttons Press to adjust the selected function and turn it on off 8 BAND ESC button Press to return to the display of each source Press DSP to display the DSP function names Press DSP repeatedly to switch between the following f...

Page 35: ...r curves by switching alternatively between FLAT and a set equalizer curve 1 Press DSP to select the graphic equalizer Press DSP until PWFL appears in the display If the graphic equalizer has been previously set to an equalizer curve other than PWFL then the title of that previously selected equalizer curve will be displayed such as S BASS NTRL VOCAL CUSTOM or FLAT 2 Select a equalizer curve by pr...

Page 36: ...ualizer band appears in the display 4 Press 5 or to adjust the level of the equalizer band Each press of 5 or increases or decreases the level of the equalization band 6 6 is displayed as the level is increased or decreased You can then select another band and adjust the level Notes You can create different CUSTOM curves for different sources The built in CD player and the multi CD player are set ...

Page 37: ... or decreased Using the position selector One way to assure a more natural sound is to clearly position the stereo image putting you right in the center of the sound field The posi tion selector adjusts the volume level of sound from each speaker to match seat positions and the number of people in the car and lets you recall settings at the touch of a button The result is a natural sound regardles...

Page 38: ...play If the subwoofer setting has been previously adjusted the frequency of that previously selected will be displayed such as 50Hz or 125Hz 2 Press 2 or 3 to select cut off frequency Press 2 and 50Hz is displayed Press 3 and 125Hz is displayed Only frequencies lower than those in the selected range are output from the subwoofer 3 Press 5 or to adjust the output level of the subwoofer Each press o...

Page 39: ...epeatedly to turn off the unit 1 Press SOURCE OFF and hold on the head unit or press CD CASSETTE TUNER on the remote repeatedly until the unit turns off 2 Press FUNCTION and hold until the time setting appears in the display 3 Press FUNCTION to select one of the initial settings Press FUNCTION repeatedly to switch between the following settings TIME WARN AUX DIMMER REAR SP DIG ATT CONTRAST Use the...

Page 40: ... ON Switching the auxiliary setting It is possible to use auxiliary equipment with this unit Activate the auxiliary setting when using external equipment connected to this unit 1 Press FUNCTION to select AUX Press FUNCTION repeatedly until AUX appears in the display 2 Select AUX on or off with 5 Pressing 5 will switch AUX between on and off and that status will be displayed e g AUX ON Switching th...

Page 41: ...ording level is high setting the equalizer curve level to high may result in distor tion You can switch the digital attenuator to low to reduce distortion Sound quality is better at the high setting so this setting is usually used 1 Press FUNCTION to select DIG ATT Press FUNCTION repeatedly until DIG ATT appears in the display 2 Select DIG ATT high or low with 2 3 Pressing 2 3 will switch DIG ATT ...

Page 42: ...ce 7 1 2 buttons Press to change between letters or number symbol input 8 ENTERTAINMENT button Press to change to the entertainment dis play 9 CLOCK button Press to change the clock display 0 CASSETTE button Press to select a source Using the demonstration Demonstration can be shown in the display when the unit is off 1 Press SOURCE OFF to turn off the unit Press SOURCE OFF and hold until the unit...

Page 43: ...ns time display on or off The time display disappears temporarily when you perform other operations but the time indi cation is displayed again after 25 seconds Using the AUX source An IP BUS RCA Interconnector such as the CD RB20 or CD RB10 sold separately lets you connect this unit to auxiliary equipment featur ing RCA output For more details refer to the IP BUS RCA Interconnector owner s manual...

Page 44: ...cursor to the next character position When the letter you want is displayed press 3 to move the cursor to the next position and then select the next letter Press 2 to move back wards in the display 4 Move the cursor to the last position by pressing 3 after entering the title When you press 3 one more time the entered title is stored in memory 5 Press BAND ESC to return to the playback display En 4...

Page 45: ...se tapes A tape with a gap of 4 seconds or less between songs A tape containing dialog or other non musical content with pauses lasting 4 seconds or longer A tape with an extremely quiet passage in the music lasting for 4 seconds or longer CD player and care Use only CDs that have either of the two Compact Disc Digital Audio marks as show below Use only normal round CDs If you insert irregular non...

Page 46: ...may not be displayed by this unit This unit conforms to the track skip function of the CD R disc The tracks containing the track skip information are skipped automati cally Read the precautions with CD R discs before using them Understanding built in CD player error messages When problems occur during CD play an error message may appear on the display If an error message appears on the display ref...

Page 47: ...uency 44 1 kHz Number of quantization bits 16 linear Frequency characteristics 5 20 000 Hz 1 dB Signal to noise ratio 94 dB 1 kHz IHF A network Dynamic range 92 dB 1 kHz Number of channels 2 stereo Cassette player Tape Compact cassette tape C 30 C 90 Tape speed 4 8 cm sec Fast forward rewinding time Approx 100 sec C 60 Wow flutter 0 09 WRMS Frequency response Metal 30 19 000 Hz 3 dB Stereo separat...

Page 48: ... Lecteur de CD intégré Ecoute d un CD 19 Introduction au fonctionnement détaillé du lecteur de CD intégré 20 Répétition de la lecture 21 Ecoute des plages musicales dans un ordre quelconque 21 Examen du contenu d un CD 22 Pause de la lecture d un CD 22 Utilisation des fonctions de titrage des disques 22 Frappe du titre d un disque 22 Affichage du titre d un disque 23 Utilisation des fonctions CD T...

Page 49: ...tion de la sortie pour haut parleur d extrêmes graves 37 Réglages de la sortie vers le haut parleur d extrêmes graves 38 Utilisation du filtre passe haut 38 Réglages initiaux Ajustement des réglages initiaux 39 Réglage de l heure 40 Mise en service ou hors service du signal sonore d avertissement 40 Mise en service ou hors service de l entrée auxiliaire 40 Mise en service ou hors service de l atté...

Page 50: ... des dommages ou des pertes de sen sibilités d écoute dans le futur Après tout nous voulons que vous écoutiez pendant toute votre vie Nous voulons que vous écoutiez pendant toute votre vie Utilisé avec sagesse votre nouvel équipement sonore sera une source de plaisir pendant toute votre vie Comme les dommages de l ouïe provenant d un bruit fort ne sont souvent détectables que lorsqu il est trop ta...

Page 51: ...toute question relative au service après vente y compris les conditions de garantie veuillez consulter le distributeur ou le reven deur qui vous a fourni cet appareil Si les infor mations requises ne sont pas disponibles prenez contact avec les compagnies mention nées ci dessous N expédiez pas l appareil pour réparation à l une des adresses figurant ci dessous sans avoir pris un contact préalable ...

Page 52: ...eil à commander Important Ne conservez pas le boîtier de télécommande exposé aux températures élevées ou à la lumière directe du soleil Le boîtier de télécommande peut ne pas don ner satisfaction lorsqu il est exposé à la lumière directe du soleil Veillez à ce que le boîtier de télécommande ne tombe pas car ce faisant il pourrait empêcher le bon fonctionnement de la pédale de frein ou d accélérati...

Page 53: ...READY La marque XM READY imprimée sur la face avant signifie que le syntoniseur Pioneer XM vendu séparément peut être commandé par cet appareil ci Pour connaitre précisément le modèle de syntoniseur XM qui peut être con necté à cet appareil consultez un revendeur ou un centre d entretien Pioneer agréés Pour tout ce qui concerne le fonctionnement du syntoniseur XM reportez vous au mode d em ploi de...

Page 54: ...tuer un accord manuel atteindre rapidement le début ou la fin du support rechercher une plage musicale Ces touches servent égale ment aux commandes des fonctions 8 Touche BAND ESC Appuyez sur cette touche pour choisir une des trois gammes FM ou la gamme AM ou encore abandonner la commande des fonc tions 9 Touche DSP Appuyez sur cette touche pour choisir une correction de champ sonore 0 Touche SOUR...

Page 55: ...7 Touches 5 2 3 Appuyez sur ces touches pour effectuer un accord manuel atteindre rapidement le début ou la fin du support rechercher une plage musicale Ces touches servent égale ment aux commandes des fonctions 8 Touche BAND ESC Appuyez sur cette touche pour choisir une des trois gammes FM ou la gamme AM ou encore abandonner la commande des fonc tions Touche VOLUME Appuyez sur cette touche pour a...

Page 56: ...es sources CD Lecteur de CD intégré Lecteur de CD à chargeur Mise hors service des sources Remarques Dans les cas suivants une autre source sonore n est pas sélectionnée Le produit correspondant à la source n est pas connecté à cet appareil ci L appareil ne contient pas de disque L appareil ne contient pas de cassette Le lecteur de CD à chargeur ne contient pas de chargeur L entrée AUX entrée pour...

Page 57: ...yez sur cette touche pour choisir une des trois gammes FM ou la gamme AM 6 Touche VOLUME Appuyez sur cette touche pour augmenter ou diminuer le niveau sonore 7 Touche SOURCE OFF Appuyez sur cette touche pour choisir le syntoniseur comme source 8 Touche TUNER Appuyez sur cette touche pour choisir le syntoniseur comme source 1 Pour choisir le syntoniseur appuyez sur SOURCE OFF sur l appareil central...

Page 58: ...on une seconde sur 2 ou sur 3 Le syntoniseur examine les fréquences jusqu à ce que se présente une émission dont la récep tion est jugée satisfaisante Vous pouvez arrêter l accord automatique en appuyant brièvement sur 2 ou sur 3 Si vous maintenez la pression d un doigt sur 2 ou sur 3 les fréquences sont ignorées L accord automatique ne commence qu au moment où vous relâchez la pression sur la tou...

Page 59: ...r à l affichage de la fréquence Remarque Si vous ne réglez aucun paramètre de la fonc tion pendant environ 30 secondes l afficheur indique à nouveau la fréquence d accord Mise en mémoire et rappel des fréquences des stations Grâce aux touches PRESET TUNING vous pou vez aisément mettre en mémoire six fréquences que vous pourrez ultérieurement rappeler par une simple pression sur la touche convenabl...

Page 60: ...our revenir à l accord automatique ordi naire appuyez sur de façon à mettre hors service l accord automatique sur une station locale LOCAL OFF apparaît sur l afficheur Mise en mémoire des fréquences des émetteurs les plus puissants La fonction BSM Mémoire des meilleures sta tions vous permet d utiliser les touches PRESET TUNING 1 6 pour mémoriser les six fréquences des émetteurs les plus puissants...

Page 61: ...ner la bande 5 Touche BAND ESC Appuyez sur cette touche pour changer le sens de défilement de la bande ou repren dre la lecture après un bobinage rapide dans un sens ou dans l autre 6 Touche VOLUME Appuyez sur cette touche pour augmenter ou diminuer le niveau sonore 7 Touche SOURCE OFF Appuyez sur cette touche pour choisir le lecteur de cassette comme source 8 Touche CASSETTE Appuyez sur cette tou...

Page 62: ...x fois sur la même touche 2 ou 3 5 Pour effectuer une recherche dans un sens ou dans l autre appuyez deux fois sur 2 ou sur 3 F MS recherche de plage musicale vers la fin de la bande ou R MS recherche de plage musicale vers le début de la bande apparaît sur l afficheur Le lecteur de cassette bobine la bande jusqu au silence suivant ou précédent puis la lecture commence Pour abandonner la recherche...

Page 63: ...ur choisir une des fonctions suivantes REPEAT répétition de la lecture B SKIP saut des silences NR réducteur de bruit Dolby B Appuyez sur BAND ESC pour revenir à l af fichage des conditions de lecture Remarque Si vous ne réglez aucun paramètre de la fonc tion pendant environ 30 secondes l afficheur indique à nouveau les conditions de lecture Répétition de la lecture La répétition de la lecture vou...

Page 64: ...usicales sont ignorés 3 Appuyez sur pour mettre hors service le saut de silence B SKIP OFF apparaît sur l afficheur La bande est lue dans sa totalité Utilisation du réducteur de bruit Lors de la lecture d un enregistrement effectué avec le réducteur de bruit Dolby B mettez en service le réducteur de bruit Dolby B 1 Appuyez sur FUNCTION pour choisir NR Appuyez sur FUNCTION jusqu à ce que NR apparai...

Page 65: ...e et déplacement rapide dans les deux sens Appuyez sur cette touche pour choisir une plage musicale ou déplacer rapidement le capteur dans un sens ou dans l autre 5 Touche VOLUME Appuyez sur cette touche pour augmenter ou diminuer le niveau sonore 6 Touche SOURCE OFF Appuyez sur cette touche pour choisir le lecteur de CD intégré comme source 7 Touche CD Appuyez sur cette touche pour choisir le lec...

Page 66: ...e pression permet d atteindre la plage précédente Remarques Le lecteur de CD intégré permet la lecture d un CD de 12 cm ou d un CD de 8 cm Single N utilisez pas d adaptateur pour la lecture des disques de 8 cm N introduisez aucun objet dans le logement pour le CD autre qu un CD Si vous ne parvenez pas à introduire com plètement le disque ou encore si la lecture du disque ne commence pas après qu i...

Page 67: ...on de la lecture vous permet d écouter à nouveau la même plage musicale 1 Appuyez sur FUNCTION pour choisir REPEAT Appuyez sur FUNCTION jusqu à ce que REPEAT apparaisse sur l afficheur 2 Appuyez sur 5 pour mettre en service la répétition de la lecture REPEAT ON apparaît sur l afficheur La plage musicale en cours de lecture sera ensuite répétée 3 Appuyez sur pour mettre hors service la répétition d...

Page 68: ... lecture de la plage musicale marque une pause 3 Appuyez sur pour mettre hors service la pause PAUSE OFF apparaît sur l afficheur La lecture reprend là où elle a été interrompue Utilisation des fonctions de titrage des disques Vous pouvez taper le titre d un CD et obtenir son affichage Lorsque vous introduisez un CD pour lequel vous avez tapé le titre ce titre s affiche Frappe du titre d un disque...

Page 69: ...LE titre du disque Lorsque vous choisissez DISC TITLE le titre du disque en cours de lecture s affiche Si le disque en cours de lecture n a pas reçu de titre NO TITLE s affiche Utilisation des fonctions CD TEXT Des informations sont gravées sur certains disques pendant leur fabrication Ces informa tions peuvent être le titre du disque le nom de l interprète ou la durée de la lecture ces dis ques s...

Page 70: ...puyez sur ces touches pour choisir un disque du lecteur de CD à chargeur 5 Touches 2 3 Recherche de plage musi cale et déplacement rapide dans les deux sens Appuyez sur cette touche pour choisir une plage musicale ou déplacer rapidement le capteur dans un sens ou dans l autre 6 Touche VOLUME Appuyez sur cette touche pour augmenter ou diminuer le niveau sonore 7 Touches 1 6 Recherche d un disque pa...

Page 71: ...uite jusqu à ce que le numéro du disque s affiche Vous pouvez également utiliser les touches 5 pour choisir les disques dans l ordre 4 Pour déplacer rapidement le capteur dans un sens ou dans l autre maintenez la pression d un doigt sur 2 ou sur 3 5 Pour atteindre la plage précédente ou suivante appuyez sur 2 ou sur 3 Une pression sur 3 permet d atteindre le début de la plage suivante Une pression...

Page 72: ...ron 30 secondes l afficheur indique à nouveau les conditions de lecture Répétition de la lecture Trois modes de répétition sont prévus pour les disques du lecteur de CD à chargeur MCD répétition des disques que contient le lecteur TRK répétition d une plage musicale et DSC répétition d un disque 1 Appuyez sur FUNCTION pour choisir REPEAT Appuyez sur FUNCTION jusqu à ce que REPEAT apparaisse sur l ...

Page 73: ...la page précédente Répétition de la lecture 2 Appuyez sur FUNCTION pour choisir SCAN Appuyez sur FUNCTION jusqu à ce que SCAN apparaisse sur l afficheur 3 Appuyez sur 5 pour mettre en service l examen du contenu du disque SCAN ON apparaît sur l afficheur Les 10 pre mières secondes de chaque plage musicale du disque concerné ou de la première plage de chaque disque sont lues 4 Lorsque la plage musi...

Page 74: ...ur 5 Appuyez sur BAND ESC pour revenir à l affichage des conditions de lecture Remarque Après la mise en mémoire des données con cernant 100 disques toute donnée concer nant un nouveau disque remplace les don nées les plus anciennes Lecture commandée par la liste ITS ITS vous donne le moyen de n entendre que les plages musicales qui appartiennent à la liste établie Lorsque vous mettez en service l...

Page 75: ...uyez sur 5 ou sur pour choisir le CD 2 Maintenez la pression d un doigt sur FUNCTION jusqu à ce que TITLE IN apparaisse sur l afficheur puis appuyez sur FUNCTION pour choisir ITS Lorsque TITLE IN est affiché appuyez sur FUNCTION jusqu à ce que ITS apparaisse sur l afficheur 3 Appuyez sur pour supprimer de la liste ITS la référence à toutes les plages musicales du CD en cours de lecture La référenc...

Page 76: ...itre est à nouveau utilisé lorsque le disque est réintroduit Après la mise en mémoire des données con cernant 100 disques toute donnée concer nant un nouveau disque remplace les don nées les plus anciennes Affichage du titre d un disque Vous pouvez afficher le titre de tout disque dont le titre a été mis en mémoire Appuyez sur DISPLAY Appuyez de manière répétée sur DISPLAY pour passer d un des par...

Page 77: ...e titre commence à défiler vers la gauche La partie masquée du titre s affiche peu à peu Utilisation de la compression et de l accentuation dynamique des graves Vous pouvez utiliser ces fonctions lorsque le lecteur de CD à chargeur en est pourvu La compression COMP et l accentuation dynamique des graves DBE permettent un réglage précis des sons fournis par le lecteur de CD à chargeur Chaque foncti...

Page 78: ...yez sur AUDIO pour afficher le nom des fonctions audio Appuyez de manière répétée sur AUDIO pour choisir une des fonctions suivantes FADER equilibre sonore LOUD correction physiologique SLA réglage du niveau sonore de la source Si le syntoniseur FM a été choisi comme source vous ne pouvez pas afficher la fonction SLA Appuyez sur BAND ESC pour revenir à l affichage de l état de chaque source Remarq...

Page 79: ...OUD Appuyez sur AUDIO jusqu à ce que LOUD appa raisse sur l afficheur 2 Appuyez sur 5 pour mettre en service la correction physiologique LOUD ON apparaît sur l afficheur 3 Appuyez sur pour mettre hors service la correction physiologique LOUD OFF apparaît sur l afficheur Remarque Vous pouvez également mettre en service ou hors service la correction physiologique en appuyant sur LOUD Réglage du nive...

Page 80: ...appeler une courbe d égalisation ou une correction de champ sonore 6 Touches 2 3 Appuyez sur ces touches pour choisir un paramètre mode de la fonction 7 Touches 5 Appuyez sur ces touches pour régler la fonc tion choisie et la mettre en service ou hors service 8 Touche BAND ESC Appuyez sur cette touche pour revenir à l affichage de l état de la source Appuyez sur DSP pour afficher le nom des foncti...

Page 81: ...tte courbe est utile pour apprécier l effet d une autre courbe en basculant alternativement de la courbe FLAT à la courbe considérée 1 Appuyez sur DSP pour choisir l égaliseur graphique Appuyez sur DSP jusqu à ce que PWFL appa raisse sur l afficheur Si une courbe de l égaliseur graphique autre que PWFL a précédemment été utilisée par exemple S BASS NTRL VOCAL CUSTOM ou FLAT c est le nom de cette c...

Page 82: ...nde d égalisation Chaque pression sur 5 ou sur augmente ou diminue l amplitude de la bande d égalisation 6 6 sont les extrêmes que peut prendre l amplitude tandis qu elle augmente ou diminue Vous pouvez ensuite choisir une autre bande d égalisation et régler son amplitude Remarques Vous pouvez créer une courbe CUSTOM pour chaque source Le lecteur de CD intégré et le lecteur de CD à chargeur sont a...

Page 83: ... ayant pris place dans le véhicule les réglages mis en mémoire peuvent être rappelés par une simple pression sur une touche Il résulte de tout cela des sonorités plus naturelles quelle que soit la position que vous occupez dans le véhicule Voici la liste des posi tions Touche Indication affichée Indicateur Position 5 FRONT Siège avant ALL Tous les sièges 2 FRONT L Siège avant gauche 3 FRONT R Sièg...

Page 84: ...graves a précédemment été réalisé c est le nom de cette fréquence qui s affiche par exem ple 50Hz ou 125Hz 2 Appuyez sur 2 ou sur 3 pour choisir la fréquence de coupure Appuyez sur 2 50Hz s affiche Appuyez sur 3 125Hz s affiche Seules les fréquences inférieures à la fréquence de coupure sont émises par le haut parleur d extrêmes graves 3 Appuyez sur 5 ou sur pour régler l amplitude de sortie du ha...

Page 85: ...z sur cette touche pour abandonner les réglages initiaux 7 Touche CD CASSETTE TUNER Appuyez sur cette touche de manière répétée pour mettre l appareil hors service 1 Maintenez la pression d un doigt sur SOURCE OFF sur l appareil central ou appuyez de manière répétée sur CD CASSETTE TUNER sur le boîtier de télé commande jusqu à ce que l appareil soit hors service 2 Maintenez la pression d un doigt ...

Page 86: ... hors service ce signal sonore d avertissement 1 Appuyez sur FUNCTION pour choisir WARN Appuyez sur FUNCTION jusqu à ce que WARN apparaisse sur l afficheur 2 Mettez en service ou hors service WARN à l aide de 5 Une pression sur 5 met alternativement WARN en service ou hors service et l état du signal par exemple WARN ON est affiché Mise en service ou hors service de l entrée auxiliaire Cet apparei...

Page 87: ... gamme ou extrêmes graves à l aide de 2 3 Une pression sur 2 3 permet de basculer du haut parleur pleine gamme REAR SP FUL au haut parleur d extrêmes graves REAR SP S W et le réglage est affiché Réglage de l atténuateur numérique Lors de l écoute d un CD ou d une autre source dont le niveau sonore est élevé régler à une valeur importante le niveau de la courbe d égali sation peut conduire à de la ...

Page 88: ...ette touche pour mettre en service la démonstration 6 Touche SOURCE OFF Appuyez sur cette touche pour choisir une source 7 Touches 1 2 Appuyez sur ces touches pour choisir la frappe de lettres ou la frappe de chiffres ou symboles 8 Touche ENTERTAINMENT Appuyez sur cette touche pour obtenir l affichage divertissant 9 Touche CLOCK Appuyez sur cette touche pour modifier l affichage de l heure 0 Touch...

Page 89: ...tomatiquement silencieux quand vous placez un appel à l aide du télé phone cellulaire ou recevez un appel Les sons sont coupés et MUTE s affiche aucun réglage sonore n est possible à l exception du niveau de sortie Le fonction nement redevient normal dès que la commu nication est terminée Affichage ou non de l heure Vous pouvez afficher l heure même si les sources et la démonstration sont hors ser...

Page 90: ...hiffre puis d un symbole 1 2 3 Chaque pression sur provoque l affichage dans l ordre inverse Z Y X C B A Pour passer des majuscules aux minuscules par exemple a b c x y z appuyez sur la touche numérotée 1 Pour passer aux chiffres et aux symboles uniquement par exemple 1 2 3 appuyez sur la touche numérotée 2 3 Appuyez sur 3 pour placer le curseur sur la position suivante Lorsque la lettre que vous ...

Page 91: ... entière satis faction dans les cas suivants Le silence qui sépare deux plages musicales est inférieur à 4 secondes La cassette porte des enregistrements de dialogues entrecoupés de silence égaux ou supérieurs à 4 secondes La cassette porte un enregistrement qui con tient un passage silencieux d une durée égale ou supérieure à 4 secondes Soins à apporter au lecteur de CD N utilisez que les disques...

Page 92: ... empêcher la lecture Les titres et autres informations gravés sur les CD R ne sont pas toujours affichés par cet appareil Cet appareil tient compte des informations de saut de plage musicale gravées sur un CD R Les plages musicales contenant ces informa tions sont automatiquement ignorées Lisez les précautions qui accompagnent les CD R avant de les utiliser Signification des messages d erreur du l...

Page 93: ...ce d échantillonnage 44 1 kHz Nombre de bits de quantification 16 quantification linéaire Réponse en fréquence 5 20 000 Hz 1 dB Rapport signal bruit 94 dB 1 kHz Réseau IHF A Dynamique 92 dB 1 kHz Nombre de voies 2 stéréo Lecteur de cassette TCassette Cassette compacte C 30 C 90 Vitesse de défilement 4 8 cm s Temps de bobinage Environ 100 s C 60 Taux de pleurage el de scintillement 0 09 eff pondére...

Page 94: ......

Page 95: ......

Page 96: ...alia TEL 03 9586 6300 PIONEER ELECTRONICS OF CANADA INC 300 Allstate Parkway Markham Ontario L3R OP2 Canada TEL 905 479 4411 PIONEER ELECTRONICS DE MEXICO S A de C V San Lorenzo 1009 3er Piso Desp 302 Col Del Valle Mexico D F C P 03100 TEL 5 688 52 90 Published by Pioneer Corporation Copyright 2001 by Pioneer Corporation All rights reserved Publication de Pioneer Corporation Copyright 2001 Pioneer...

Reviews: