En(4/9)
Setting the unit
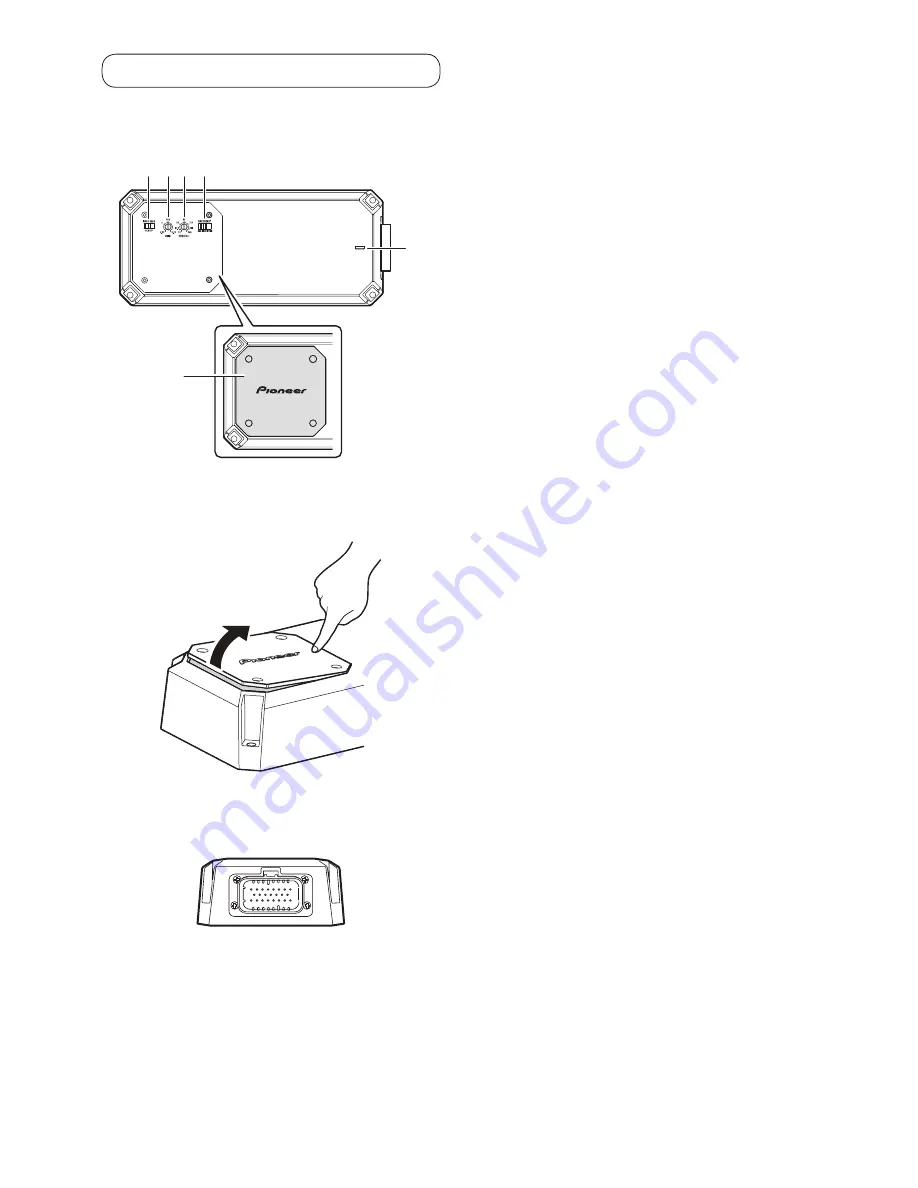
What’s what
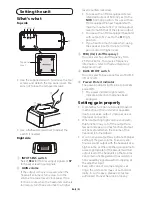
Top side
1 2 3 4
5
Top panel
cover
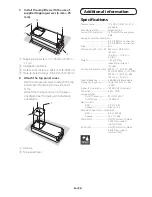
Use the supplied wrench to remove the four
screws and detach the top panel cover. Be
sure not to lose the removed screws.
1
2
Use a flathead screwdriver to adjust the
switch if needed.
Right side
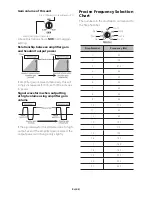
1
INPUT SENS switch
Select
RCA
for RCA level input signals or
SP
for Speaker level input signals.
2
GAIN volume
If the output remains low even when the
headunit volume is turned up, turn the
volume to a lower level (clockwise). If dis-
tortion occurs when the headunit volume is
turned up, turn these volumes to a higher
level (counterclockwise).
For use with an RCA equipped stereo
(standard output of 500 mV), set to the
NOR
(normal) position. For use with an
RCA equipped Pioneer headunit with
maximum output of 4 V or more, adjust
level to match that of the stereo output.
For use with an RCA equipped headunit
with output of 4 V, set to the
H
(High)
position.
If you hear too much noise when using
the speaker input terminals, turn the
gain control to higher level.
3
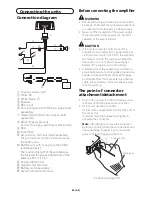
FREQ (Hz) (cutoff frequency)
You can select a cutoff frequency from
25 Hz to 240 Hz. For precise frequency
information, refer to
Precise Frequency
Selection Chart
.
4
BASS BOOST switch
You can select a bass boost level of 0 dB, 6
dB, or 12 dB.
5
Power/Protect indicator
The power indicator lights blue to indicate
power ON.
The power indicator lights red to
indicate protection mode has been
engaged.
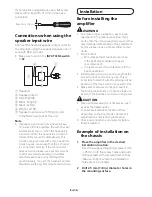
Setting gain properly
A protective function is included to avoid
malfunction of the unit and/or speakers
due to excessive output, improper use or
improper connection.
When outputting high volume sound etc.,
this function may cut off the output for a
few seconds as a normal function. Output
will be restored when the volume of the
headunit is turned down.
A cut in sound output may indicate improper
setting of the gain volume. To ensure con-
tinuous sound output with the headunit at a
high volume, set the amplifier gain volume to
a level appropriate for the preout maximum
output level of the headunit, so that volume
can remain unchanged and to avoid distor-
tion caused by signal waveform clipping at
the amplifier input.
Even with correct volume and gain set-
tings, the unit sound may cut out period-
ically. In such cases, please contact an
authorized Pioneer Service Company.

