13
2
2
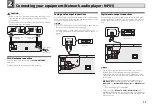
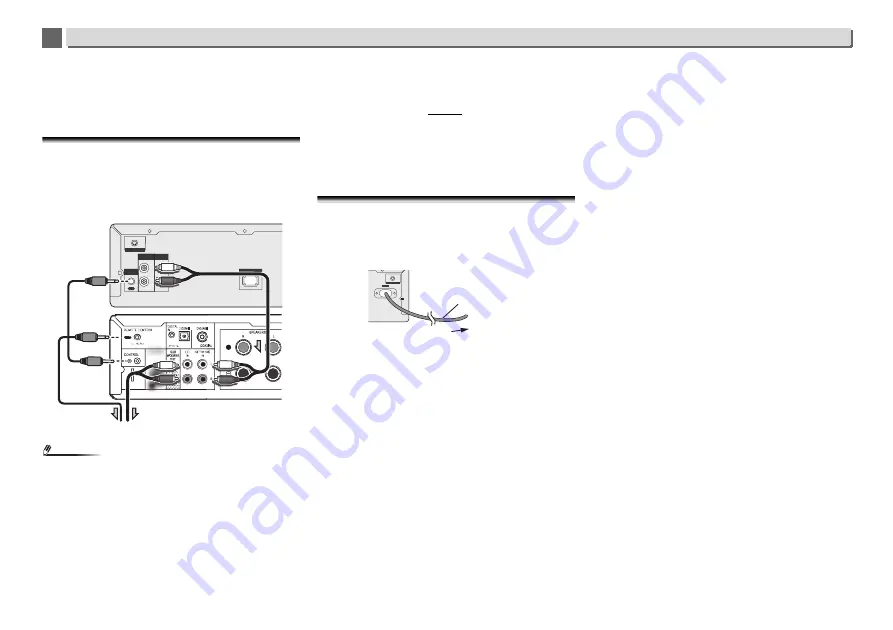
Connecting your equipment (Network audio player: N-P01)
•
When connecting the
CONTROL IN/OUT
jacks,
commercially available audio cords must also be used to
make analog connections. Merely connecting the
CONTROL IN/OUT
jacks alone will not allow proper system
control.
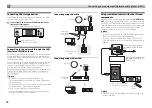
Using combined with the XC-P01 or
XC-P01DAB
•
Connect the stereo receiver (SX-P01, SX-P01DAB) and
network audio player (N-P01) using the supplied remote
control cable and RCA audio cable.
Note
•
When the stereo receiver (SX-P01, SX-P01DAB) and
network audio player (N-P01) are connected using the
remote control cable, the stereo receiver remote control
signal receiver will not function. Point the remote control at
the remote control signal receiver on the network audio
player.
•
When connecting to the control connector, you must also
connect the audio cable (analog connection). Only
connecting to the control connector will not allow for
correct system control.
•
Connecting the remote control cable will allow the Pioneer
ControlApp to be used, providing simple control over the
stereo receiver (SX-P01, SX-P01DAB) via the network audio
player (N-P01). Refer to page 31 for details of the Pioneer
ControlApp.
•
If the network audio player’s quick start setting is Off then
you will be unable to control the stereo receiver or CD
player.
Turn the network audio player’s quick start setting On and
you will be able to control them.
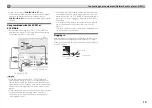
Plugging in
Before making or changing the connections, switch off the
power and disconnect the power cord from the AC outlet.
After you’ve finished making all connections, plug the player
into an AC outlet.
L
R
DIGITAL
OUT
CONTROL
OPTICAL
WLAN ANTENNA
LAN (10/100)
AUDIO
OUT
OUT
N-P01
SX-P01 or SX-P01DAB
CD Player (PD-P01)
WLAN ANTENNA
AC IN
To AC outlet
This player’s rear
panel
Power cord


