80
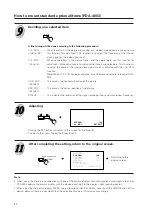
Deciding on a selected item
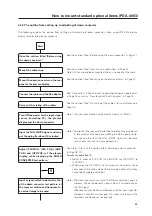
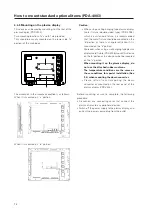
When the letters in the picture are missing, or a rainbow-shaped noise is annoying, use
this function for adjustment. This function is to adjust the frequency of the internal
clock signal for the video signal input.
When some letters in the picture flicker and the colors blurs use this function for
adjustment. Make adjustments to minimize the flickers and color blurs. This function is
to adjust the phase of the internal clock signal, which is adjusted with the CLK. FRQ.
function.
Note) When CLK. FRQ. has been adjusted, it may become necessary to readjust HOR.
POS.
This adjusts the horizontal position of the picture.
This adjusts the vertical position of the picture.
This indicates the resolution of the signal now being input, and synchronous frequency.
Adjusting
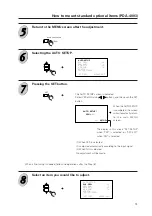
Pushing the SET button will return to the screen for the Step (8).
To adjust other items, repeat the Steps 8 to 10.
After completing the setting, return to the original screen.
Returning to the
original screen.
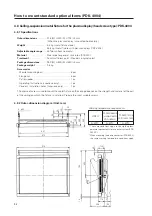
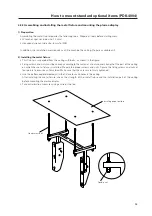
How to mount standard optional items (PDA-4003)
CLK. FRQ. .........
(-128 to 128)
CLK. PHS. ..........
(-16 to 15)
HOR. POS. ........
(-50 to 50)
VER. POS. .........
(-43 to 42)
STATUS .............
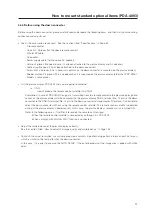
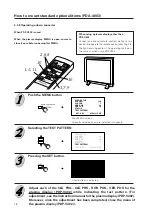
A fine-tuning will be done according to the following procedure:
SET
AUTO SETUP
CLK. FRQ.
CLK. PHS.
HOR. POS.
VER. POS.
STATUS
TEST PATTERN
SET : SEL
MENU : EXIT
120
-1
32
16
MENU
DOWN CONVERTER
CLK. FRQ.
120
: ADJ.
SET: EXIT
Note:
• When using this device in combination with one of the plasma displays manufactured by our company other than
PDP-V402 operate the plasma display with this device directing it to the display's light receiving portion.
• When adjusting the plasma display MENU using a function other than RGB-2, never push the MENU button of this
device, because there is a possibility that the adjustment value of this device may change.
Summary of Contents for PDK-5008
Page 5: ...5 Features ...
Page 11: ...11 Remote control ...
Page 21: ...21 Installation procedure ...
Page 57: ...57 Special installation Installation under the floor ...
Page 85: ...85 How to mount standard optional items PDK 4001 ...
Page 91: ...91 How to mount standard optional items PDK 4002 ...
Page 97: ...97 How to mount standard optional items PDK 4004 ...
Page 115: ...115 How to mount standard optional items PDK 5008 PDK 5008FT ...
Page 153: ...153 How to mount standard optional items Precautions for installing the optional speaker ...
Page 161: ...161 Before making adjustments ...

