PDP-501MX, PDP-V501X
77
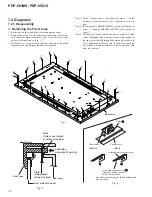
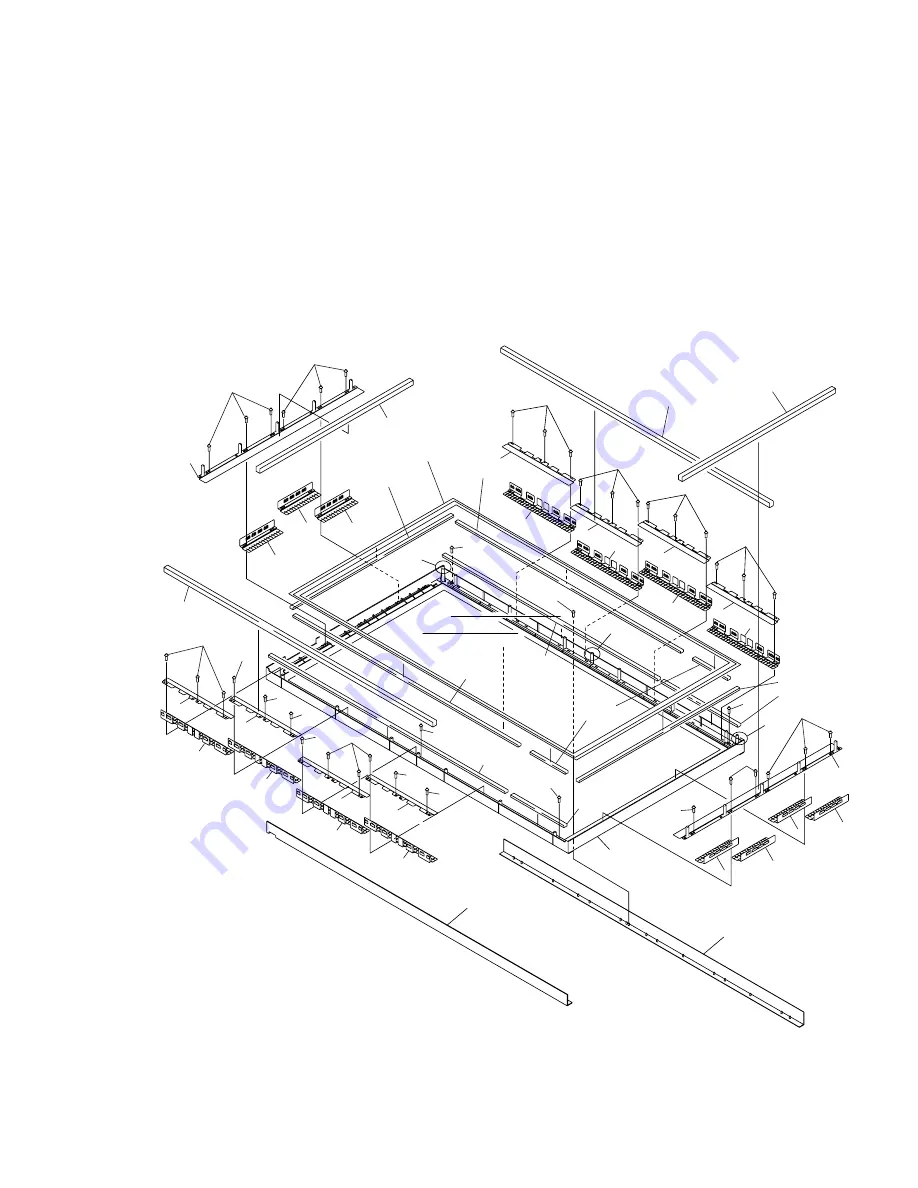
2.Removing the Front Protection Panel
(Fig. 3, Fig. 4)
1) Remove all screws
2
and
4
inside the front case.
Be careful not to remove screws
B
(two at the bottom) and screws
C
(three at the top) because they are used for securing the
aluminum sash.
2) Remove all panel shields 1 and 3 and panel holders 2 and 4.
3) Remove and replace the front protection panel.
4) Attach the protection panel by attaching to the bottom left side
first, and then attach the front case assembly in the reverse
procedure of the above.
When securing the front case to the unit, attach the two bosses
D
(one each on the two edges of the top) as a guide so that the
boss at the center
A
passes through the hole on the rear case.
Note)
When attaching the panel shield and panel holder after replacing
the protection panel, the panel shield may deform when tightening
the screws
3
as shown in Fig. 4. If it deforms, untighten screws
3
slightly and tighten until just before it starts to bend.
Fig. 3
Aluminum sash U
Front case
Aluminum sash D
2
1
2
2
2
2
2
2
2
4
3
4
3
3
3
3
Panel cushion 50V
Panel cushion 50H
Panel cushion 50V
Front protection panel
3
3
1
1
1
1
1
1
1
2
2
2
2
C
C
A
C
B
B
2
2
2
2
2
2
2
2
3
3
3
3
3
Panel cushion 50H
Shield gusket D
Shield gusket D
Shield gusket B
Shield
gusket H
Shield
gusket C
Shield
gusket G
D
D
Shield gusket F
Shield
gusket F
Shield
gusket E
Summary of Contents for PDP-501MX
Page 16: ...PDP 501MX PDP V501X 16 A B C D 1 2 3 4 1 2 3 4 3 3 POWER SUPPLY MODULE 1 2 J 1 2 ...
Page 17: ...PDP 501MX PDP V501X 17 A B C D 5 6 7 8 5 6 7 8 J 1 2 ...
Page 18: ...PDP 501MX PDP V501X 18 A B C D 1 2 3 4 1 2 3 4 3 4 POWER SUPPLY MODULE 2 2 J 2 2 ...
Page 19: ...PDP 501MX PDP V501X 19 A B C D 5 6 7 8 5 6 7 8 J 2 2 ...

