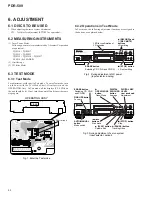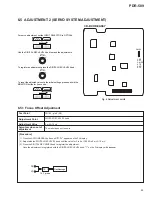
54
PDR-509
[Procedure]
(1) Turn VR163 and VR162 completely counterclockwise to set their power output to minimum.
(2) Press the ERASE button once so that "CD-R" appears on the FL display.
If the indication is "CD" or "CD-RW," press the ERASE button repeatedly until "CD-R" is displayed on the FL display.
(3) Press the RECORD button.
(4) Press the REC MUTE button. The LED for confirmation of LD emission will light in red. The LD is emitting in this status.
Adjustment of CD-R record power
(5) Turn VR163 clockwise until the adjusted value is 4.60 mW
±
0.1 mW.
Adjustment of CD-R overdrive power
(6) Turn VR162 clockwise until the adjusted value becomes adjustment value at Step 5 above + (0.1 mW
±
0.01 mW).
(7) Press the STOP button to shut off the LD.
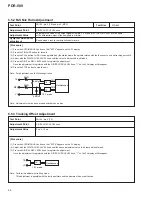
6.4.2 CD-R Record Power Adjustment
Pickup objective lens
Test Point
Adjustment Point
Adjustment Value
VR163 (R REC), VR162 (R O.D.)
VR163 : 4.60 mW
±
0.1 mW
VR162 : Addition of 0.1 mW
±
0.01 mW to the adjustment value of VR163
[Procedure]
(1) Turn VR141, VR161 and VR164 completely counterclockwise to set their power output to minimum.
(2) Press the ERASE button twice so that "CD-RW" appears on the FL display.
If the indication is "CD" or "CD-R," press the ERASE button repeatedly until "CD-RW" appears on the FL display.
(3) Press the RECORD button.
(4) Press the REC MUTE button. The LED for confirmation of LD emission will light in red. The LD is emitting in this status.
Adjustment of BIAS power
(5) Turn VR141 clockwise until the adjusted value is 0.40 mW
±
0.05 mW.
Adjustment of CD-RW record power
(6) Turn VR161 clockwise until the adjusted value is 2.00 mW
±
0.1 mW.
Adjustment of CD-RW erase power
(7) Turn VR164 clockwise until the adjusted value is 5.70 mW
±
0.1 mW.
(8) Press the STOP button to shut off the LD.
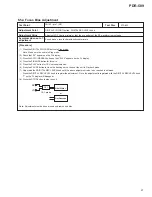
6.4.3 CD-RW Record Power Adjustment
Pickup objective lens
Test Point
Adjustment Point
Adjustment Value
VR141 (RW BIAS), VR161 (RW REC), VR164 (RW ERASE)
VR141 : 0.40 mW
±
0.05 mW
VR161 : 2.00 mW
±
0.1 mW
VR164 : 5.70 mW
±
0.1 mW
DANGER – LASER RADIATION WHEN OPEN.
AVOID DIRECT EXPOSURE TO BEAM.
DANGER – LASER RADIATION WHEN OPEN.
AVOID DIRECT EXPOSURE TO BEAM.
Summary of Contents for PDR-509
Page 19: ...PDR 509 19 A B C D 5 6 7 8 5 6 7 8 CDR SERVO AMP MULTI PLEXER A1 5 A4 5 A3 5 A1 5 1 3 5 A ...
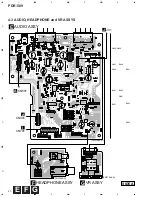
Page 43: ...PDR 509 43 A B C D 5 6 7 8 5 6 7 8 PNP1466 A Q701 Q704 PNP1466 A CN51 J SIDE A SIDE B I ...
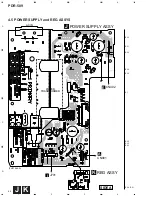
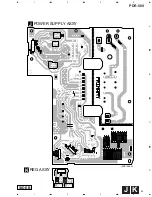
Page 45: ...PDR 509 45 A B C D 1 2 3 4 1 2 3 4 J K PNP1466 A POWER SUPPLY ASSY J REG ASSY K SIDE B ...
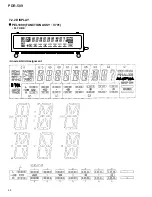
Page 68: ...68 PDR 509 FL TUBE 7 2 2 DISPLAY PEL1099 FUNCTION ASSY V701 Anode Grid Assignment 1 35 ...
Page 69: ...69 PDR 509 Pin Assignment ...
Page 73: ...73 PDR 509 MONITOR DIGITAL REC LEVEL ANALOG REC LEVEL INPUT SELECTOR TIME REPEAT ...

