background image

39

En

7 Additional information

English

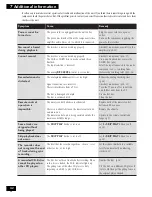
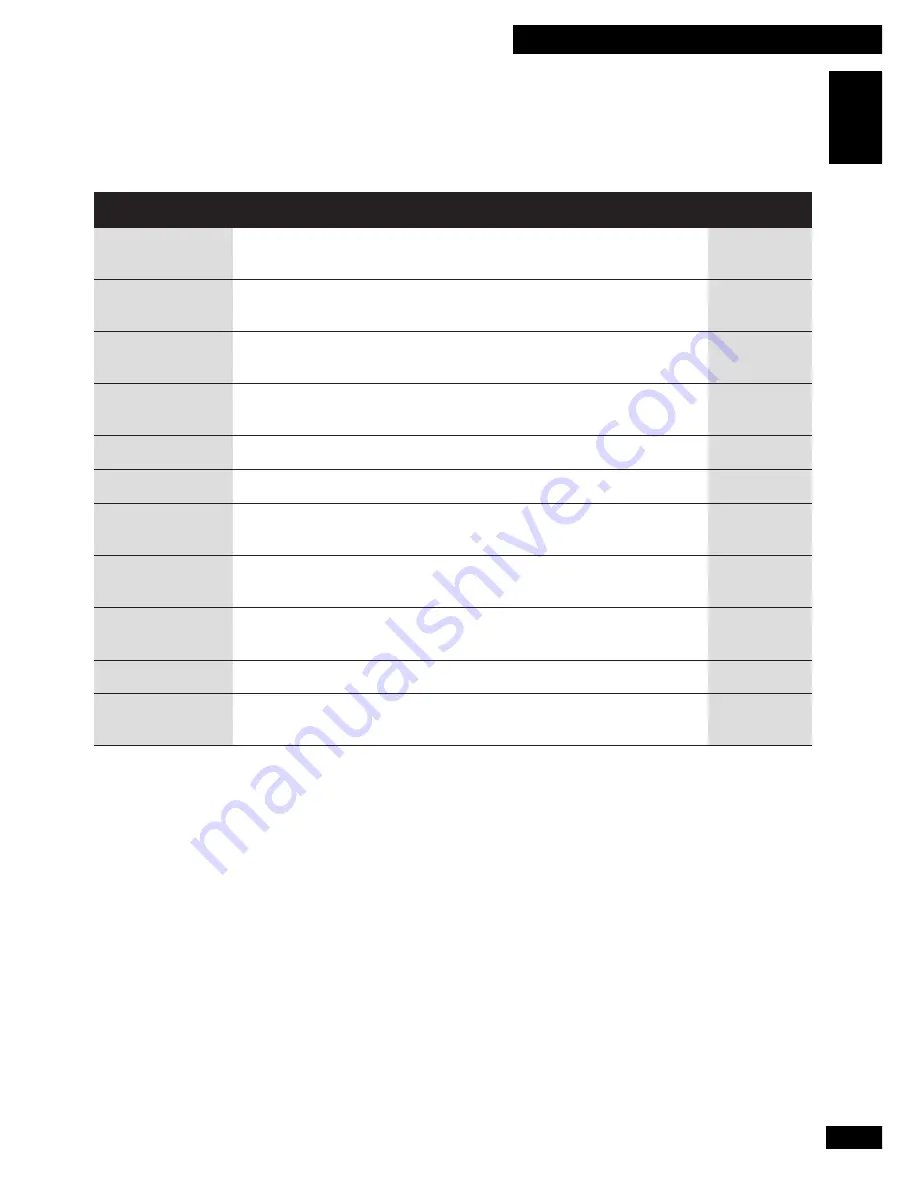
Understanding display messages

Below is a list of messages you’ll see during normal operation of the PDR–609 together with a brief explanation of what they mean.
If you need more information, turn to the page indicated.

Note: 

In the table below, 

**

 indicates a track number.

e

g

a

s

s

e

M

n

o

i

t

p

i

r

c

s

e

D

e

c

n

e

r

e

f

e

R

D

A

E

R

C

O

T

o

t

e

g

a

s

s

e

m

e

h

t

r

o

f

ti

a

W

.

)

s

t

n

e

t

n

o

C

f

o

e

l

b

a

T

(

C

O

T

s

'

c

s

i

d

e

h

t

g

n

i

d

a

e

r

s

i

r

e

d

r

o

c

e

r

e

h

T

.

r

a

e

p

p

a

s

i

d

5

1

.

p

1

C

N

Y

S

e

h

t

n

e

h

w

s

t

r

a

t

s

g

n

i

d

r

o

c

e

R

.

e

d

o

m

g

n

i

d

r

o

c

e

r

l

a

ti

g

i

d

c

it

a

m

o

t

u

a

k

c

a

r

t

-

1

n

i

s

i

ti

n

u

e

h

T

.l

a

n

g

i

s

t

u

p

n

i

e

c

r

u

o

s

l

a

ti

g

i

d

e

h

t

s

t

c

e

t

e

d

r

e

d

r

o

c

e

r

9

1

.

p

L

L

A

C

N

Y

S

e

h

t

n

e

h

w

s

t

r

a

t

s

g

n

i

d

r

o

c

e

R

.

e

d

o

m

g

n

i

d

r

o

c

e

r

l

a

ti

g

i

d

c

it

a

m

o

t

u

a

k

c

a

r

t

-

ll

a

n

i

s

i

ti

n

u

e

h

T

.l

a

n

g

i

s

t

u

p

n

i

e

c

r

u

o

s

l

a

ti

g

i

d

e

h

t

s

t

c

e

t

e

d

r

e

d

r

o

c

e

r

0

2

.

p

C

E

R

A

M

P

r

e

v

e

N

.

)

a

e

r

A

y

r

o

m

e

M

m

a

r

g

o

r

P

(

A

M

P

s

'

c

s

i

d

e

h

t

o

t

a

t

a

d

C

O

T

g

n

it

i

r

w

s

i

r

e

d

r

o

c

e

r

e

h

T

.

g

n

i

w

o

h

s

s

i

y

a

l

p

s

i

d

s

i

h

t

e

li

h

w

r

e

w

o

p

e

h

t

ff

o

n

r

u

t

T

E

S

P

I

K

S

*

*

e

h

t

g

n

i

s

s

e

r

p

y

b

D

I

p

i

k

s

a

t

e

s

o

t

t

n

a

w

u

o

y

t

a

h

t

m

r

if

n

o

C

T

E

S

D

I

P

I

K

S

.

n

o

tt

u

b

9

2

.

p

R

L

C

P

I

K

S

*

*

e

h

t

g

n

i

s

s

e

r

p

y

b

D

I

p

i

k

s

a

t

e

s

o

t

t

n

a

w

u

o

y

t

a

h

t

m

r

if

n

o

C

R

A

E

L

C

D

I

P

I

K

S

.

n

o

tt

u

b

9

2

.

p

?

T

S

A

L

E

S

A

R

E

g

n

i

s

s

e

r

p

y

b

c

s

i

d

W

R

-

D

C

a

f

o

k

c

a

r

t

t

s

a

l

e

h

t

e

s

a

r

e

o

t

t

n

a

w

u

o

y

t

a

h

t

m

r

if

n

o

C

6

(

8

.

)

l

o

r

t

n

o

c

e

t

o

m

e

r

e

h

t

n

o

7

3

.

p

?

L

L

A

E

S

A

R

E

g

n

i

s

s

e

r

p

y

b

c

s

i

d

W

R

-

D

C

a

n

o

s

k

c

a

r

t

ll

a

e

s

a

r

e

o

t

t

n

a

w

u

o

y

t

a

h

t

m

r

if

n

o

C

6

(

8

n

o

.

)

l

o

r

t

n

o

c

e

t

o

m

e

r

e

h

t

7

3

.

p

?

C

O

T

E

S

A

R

E

a

o

t

ti

n

r

u

t

e

r

o

t

c

s

i

d

W

R

-

D

C

d

e

z

il

a

n

if

a

f

o

C

O

T

e

h

t

e

s

a

r

e

o

t

t

n

a

w

u

o

y

t

a

h

t

m

r

if

n

o

C

.

c

s

i

d

e

h

t

n

o

l

a

i

r

e

t

a

m

e

r

o

m

d

r

o

c

e

r

n

a

c

u

o

y

,

s

i

h

t

g

n

i

o

d

r

e

tf

A

.

e

t

a

t

s

d

e

z

il

a

n

if

-

n

o

n

8

3

.

p

?

*

*

*

*

E

S

A

R

E

.

c

s

i

d

W

R

-

D

C

a

n

o

d

e

d

r

o

c

e

r

s

k

c

a

r

t

e

s

a

r

e

o

t

t

n

a

w

u

o

y

t

a

h

t

m

r

if

n

o

C

7

3

.

p

?

E

Z

I

L

A

I

T

I

N

I

g

n

i

s

s

e

r

p

y

b

c

s

i

d

W

R

-

D

C

e

h

t

e

z

il

a

it

i

n

i

-

e

r

o

t

t

n

a

w

u

o

y

t

a

h

t

m

r

if

n

o

C

6

(

8

e

h

t

n

o

.

)

l

o

r

t

n

o

c

e

t

o

m

e

r

8

3

.

p

Summary of Contents for PDR-609

Page 1: ...Operating Instructions COMPACT DISC RECORDER PDR 609 ...

Page 2: ...quirements for the grounding electrode See Figure A LIGHTNING For added protection for this product duringalightningstorm orwhenitisleftunattended and unused for long periods of time unplug it from the wall outlet and disconnect the antenna or cable system This will prevent damage to the product due to lightning and power line surges POWER LINES An outside antenna system should notbelocatedinthevi...

Page 3: ...hen shielded cables and connectors are used to connect the unit to other equipment To prevent electromagnetic interference with electric appliances such as ra dios and televisions use shielded cables and connectors for connections WARNING TO PREVENT FIRE OR SHOCK HAZARD DO NOT EXPOSE THIS APPLIANCE TO RAIN OR MOISTURE For U S model IMPORTANT NOTICE The serial number for this equipment is located i...

Page 4: ...nly the start of your musical enjoyment Now it s time to consider how you can maximize the fun and excitement your equipment offers This manufacturer and the Electronic Industries Association s Consumer Electronics Group want you to get the most out of your equipment by playing it at a safe level One that lets the sound come through loud and clear without annoying blaring or distortion and most im...

Page 5: ...ital signal interruptions 18 Power interruptions 18 Recording one track from a source 19 Recording all tracks from a source 20 Automatically recording and finalizing a disc 21 Manual recording 22 Setting the digital recording level 23 Setting the analog recording level 24 Setting the balance 25 Finalizing a disc 26 5 More Playback Features Programming the track order 27 Clearing the playlist 27 Cl...

Page 6: ... of the PDR 609 CD recorder Create your own audio CDs At last there s a convenient and affordable way to make your own audio CDs Create your own original recordings or put together compilations of your favorite tracks from your existing CDs Other uses include making high quality recordings from radio or satellite broadcasts and making personal copies of CDs MDs etc to keep in the car keeping the o...

Page 7: ...nds of each battery match the indications in the battery compartment Remove batteries from equipment that isn t going to be used for a month or more When disposing of used batteries please comply with governmental regulations or environmental public institution s rules that apply in your country or area Wipe lightly from the center of the disc using straight strokes Don t wipe the disc surface usi...

Page 8: ...the above makers may also be sold under different brand names Storing discs Although CD CD R and CD RW discs are more durable than vinyl records you should still take care to handle and store discs correctly When you re not using a disc return it to its case and store upright Avoid leaving discs in excessively cold humid or hot environments including under direct sunlight When labeling discs use a...

Page 9: ...RW FINALIZE CD RW CD RW Recording Finalization Recordable Erasable Skip ID set clear Plays in ordinary CD player Recordable Erasable Skip ID set clear Plays in ordinary CD player Recordable Erasable Skip ID set clear Plays in ordinary CD player Recordable Erasable Skip ID set clear Plays in ordinary CD player Recordable Erasable Skip ID set clear Plays in ordinary CD player Recordable Erasable Ski...

Page 10: ... the amplifier when using CD text control cords LINE IN DIGITAL IN OPTICAL COAXIAL OPTICAL COAXIAL DIGITAL OUT TEXT CONTROL AC IN IN REC OUT PLAY L R DIGITAL OUT OPTICAL COAXIAL DIGITAL IN OPTICAL COAXIAL CONTROL IN Digital playback component CD MD DAT player etc Digital recording component CD R MD DAT recorder etc Note It is not possible to daisy chain several units together for digital duplicati...

Page 11: ...e wall outlet Next connect this unit to your amplifier receiver using the two sets of supplied audio leads one set for playback the other for recording On the rear panel of your amplifier find an unused set of inputs outputs for a tape md recorder check the instruction manual that came with your amplifier if you re unsure about which terminals to use Using this set up you can make recordings from ...

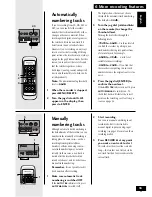
Page 12: ...6 Press to scroll through long names in CD text 3 TIME p 17 Switches the display mode elapsed track time remaining track time total disc playing time etc 4 DISPLAY CHARA p 16 30 Press to switch between display modes disc title artist name track title p 16 and between upper and lower case characters while using CD text p 30 5 MONITOR p 23 25 36 Press to monitor the selected input and display digita...

Page 13: ...l see page 12 9 Playback control p 15 16 19 22 ENTER 3 Press to play or resume playing a disc 1 and Press and hold for fast reverse and fast forward playback and to move cursor position using CD text 7 Press to stop playback or recording ENTER Confirm playback recording menu settings p 16 and characters in CD text p 30 10 ø Press to skip backward index points 11 RANDOM p 28 Press to start random p...

Page 14: ...ing 12 MANU TRK p 34 Lights up when manual track numbering is on during recording TOTAL REMAIN TIME DISC TRACK ARTST FINALIZE SYNC 1 AUTO TRK MANU TRK ANALOG OPTICAL COAXIAL 50 32 18 12 6 2 0 dB OVER TRK INDEX MIN SEC VOL FADER SKIP ON RPT 1 PGM RDM CD TEXT CD RW 3 1 2 45 6 7 8 9 10 1 1 12 13 14 15 16 17 19 18 20 13 SKIP ON p 28 Lights up to indicate that a disc contains skip IDs When setting or c...

Page 15: ...plays Pressing TIME allows you to switch to the disc and track time information displays See page 17 for more on time displays 5 Press 3 to start the disc playing Pressing 6 or the jog dial on the front panel also starts playback 6 To pause playback press 8 or 6 again To resume playback press either 8 again or 3 6 The recorder only remains paused for 10 minutes then it stops 7 To fast reverse or f...

Page 16: ...TE NAME MARK SET CLEAR DISPLAY CHARA 7 1 8 3 4 ABC DEF GHI MNO JKL PQRS TUV WXYZ REC SYNCHRO REPEAT RANDOM NAMECLIP INPUT SELECTER FADER SKIPPLAY SKIPID PROGRAM CHECK CLEAR AUTO MANUAL 1 2 3 4 5 6 7 8 9 10 0 10 SCROLL TIME Î Number buttons ENTER CURSOR MENU DELETE NAME MARK SET CLEAR DISPLAY CHARA 7 1 8 3 4 ABC DEF GHI MNO JKL PQRS TUV WXYZ REC SYNCHRO REPEAT RANDOM NAMECLIP INPUT SELECTER FADER S...

Page 17: ...me available Total disc time and number of tracks O9 45 37 REC 28 23 Although compatible with 80 minute discs the remaining recording time display will not accurately show 80 minutes for blank discs Introduction to CD recording The PDR 609 is designed to let you make extremely high quality digital recordings onto recordable compact discs For flexibility you can use either rewritable discs CD RW or...

Page 18: ... and automatic track numbering The maximum number of tracks on a disc is 99 Digital recording from DAT If you re recording a DAT tape that was recorded using the DAT machine s auto ID function the IDs on the tape are slightly after the beginning of the actual recording This can cause problems for the CD recorder The start of the track may not be recorded The track number will be recorded on the di...

Page 19: ...Record pause no sync Synchro recording will not work if the source is already playing The SYNC 1 indicator will start to blink when the recorder is ready SYNC 1 SYNC 1 CD R The display shows the 1 track sync mode with the SYNC 1 indicator blinking to show that recording can start 4 Play the source The recorder starts recording automati cally 5 The recorder pauses recording after recording one trac...

Page 20: ...6 3 2 Recording all tracks from a source If you want to copy all the tracks from a source use this mode Like the 1 track synchro recording mode the recorder starts and stops automatically When recording from MD or CD you can play the source in either normal play mode or program play if you d like the recorded tracks in a different order to the original We do not recommend recording from a DAT in p...

Page 21: ...ecording can start Note If You want to record CD text information as well press NAME after pressing SYNCHRO The CD TEXT indicator will light 4 Play the source Recording starts automatically If you press SYNCHRO during recording the recorder will finish recording without finalizing the CD R 5 After recording all tracks on the source the recorder starts finalizing the disc After the recorder encount...

Page 22: ...inyl record or from a source with long quiet sections where the recorder may not recognize the end of tracks 1 Load a CD R or CD RW disc Check the display to make sure that there s enough space on the disc for what you want to record 2 Press INPUT SELECTOR to choose an input Pressing INPUT SELECTOR repeatedly switches the active input Analog Optical Coaxial The recorder s display indicates the cur...

Page 23: ...al input has its own level which can be set independently NOTE If you are recording DTS encoded audio CDs or HDCD format CDs the digital recording level must be set to 0 0dB for recording ÛB MONITOR INPUT SELECTOR AUTO MANUAL AUTO MANUAL TRACK NO WRITE TIME FINALIZE ERASE SCROLL 1 DIGITAL REC LEVEL ANALOG REC LEVEL MENU DELETE TEXT SYNCHRO PUSH ENTER R L ANALOG REC BALANCE Legato Link Conversion C...

Page 24: ...the remote control The recorder goes into record pause You can also pressMONITOR 3 Start playing the source 4 Adjust the recording level using the ANALOG REC LEVEL control Don t let the recording level to reach the red OVER indicator 50 32 18 12 6 2 0 OVER The maximum recording level should be in this area When you re happy with the recording level stop the source ANALOG REC LEVEL ÛB MONITOR INPUT...

Page 25: ...However It is generally not necessary to change the balance of a commercially recorded source 1 Press INPUT SELECTOR to choose an input Pressing INPUT SELECTOR repeatedly switches the active input Analog Optical Coaxial The recorder s display indicates the current input 2 Make sure the recorder is stopped then press RECORD REC on the remote control The recorder goes into record pause You can also ...

Page 26: ...ase the disc afterward and reuse it so it s not anything like as final as it is with a CD R disc A finalized CD RW disc can only be played on a CD player that is compatible with CD RW discs at present these are very few Caution Finalization takes a couple of minutes During this time never switch off the power to the unit the disc may become unusable as a result 1 Load the CD R or CD RW you want to...

Page 27: ...if you want to enter another track after you have started playback DIGITAL REC LEVEL ANALOG REC LEVEL MENU DELETE TEXT SYNCHRO PUSH ENTER R L ANALOG REC BALANCE Legato Link Conversion CD TEXT 2 As you program tracks the total running time of the program is displayed here ENTER CURSOR MENU DELETE NAME MARK SET CLEAR DISPLAY CHARA 7 1 8 3 4 ABC DEF GHI MNO JKL PQRS TUV WXYZ REC SYNCHRO REPEAT RANDOM...

Page 28: ...sent on the disc O1 O1 OO OO SKIP ON ENTER CURSOR MENU DELETE NAME MARK SET CLEAR DISPLAY CHARA 7 1 8 3 4 ABC DEF GHI MNO JKL PQRS TUV WXYZ REC SYNCHRO REPEAT RANDOM NAMECLIP INPUT SELECTER FADER SKIPPLAY SKIPID PROGRAM CHECK CLEAR AUTO MANUAL 1 2 3 4 5 6 7 8 9 10 0 10 SCROLL TIME Î FADER REPEAT ENTER CURSOR MENU DELETE NAME MARK SET CLEAR DISPLAY CHARA 7 1 8 3 4 ABC DEF GHI MNO JKL PQRS TUV WXYZ ...

Page 29: ...e s no room left on the disc to record another skip ID the display will show the message FULL DIGITAL REC LEVEL ANALOG REC LEVEL MENU DELETE TEXT SYNCHRO PUSH ENTER R L ANALOG REC BALANCE Legato Link Conversion CD TEXT 2 4 2 ENTER CURSOR MENU DELETE NAME MARK SET CLEAR DISPLAY CHARA 7 1 8 3 4 ABC DEF GHI MNO JKL PQRS TUV WXYZ REC SYNCHRO REPEAT RANDOM NAMECLIP INPUT SELECTER FADER SKIPPLAY SKIPID ...

Page 30: ...WXYZ REC SYNCHRO REPEAT RANDOM NAMECLIP INPUT SELECTER FADER SKIPPLAY SKIPID PROGRAM CHECK CLEAR AUTO MANUAL 1 2 3 4 5 6 7 8 9 10 0 10 SCROLL TIME Î 4 5 6 2 7 7 7 6 3 6 6 DIGITAL REC LEVEL ANALOG REC LEVEL MENU DELETE TEXT SYNCHRO PUSH ENTER R L ANALOG REC BALANCE Legato Link Conversion CD TEXT 6 2 7 3 6 6 Using CD text You can name a CD R or CD RW so that when you load the disc into the player th...

Page 31: ...When an unfinalized CD R containing CD text is loaded this text will automatically return to memory Before finalizing the CD R you can go back and edit the text as many times as you like or until you input CD text for a fourth disc this will erase the oldest information in memory 1 Load the CD R or CD RW you wish to edit 2 Press NAME Choose the name you wish to edit as in steps 1 3 of Using CD tex...

Page 32: ...nother track name the oldest one is deleted from memory 1 Go to the track with the name you want to copy Use one of the usual methods track skip direct selection etc 2 Press NAME CLIP to copy the currently displayed into memory The display should confirm that the track name has been copied You cannot copy the names of commercially recorded discs 3 Go to the track that you want to copy the name to ...

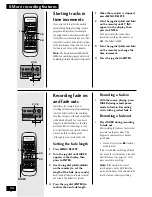
Page 33: ...ns of classical music for example 60dB to 48dB A mid level suitable for most recordings 42dB to 24dB If you find that the recorder is not putting in new track numbers because the original source is too noisy 4 Press the jog dial ENTER to confirm the new level If the AUTO TRK indicator is not lit press AUTO MANUAL to switch it on To check that tracks will start at the correct points on the recordin...

Page 34: ... REC LEVEL MENU DELETE TEXT SYNCHRO PUSH ENTER R L ANALOG REC BALANCE Legato Link Conversion CD TEXT 2 3 4 1 ENTER CURSOR MENU DELETE NAME MARK SET CLEAR DISPLAY CHARA 7 1 8 3 4 ABC DEF GHI MNO JKL PQRS TUV WXYZ REC SYNCHRO REPEAT RANDOM NAMECLIP INPUT SELECTER FADER SKIPPLAY SKIPID PROGRAM CHECK CLEAR AUTO MANUAL 1 2 3 4 5 6 7 8 9 10 0 10 SCROLL TIME Î 2 3 2 4 1 1 When the recorder is stopped pre...

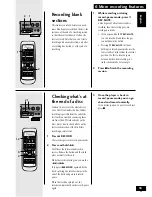
Page 35: ...uted section only after a recording has started or at the end of a recording Checking what s at the end of a disc You don t have to record a whole disc at once Until you finalize the disc further recording is possible from the end of the last track you recorded assuming there are fewer than 99 tracks already on the disc Here s how to check what s on the last recorded section of the disc before rec...

Page 36: ...n selected the TRACK indicator will light for 2 seconds at track start points See Automatically numbering tracks on page 33 if you find the recorder can t recognize the gaps between tracks When monitoring through a digital output you cannot hear changes you make in the recording level or balance 3 To switch off monitoring press MONITOR again The monitor indicator switches off ÛB MONITOR INPUT SELE...

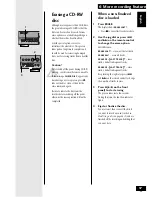
Page 37: ...loaded 1 Press ERASE The display shows ERASE LAST Press 7 to cancel last track erase here 2 Use the jog dial or press 4 and on the remote control to change the erase option Switch between ERASE LAST erase just the last track ERASE ALL erase all tracks ERASE 02 LAST TRACK erase track 2 and all subsequent tracks ERASE 03 LAST TRACK erase track 3 and all subsequent tracks Keep turning the jog dial or...

Page 38: ... want to record any new tracks Reinitializing a disc 1 Press and hold ERASE for about four seconds The recorder prompts you to confirm with the message INITIALIZE Press 7 to cancel all disc erase here 2 Press 8 6 on the front panel to start erasing The process takes about 40 minutes depending on the disc During this time the display shows ERASE followed by the remaining time to completion You can ...

Page 39: ...i t i r w s i r e d r o c e r e h T g n i w o h s s i y a l p s i d s i h t e l i h w r e w o p e h t f f o n r u t T E S P I K S e h t g n i s s e r p y b D I p i k s a t e s o t t n a w u o y t a h t m r i f n o C T E S D I P I K S n o t t u b 9 2 p R L C P I K S e h t g n i s s e r p y b D I p i k s a t e s o t t n a w u o y t a h t m r i f n o C R A E L C D I P I K S n o t t u b 9 2 p T S A L ...

Page 40: ...r r u c c o r o r r e m e t s y s A r o e s i o n o t e u d s p a h r e p y t i c i r t c e l e c i t a t s d e y a l p s i d s i e g a s s e m e m a s e h t f I n i a g a n i t i g u l p d n a d r o c r e w o p e h t g u l p n U r e t n e c e c i v r e s d e z i r o h t u a r e e n o i P a t c a t n o c e s a e l p n i a g a Troubleshooting Below is a list of messages mainly related to playback a...

Page 41: ... e h t o t n o n o i t a m r o f n i e l i h W R I A P E R e h t s e n i m a x e y l l a c i t a m o t u a r e d r o c e r e h t d e y a l p s i d s i g n i d r o c e r d n a s r e b m u n k c a r t e h t s e t a d p u d n a c s i d e h t f o a e r a d e d r o c e r c s i d d e d r o c e r y l l u f a r o f s e t u n i m 0 4 t u o b a s e k a t s s e c o r p s i h T a t a d e m i t e h t e c n o e...

Page 42: ...r o c e r g o l a n a e h t e c u d e R 4 2 p 1 1 0 1 p s n o i t c e n n o c l l a k c e h C s i h t l l a t s n i r o f f o r e w o p V T e h t n r u T V T e h t m o r f y a w a r e h t r u f t i n u c s i d r e h t o n a e s U c s i d e h t n a e l C l o r t n o c e t o m e R s i n o i t a r e p o e l b i s s o p m i d e t s u a h x e e r a s e i r e t t a b l o r t n o c e t o m e r e h T t i ...

Page 43: ...dB Recording S N 92 dB Recording dynamic range 92 dB Recording total harmonic distortion 0 005 EIAJ U S and Canadian models 0 004 EIAJ U K model Output voltage 2 V Wow flutter Less than measurement limit 0 001 W PEAK EIAJ Number of channels 2 channels stereo Digital output Coaxial output 0 5 Vp p 20 75 Ω Optical output 15 to 21 dBm wavelength 660 nm Frequency deflection Level 2 standard mode Recor...

Page 44: ...A and you wish to locate the nearest Pioneer Authorized Independent Service Company or if you wish to purchase replacement parts operating instructions service manuals or accessories please call the number shown below Si ce produit doit être réparé au Canada veuillez vous adresser à un distributeur autorisée Pioneer au Canada pour obtenir le nom de la Société de Service Autorisée Pioneer le plus p...

Reviews: