50
5
Projection Screen Kit (RMS-V4011/V5011)
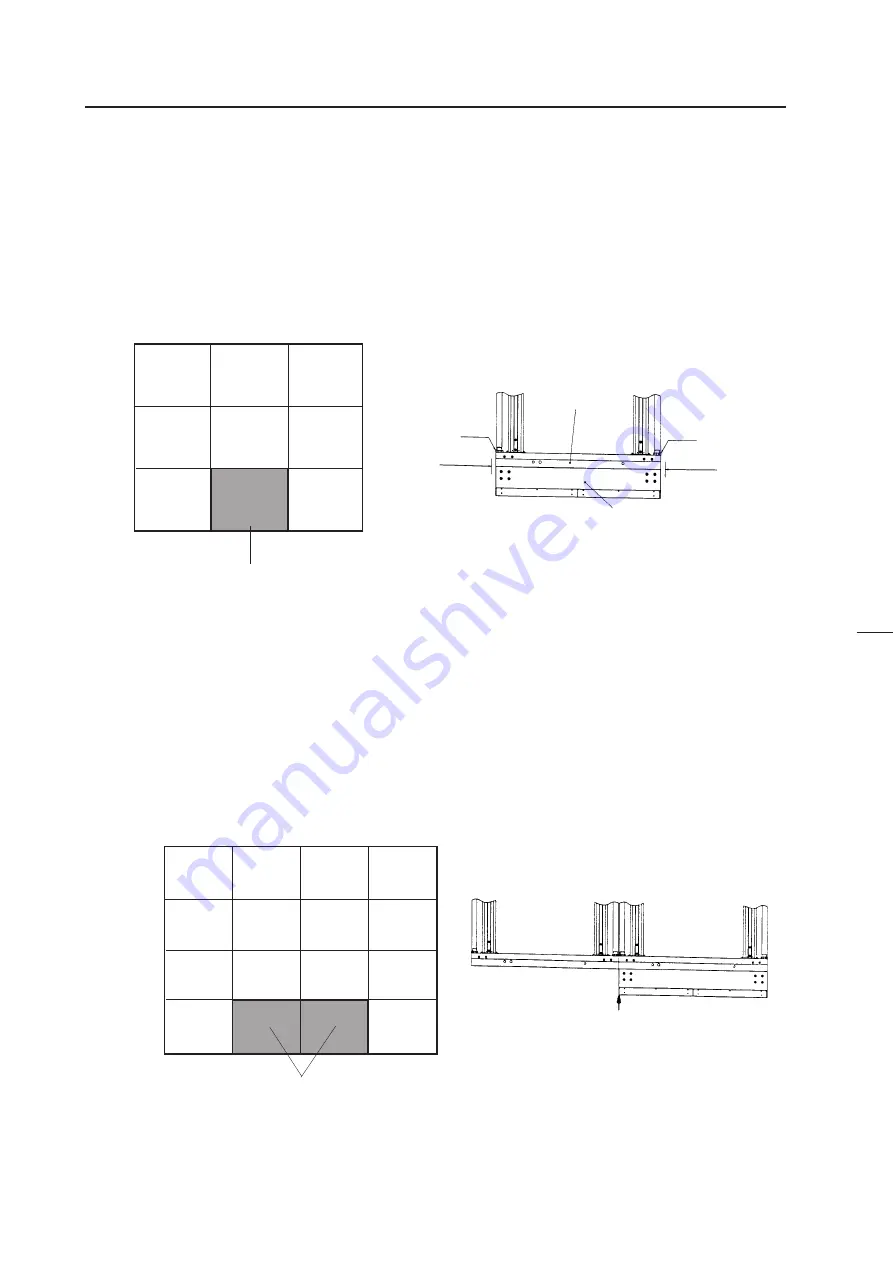
[1] Mount the screen unit serving as the reference. Basically, mount from the center unit at the bottom.
a
If the number of units arranged are odd (E.g.: 3
×
3=9 screens)
• Adjust the screen unit to the cabinet at the center of the bottom level and temporarily tighten the linking bolts. (Do not
tighten tightly.)
• Adjust the left and right balance with your hand and tighten the linking bolts tightly so that the two centers coincide.
Reference Unit
Top view
Linking bolt
Linking bolt
Adjust the left and
right balance with
your hand.
Adjust the left and
right balance with
your hand.
(Fig. 3-34)
b
If the number of units arranged are even (E.g.: 4
×
4=16 screens)
• Adjust the screen unit to the right cabinet (or left cabinet) at the center two cabinets of the bottom level and temporarily
tighten the linking bolts. (Do not tighten tightly.)
• Adjust the left side of the screen unit attached and left side of the cabinet (rights sides if the screen unit was attached to the
left cabinet at the center) so that they are aligned precisely with your hand, and tighten the linking bolts.
• Join the left side (or right side) screen unit to the unit mounted first as closely as possible.
(Fig.3-35)
Reference Unit
Projection screen
Projection Frame
Adjust so that they are aligned precisely
INSTALLATION AND ASSEMBLY
Summary of Contents for RM-V2400NA
Page 4: ......
Page 5: ......
Page 6: ......
Page 7: ......
Page 8: ...7 Dimensions GENERAL SPECIFICATIONS Fig 2 1 540 545 490 40 380 ...
Page 11: ......
Page 12: ......
Page 13: ......
Page 16: ......
Page 17: ......
Page 18: ......
Page 19: ......
Page 24: ......
Page 25: ......
Page 26: ......
Page 27: ......
Page 28: ......
Page 29: ......
Page 32: ......
Page 33: ......
Page 34: ......
Page 35: ......
Page 36: ......
Page 45: ......
Page 48: ......
Page 54: ......
Page 59: ......
Page 63: ......
Page 64: ......
Page 66: ......
Page 74: ......
Page 76: ...75 ADJUSTMENTS ...
Page 77: ...76 ADJUSTMENTS ...
Page 79: ...78 ADJUSTMENTS Movement on screen Displayed OSD ...
Page 80: ...79 ADJUSTMENTS ...
Page 81: ...80 ADJUSTMENTS ...
Page 82: ...81 ADJUSTMENTS ...
Page 83: ...82 ADJUSTMENTS ...
Page 85: ......
Page 86: ......
Page 90: ......
Page 91: ......
Page 92: ......
Page 95: ......
Page 96: ......
Page 98: ......
Page 99: ......
Page 100: ......
Page 101: ......
Page 102: ......
Page 103: ......
Page 104: ......
Page 105: ......
Page 108: ......
Page 110: ......
Page 111: ......
Page 112: ......
Page 114: ......
Page 117: ......
Page 118: ......
Page 121: ......
Page 124: ......
Page 127: ......
Page 129: ......
Page 132: ......
Page 134: ......
Page 135: ......
Page 136: ......
Page 137: ......
Page 138: ......
Page 139: ......
Page 140: ......
Page 141: ......
Page 142: ......


