background image

3

En

CABINET MAINTENANCE

Use a polishing cloth or dry cloth to wipe off dust and dirt.

When the cabinet is very dirty, clean with a soft cloth 

dipped in some neutral cleanser diluted five or six times 

with water, and then wipe again with a dry cloth. Do not 

use furniture wax or cleaners.

Never use thinners, benzine, insecticide sprays and other 

chemicals on or near the cabinets, since these will 

corrode the surfaces.

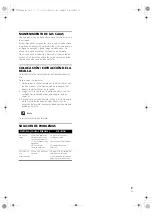
ATTACHING / DETATCHING THE GRILLE

The front grille of this speaker system is removable. 

Proceed as follows:

1.  To detatch the grille, grab it by its bottom with both 

hands and toward you to separate the bottom part of 
the grille from the speaker.

2.  Next, grab the top part of the grille and gently pull it 

toward you to remove the top portion.

3.  To replace the grille, align the holes in the front of the 

speaker’s corners with the projections on the grille, 
and push each of the corners into place.

The side grille is not removable.

TROUBLESHOOTING

Symptom Possible cause

Remedy

No sound

• Bad speaker cord or 
connection.
• Amplifier is off.
• Volume control is at zero.

• Connect correctly or 
replace cord.
• Turn on amplifier.
• Slowly turn up volume.

Sound is 
distorted.

• Extreme signal condition. • Turn down the 

amplifier’s output level 
(volume, bass control, 
bass boost) to lower the 
level.

S-ESR2-LR.fm  3 ページ  2011年4月13日 水曜日 午後4時42分

Summary of Contents for S-ESR2-LR

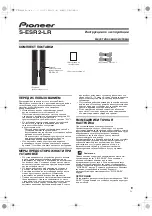
Page 1: ... system is magnetically shielded However depending on the installation location color distortion may occur if the speaker system is installed extremely close to the screen of a television set If this happens turn off the television then turn it on again after 15 min to 30 min If the problem persists place the speaker system away from the television set Do not install your speakers overhead on the ...

Page 2: ...ack terminal as shown below SECURING THE FRONT SPEAKERS Pass a commercially available reinforced string through the plastic catch to securely support the speaker to the wall Be sure that the wall to which you fasten the speaker is strong enough to support the weight of the speaker After fastening the speaker make sure that it does not fall over The speaker can incur damage in the event of a fall D...

Page 3: ... bottom with both hands and toward you to separate the bottom part of the grille from the speaker 2 Next grab the top part of the grille and gently pull it toward you to remove the top portion 3 To replace the grille align the holes in the front of the speaker s corners with the projections on the grille and push each of the corners into place The side grille is not removable TROUBLESHOOTING Sympt...

Page 4: ...t to dispose this product do not mix it with general household waste There is a separate collection system for used electronic products in accordance with legislation that requires proper treatment recovery and recycling Private households in the member states of the EU in Switzerland and Norway may return their used electronic products free of charge to designated collection facilities or to a re...

Page 5: ...ugar de instalación pueden producirse distorsiones de color en la pantalla del televisor si los sistemas de altavoces están cerca de él Si así sucede apague el televisor y vuélvalo a encender después de 15 minutos a 30 minutos Si el problema persiste aparte del televisor el sistema del altavoz No instale los altavoces en el techo o en los muros por encima de la altura de la cabeza La rejilla está ...

Page 6: ...terminal rojo y el otro cable en el terminal negro como se muestra a continuación FIJACIÓN SEGURA DE LOS ALTAVOCES DELANTEROS Pase una cuerda reforzada de venta en los establecimientos del ramo por el fijador de plástico para sostener con seguridad el altavoz en la pared Asegúrese de que la pared en la que fija el altavoz tenga suficiente resistencia para soportar el peso del altavoz Después de fi...

Page 7: ...a separar del altavoz la parte inferior de la rejilla 2 Luego tome la rejilla por la parte superior y tire con cuidado hacia usted para que se separe la parte superior 3 Para volver a colocar la rejilla alinee los orificios de la parte frontal de las esquinas del altavoz con los salientes de la rejilla y empuje cada esquina para que quede en su sitio La rejilla lateral no es extraíble SOLUCIÓN DE ...

Page 8: ... generales de su hogar De conformidad con la legislación vigente existe un sistema de recogida distinto para los productos electrónicos que requieren un procedimiento adecuado de tratamiento recuperación y reciclado Las viviendas privadas en los estados miembros de la UE en Suiza y Noruega pueden devolver gratuitamente sus productos electrónicos usados en las instalaciones de recolección previstas...

Page 9: ...стема установлена слишком близко к экрану телевизора это может вызывать появление цветовых искажений Если это произойдет выключите телевизор и включите его снова через 15 30 минут Если проблема сохранится переместите акустическую систему подальше от телевизора Не устанавливайте динамики над головой на потолке или на стене Поскольку решетка является съемной по конструкции при установке над головой ...

Page 10: ...ано ниже за более подробной информацией обращайтесь к руководству по эксплуатации усилителя После подсоединения штепселей слегка потяните за кабели чтобы убедиться в том что концы кабелей надежно закреплены в контактных разъемах Плохой контакт может стать причиной появления шумов и пропадания звука Выполните подсоединение к контактным разъемам в задней части громкоговорителей Отвинтите головки раз...

Page 11: ...ухой тканью Не используйте полироль и моющие средства для мебели Никогда не используйте для ухода за этим корпусом и рядом с ним разбавители бензин инсектицидные аэрозоли и другие химические вещества так как они могут повредить поверхности УСТАНОВКА СНЯТИЕ РЕШЕТКИ Передняя решетка этой акустической системы является съемной Выполняйте следующую процедуру 1 Чтобы снять решетку возьмите ее обеими рук...

Page 12: ...следующую продолжительность срока службы официально поставляемых на Российский рынок товаров Аудио и видеооборудование 7 лет Переносное аудиооборудование 6 лет Другое оборудование наушники микрофон и т д 5 лет Автомобильная электроника 6 лет D3 7 10 6_A1_Ru Если вы желаете утилизировать данное изделие не выбрасывайте его вместе с обычным бытовым мусором Существует отдельная система сбора использов...

Page 13: ...在不穩定的平面上會導致危險 請務必將 其放在平坦 堅實的平面上 本揚聲器系統帶有磁性遮罩 但根據設置的位置 揚聲器系統極端靠近電視機組時 可能發生彩色失 真 發生這種情況時 請關斷電源之後 經過 15 分鐘至 30 分鐘才重新打開電源 如果還繼續發生這種現象 請將揚聲器系統離開電視機的位置放置 請勿於天花板或牆壁上安裝揚聲器 格柵的設計為 可拆卸式 若安裝在上方位置 可能會因掉落而造 成裝置受損或人員受傷 請勿在揚聲器上方放置重物或大型物體 這麼做可 能會導致揚聲器傾倒 造成受損或人員受傷 位置擺設及調整 為了產生最佳效果 揚聲器應置於接近耳朵的高度 且 揚聲器應分別置於與聆聽距離相近的同等距離上 將揚 聲器的角度往內面向聆聽者 將可有助於改善非居中聆 聽者的音像穩定性 而靠近一邊或後方牆壁則可有助於 提高中度低音的效能 但太過靠近 尤其角落的位 置 低音則會異常過高且音像品質可能會降低 ...

Page 14: ...連接至揚聲器背面的揚聲器端子 鬆開揚聲器的端子 然後如下所示將條紋的揚聲器 接線插入紅色 正極端子 將其他接線插入黑色 負極端子 固定前置揚聲器 將市售支撐細繩穿過塑膠扣鉤 以支撐牆上的揚聲 器 請務必確認支撐揚聲器的牆壁有足夠的強度承 受揚聲器的重量 揚聲器緊固後 請確認它不會掉 落 掉落時 揚聲器會導致損壞 請勿直接在牆上安裝塑膠扣鉤 它只能用於連接增 強繩以防止揚聲器落下 如上圖所示 將支撐細繩穿過塑膠扣鉤並綁緊 然後再 將揚聲器固定在牆壁上 備註 若不確定牆壁材質及強度 請向專業人士洽詢相關 資訊 Pioneer 對於因安裝不當而導致之意外或損壞 概不 負責 ѿᕘᙔ Ѣᕘᙔ Ϝဋ २մॲ Ȟґᓎߤȟ ѿࠊဋ Ѣࠊဋ ರ ဋ ݨ ཏ ඵᖑᏣᆓφழԥԥড় ޠ ႬᔇȄഀ௦ ܗ ϹᘟႬྜጤਣȂ ᗘռដႬϟॴᓏȂ Ӷ௦ដӉեґ๙ጣഌϸࠊӒ Ⴌྜ ϹᘟȄ D3 4 2 2 3_A1_Zhtw ...

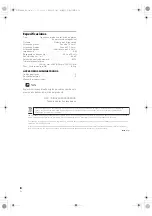
Page 15: ...角落推至定位即可 備註 側格柵是不能拆卸的 疑難排解 規格 外箱 低音反射落地型 防磁 系統 3 way 系統 低音 16 cm 圓錐體型 x1 中距離揚聲器 7 7 cm 圓錐體型 x1 高音 2 6 cm 半圓頂型 x1 額定阻抗 8 Ω 頻率範圍 40 Hz 至 30 kHz 靈敏度 1m 1w 80 dB 最大輸入功率 150 W 尺寸 160 mm 寬 x 983 mm 高 x 234 mm 深 重量 包括格柵 8 0 kg 配件 揚聲器線 2 前格柵 2 操作手冊 備註 如因改良使以致規格及設計有所變動 恕不另行通知 問題現象 可能原因 解決辦法 沒有聲音 揚聲器線品質不良或連接 不當 擴大機關閉 音量控制調至零的位置 正確連接或更換導線 打開擴大機 慢慢將音量調高 聲音失真 信號條件過度 調低擴大機的輸出位準 音量 低音控制 低 音增量 以降低該信 號位準 3122 СҐӒᎣ...

Page 16: ... 800 421 1404 PIONEER ELECTRONICS OF CANADA INC 300 Allstate Parkway Markham Ontario L3R 0P2 Canada TEL 1 877 283 5901 905 479 4411 PIONEER EUROPE NV Haven 1087 Keetberglaan 1 B 9120 Melsele Belgium TEL 03 570 05 11 PIONEER ELECTRONICS ASIACENTRE PTE LTD 253 Alexandra Road 04 01 Singapore 159936 TEL 65 6472 7555 PIONEER ELECTRONICS AUSTRALIA PTY LTD 5 Arco Lane Heatherton Victoria 3202 Australia T...

Reviews: