background image

91

11

The Advanced MCACC menu

Manual MCACC setup

You can use the settings in the 

Manual MCACC

 setup menu to make detailed adjustments when you’re more 

familiar with the system. Before making these settings, you should have already completed 

Automatically con-

ducting optimum sound tuning (Full Auto MCACC)

 on 

page 45

.

You only need to make these settings once (unless you change the placement of your current speaker system or 
add new speakers).

 CAUTION

!

  The test tones used in the 

Manual MCACC

 setup are output at high volume.

 Important

!

  Press the 

MCACC

 button while the pertinent setup screens are displayed to select MCACC presets.

!

  For some of the settings below, you’ll have to connect the setup microphone to the front panel and place it 

about ear level at your normal listening position. Press 

HOME MENU

 to display the 

Home Menu

 before you 

connect the microphone to this receiver.

!

 See 

Problems when using the Auto MCACC Setup

 on 

page 46

 for notes regarding high background noise 

levels and other possible interference.

!

  If you’re using a subwoofer, switch it on and turn up the volume to the middle position.

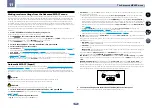
1  Select ‘Manual MCACC’ from the Advanced MCACC menu.

See 

Making receiver settings from the Advanced MCACC menu

 on 

page 89

 if you’re not already at this screen.

2  Select the setting you want to adjust.

If you’re doing this for the first time, you might want to make these settings in order.

!


Fine Channel Level

 – Make fine adjustments to the overall balance of your speaker system (see 

Fine Channel 

Level

 on 

page 91

).

!


Fine SP Distance

 – Make precise delay settings for your speaker system (see 

Fine Speaker Distance

 on 

page 

91

).

!


Standing Wave

 – Control overly resonant low frequencies in your listening room (see 

Standing Wave

 on 

page 92

).

The last two settings are specifically for customizing the parameters explained in 

Acoustic Calibration EQ Adjust


on 

page 92

:

!


EQ Adjust

 – Manually adjust the frequency balance of your speaker system while listening to test tones (see 

Acoustic Calibration EQ Adjust

 on 

page 92

).

!


EQ Professional

 – Calibrate your system based on the direct sound coming from the speakers and make 

detailed settings according to your room’s reverb characteristics (see 

Acoustic Calibration EQ Professional


on 

page 92

).

!


Precision Distance


(SC-LX86 only)

 – Fine-adjusting the positions of the speakers (see 

Precision Distance

 on 

page 93

).

Fine Channel Level

!

  Default setting: 

0.0dB

 (all channels)

You can achieve better surround sound by properly adjusting the overall balance of your speaker system. You can 
adjust the Channel Level of each speaker in 0.5 dB increments. The following setting can help you make detailed 
adjustments that you may not achieve using the 

Manual speaker setup

 on 

page 97

.

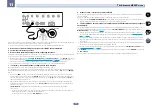
1  Select ‘Fine Channel Level’ from the Manual MCACC setup menu.

The volume increases to the 0.0 dB reference level.

2  Adjust the level of the left channel.

This will be the reference speaker level, so you may want to keep the level around 

0.0dB

 so that you’ll have plenty 

of room to adjust the other speaker levels.

!

  After pressing 

ENTER

, test tones will be output.

3  Select each channel in turn and adjust the levels (+/–12.0 dB) as necessary.

Use 

k

/

l

 to adjust the volume of the speaker you selected to match the reference speaker. When it sounds like 

both tones are the same volume, press 

j

 to confirm and continue to the next channel.

!

  For comparison purposes, the reference speaker will change depending on which speaker you select.

!

  If you want to go back and adjust a channel, simply use 

i

/

j

 to select it.

4  When you’re finished, press RETURN.

You will return to the 

Manual MCACC

 setup menu.

Fine Speaker Distance

!

  Default setting: 

3.00m

 (all speakers)

For proper sound depth and separation with your system, it is necessary to add a slight bit of delay to some 
speakers so that all sounds will arrive at the listening position at the same time. You can adjust the distance of 
each speaker in 1 cm increments. The following setting can help you make detailed adjustments that you may not 
achieve using the 

Manual speaker setup

 on 

page 97

.

1  Select ‘Fine SP Distance’ from the Manual MCACC setup menu.
2  Adjust the distance of the left channel from the listening position.
3  Select each channel in turn and adjust the distance as necessary.

Use 

k

/

l

 to adjust the delay of the speaker you selected to match the reference speaker.

Listen to the reference speaker and use it to measure the target channel. From the listening position, face the two 
speakers with your arms outstretched pointing at each speaker. Try to make the two tones sound as if they are 
arriving simultaneously at a position slightly in front of you and between your arm span.

!

  If you can’t seem to achieve this by adjusting the distance setting, you may need to change the angle of your 

speakers very slightly.

!

  The subwoofer’s test tone differs in tone from other channels. Adjust so that the sound of the subwoofer can 

be heard distinctly. Note that when adjusting the subwoofer, depending on the low frequency response of 
your speaker, it may be difficult to hear the change even when the setting is increased or decreased or when 
the position of the speaker is changed. Note that it may be difficult to compare this tone with the other speak-
ers in your setup (depending on the low frequency response of the reference speaker).

When it sounds like the delay settings are matched up, press 

j

 to confirm and continue to the next channel.

!

  For comparison purposes, the reference speaker will change depending on which speaker you select.

!

  If you want to go back and adjust a channel, simply use 

i

/

j

 to select it.

4  When you’re finished, press RETURN.

You will return to the 

Manual MCACC

 setup menu.
Summary of Contents for sc-lx76

Page 1: ...Operating Instructions AV Receiver SC LX76 SC LX86 ...

Page 2: ... 4 2 1 7b _A1_En Operating Environment Operating environment temperature and humidity 5 C to 35 C 41 F to 95 F less than 85 RH cooling vents not blocked Do not install this unit in a poorly ventilated area or in locations exposed to high humidity or direct sunlight or strong artificial light D3 4 2 1 7c _A1_En If the AC plug of this unit does not match the AC outlet you want to use the plug must b...

Page 3: ...N 42 Connecting an IR receiver 42 Switching components on and off using the 12 volt trigger 43 Plugging in the receiver 43 04 Basic Setup Changing the OSD display language OSD Language 45 Changing the TV format setting 45 Changing the frequency step 45 Automatically conducting optimum sound tuning Full Auto MCACC 45 The Input Setup menu 47 Operation Mode Setup 48 About the Home Menu 48 05 Basic pl...

Page 4: ...p menus Making receiver settings from the System Setup menu 97 Manual speaker setup 97 Network Setup menu 99 Checking the Network Information 100 The Other Setup menu 101 MHL Setup 103 13 FAQ Troubleshooting 105 Power 105 No sound 105 Other audio problems 106 ADAPTER PORT terminal 107 Video 107 Settings 107 Professional Calibration EQ graphical output 108 Display 108 Remote control 109 HDMI 109 AV...

Page 5: ... Bi amping connection High quality surround j 3 Connecting the speakers Placing the speakers on page 22 Connecting the speakers on page 22 Installing your speaker system on page 24 Bi amping your speakers on page 23 j 4 Connecting the components About the audio connection on page 29 About the video converter on page 29 Connecting your TV and playback components on page 30 Connecting AM FM antennas...

Page 6: ...ly sold Bluetooth ADAPTER and wireless LAN converter 7 Our philosophy 7 Features 7 Installing the receiver 8 Loading the batteries 8 Operating range of remote control unit 9 Selecting the OSD character set 9 About using AVNavigator included CD ROM 9 Before you start ...

Page 7: ...n easily enjoy your iTunes music in any room in the house Air Jam App compatible For the SC LX86 and SC LX76 the optional AS BT200 Bluetooth adapter works together with Pioneer s exclusive Air Jam application Available free App in App Store and Android Market Air Jam allows up to 4 iPhone iPod touch iPad or Android devices to share music and create a group playlist for a unique and fun social musi...

Page 8: ...luetooth ADAPTER AS BT100 or AS BT200 lets you enjoy music files on an iPhone or other Bluetooth wireless technology device wirelessly Auto Sound Retriever The Auto Sound Retriever feature employs DSP technology to restore sound pressure and smooth jagged arti facts left over after compression Easy setup using Advanced MCACC The Auto MCACC Setup provides a quick but accurate surround sound setup w...

Page 9: ...sociation with the receiver updating of various types of software and MCACC Application that lets you check the MCACC measurement results on 3D graphs Installing AVNavigator 1 Load the included CD ROM into your computer s CD drive The CD ROM s top menu screen appears 2 Click Install AVNavigator from the CD ROM top menu 3 Follow the instructions on the screen to install When Finish is selected inst...

Page 10: ...ions Interactive Manual Automatically displays the pages explaining the functions that have been operated on the receiver It is also possible to operate the receiver from the Interactive Manual Glossary Displays glossary pages MCACC Appli Displays Advanced MCACC measurement results vividly on the computer There are special operating instructions for MCACC Application These instructions are include...

Page 11: ...11 Remote control 12 Display 14 Front panel 15 Controls and displays ...

Page 12: ...DARD Press for Standard decoding and to switch various modes 2 Pro Logic Neo X etc page 58 ADV SURR Use to switch between the various surround modes page 59 THX Press to select a Home THX listening mode page 59 SIGNAL SEL Use to select an input signal page 60 MCACC Press to switch between MCACC presets page 60 CH LEVEL Press repeatedly to select a channel then use k l to adjust the level page 98 A...

Page 13: ...ntrol the receiver used to select the white commands Switch to perform operations in the main zone Also use this button to set up surround sound 13 VOLUME Use to set the listening volume 14 MUTE Mutes the sound or restores the sound if it has been muted adjusting the volume also restores the sound 15 LIGHT Press to turn on off the illumination for the buttons The way the buttons light can be selec...

Page 14: ... switched on page 61 6 Listening mode indicators AUTO SURROUND Lights when the Auto Surround feature is switched on page 58 ALC Lights when the ALC Auto level control mode is selected page 58 STREAM DIRECT Lights when Direct Pure Direct is selected page 60 ADV SURROUND Lights when one of the Advanced Surround modes has been selected page 59 STANDARD Lights when one of the Standard Surround modes i...

Page 15: ...AUDIO PARAMETER Use to access the Audio options page 73 9 i j k l TUNE PRESET ENTER Use the arrow buttons when setting up your Home Menu Use TUNE i j to find radio frequencies and use PRESET k l to find preset stations page 54 10 VIDEO PARAMETER Use to access the Video options page 75 11 MULTI ZONE controls If you ve made MULTI ZONE connections page 37 use these controls to control the sub zone fr...

Page 16: ...ols and displays 21 HDMI input MHL connector Use for connection to a compatible HDMI device Video camera etc page 41 An MHL compatible mobile device can also be connected here using the included MHL cable page 41 ...

Page 17: ...nnecting other audio components 35 Connecting additional amplifiers 35 Connecting the multichannel analog inputs 36 Connecting AM FM antennas 36 MULTI ZONE setup 37 Connecting to the network through LAN interface 40 Connecting optional Bluetooth ADAPTER 40 Connecting an iPod 40 Connecting a USB device 41 Connecting an MHL compatible device 41 Connecting an HDMI equipped component to the front pane...

Page 18: ... IN 2 DVR BDR IN 1 DVD IN 2 SAT CBL IN 1 DVD IN 3 VIDEO IN 2 DVR BDR IN 6 IN 7 USB DAC IN OUT 220 230 V 240 V VOLTAGE SELECTOR SC LX76 OUT IN AC IN BD IN ZONE 4 OUT LAN 10 100 OUT 2 OUT 1 DC OUTPUT forWIRELESSLAN OUTPUT 5V 0 6 AMAX OUTPUT5V 150 mAMAX OUTPUT12V TOTAL150 mAMAX OUTPUT5V 0 1 AMAX OPTICAL COAXIAL ASSIGNABLE ASSIGNABLE ASSIGNABLE ASSIGN ABLE ADAPTERPORT VIDEO AUDIO SUBWOOFER SUBWOOFER 1...

Page 19: ...ront height Front wide connection Default setting Speaker System setting 9 1ch FH FW FWR FWL SL L FHL SW 2 SW 1 C R FHR SR SBL SBR A 9 2 ch surround system connects the left and right front speakers L R the center speaker C the left and right front height speakers FHL FHR the left and right front wide speakers FWL FWR the left and right surround speakers SL SR the left and right surround back spea...

Page 20: ... To achieve 7 2 channel playback using the surround back channels with ZONE 2 connections see D It is not possible to produce sound simultaneously from the front height speakers and the front wide speakers The speakers from which sound is output can be switched using the SPEAKERS button For details see Switching the speaker terminals on page 77 L R Main zone Sub zone ZONE 2 L R C SW 1 SW 2 FWR FWL...

Page 21: ...gh sound quality with 5 2 channel surround sound L R SL SR Front Bi Amp Surround Bi Amp SW 1 SW 2 C J 5 2 channel surround system Front and Center Bi amping connection High quality surround Speaker System setting 5 1ch F C Bi Amp Bi amping connection of the front and center speakers for high sound quality with 5 2 channel surround sound L R SL SR Front Bi Amp Center Bi Amp SW 1 SW 2 C Other speake...

Page 22: ...nt left and right speakers It is best to angle the speakers towards the listening position The angle depends on the size of the room Use less of an angle for bigger rooms Surround and surround back speakers should be positioned 60 cm to 90 cm higher than your ears and tilted slightly downward Make sure the speakers don t face each other For DVD Audio the speakers should be more directly behind the...

Page 23: ...t speakers with both High and Low terminals have two metal plates that connect the High to the Low terminals These must be removed when you are bi amping the speakers or you could severely damage the amplifier See your speaker manual for more information If your speakers have a removable crossover network make sure you do not remove it for bi amping Doing so may damage your speakers Bi wiring your...

Page 24: ...D BACK FRONT HEIGHT FRONTWIDE B R L R L R L R L R L LINELEVEL INPUT LINELEVEL INPUT Front height left Front height right Front wide left Front wide right Front left Front right Center Subwoofer 2 Subwoofer 1 Surround left Surround back right Surround back left Surround right B 7 2 channel surround system Speaker B connection Select 7 1ch Speaker B from the Speaker System menu See Speaker system se...

Page 25: ...ont right Bi amp compatible speaker Front left Center Subwoofer 2 Subwoofer 1 Surround left Surround back right Surround back left Surround right D 7 2 channel surround system Surround back ZONE 2 connection Multi Zone Select 7 1ch ZONE 2 from the Speaker System menu See Speaker system setting on page 97 to do this When only connecting one surround back speaker connect it to the SURROUND BACK L Si...

Page 26: ...t left Front right Center Subwoofer 2 Subwoofer 1 Surround left ZONE 2 right ZONE 2 left Surround right F 5 2 channel surround system Front Bi amping connection High quality surround ZONE 2 connection Multi Zone Select 5 1ch Bi Amp ZONE 2 from the Speaker System menu See Speaker system setting on page 97 to do this SUBWOOFER 1 2 SURROUND SURR BACK F HEIGHT Single Single FRONT CENTER PRE OUT FWIDE ...

Page 27: ...t right Center Subwoofer 2 Subwoofer 1 Surround left ZONE 2 right ZONE 2 left Surround right H 5 2 channel surround system Speaker B Bi amping connection Select 5 1ch SP B Bi Amp from the Speaker System menu See Speaker system setting on page 97 to do this SUBWOOFER 1 2 SURROUND SURR BACK F HEIGHT Single Single FRONT CENTER PRE OUT FWIDE SPEAKERS FRONT CENTER A A SURROUND SURROUND BACK FRONT HEIGH...

Page 28: ...tible speaker Front left Center Subwoofer 2 Subwoofer 1 Bi amp compatible speaker Surround right Bi amp compatible speaker Surround left J 5 2 channel surround system Front and Center Bi amping connection High quality surround Select 5 1ch F C Bi Amp from the Speaker System menu See Speaker system setting on page 97 to do this SUBWOOFER 1 2 SURROUND SURR BACK F HEIGHT Single Single FRONT CENTER PR...

Page 29: ...HDMI OUT High picture quality Video signals can be output Terminal for connection with source device Terminal for connection with TV monitor Note The only exception is HDMI since this resolution cannot be downsampled you must connect your monitor TV to the receiver s HDMI output when connecting this video source If the video signal does not appear on your TV try adjusting the resolution settings o...

Page 30: ...I cable other than a High Speed HDMI TM cable is used it may not work properly When an HDMI cable with a built in equalizer is connected it may not operate properly Signal transfer is only possible when connected to a compatible component HDMI format digital audio transmissions require a longer time to be recognized Due to this interruption in the audio may occur when switching between audio forma...

Page 31: ... VIDEO PB Y PR IN 1 DVD IN 2 SAT CBL IN 3 DVR BDR IN 4 VIDEO IN 1 TV IN 2 DVR BDR IN 1 DVD IN 2 SAT CBL IN 1 DVD IN 2 DVR BDR IN 6 IN 7 OUT BD IN LAN 10 100 OUT 2 OUT 1 DC OUTPUT forWIRELESSLAN OUTPUT 5V 0 6 AMAX OPTICAL COAXIAL ASSIGNABLE ASSIGNABLE CONTROL IN 1 DVD IN 2 SAT CBL IN 3 DVR BDR IN 4 VIDEO IN 1 TV IN 2 DVR BDR IN 1 DVD IN 2 SAT CBL IN 6 IN 7 OUT DVD IN ASSIGNABLE COMPONENT VIDEO PB Y...

Page 32: ... IN 6 IN 7 OUT IN 3 VIDEO BD IN LAN 10 100 OUT 2 OUT 1 DC OUTPUT forWIRELESSLAN OUTPUT 5V 0 6 AMAX OPTICAL COAXIAL ASSIGNABLE ASSIGNABLE ASSIGNABLE CONTROL DVD IN MONITOR OUT MONITOR OUT COMPONENT VIDEO PB Y PR IN 1 DVD IN 2 SAT CBL IN 3 DVR BDR IN 4 VIDEO IN 1 TV IN 2 DVR BDR IN 1 DVD IN 2 SAT CBL IN 1 DVD IN 2 DVR BDR IN 6 IN 7 OUT IN 3 VIDEO VIDEO VIDEO OUT VIDEO VIDEO IN DIGITAL OUT COAXIAL AN...

Page 33: ... forWIRELESSLAN OUTPUT 5V 0 6 AMAX OPTICAL COAXIAL ASSIGNABLE ASSIGNABLE VIDEO AUDIO CONTROL DVR BDR IN OUT IN 1 DVD IN 2 SAT CBL IN 3 DVR BDR IN 4 VIDEO IN 1 TV IN 2 DVR BDR IN 1 DVD IN 2 SAT CBL IN 6 IN 7 OUT HDD DVD recorder BD recorder etc VIDEO VIDEO OUT VIDEO VIDEO IN DIGITAL OUT COAXIAL ANALOG R L AUDIO OUT ANALOG R L AUDIO IN OPTICAL Select one In order to record you must connect the analo...

Page 34: ...IDEO OUT STB DIGITAL OUT ANALOG R L AUDIO OUT COAXIAL OPTICAL Select one If your set top box is equipped with an HDMI output terminal we recommend connecting it to the receiver s HDMI SAT CBL IN terminal When doing so also connect the receiver and TV by HDMI see Connecting using HDMI on page 30 BD IN OUT 2 OUT 1 CONTROL IN 1 DVD IN 2 SAT CBL IN 3 DVR BDR IN 4 VIDEO IN 6 IN 7 HDMI IN HDMI OUT HDMI ...

Page 35: ...ts Make the connections shown below to add amplifiers to power your speakers SUBWOOFER 1 2 SURROUND SURR BACK F HEIGHT Single FRONT CENTER PRE OUT FWIDE L R SUBWOOFER 1 2 SURROUND SURR BACK F HEIGHT Single FRONT CENTER PRE OUT FWIDE L R R L ANALOG INPUT R L ANALOG INPUT R L ANALOG INPUT ANALOG INPUT ANALOG INPUT R L ANALOG INPUT Front channel amplifier Center channel amplifier mono Surround channe...

Page 36: ...e MULTI CH IN must be selected at Input under Input Setup and the connected HDMI terminal must be assigned to HDMI Input For details see The Input Setup menu on page 47 To input video signals using a composite video cable Multi Ch In Setup must be selected at Other Setup and the connected video input terminal must be assigned to Video Input For details see Multi Channel Input Setup on page 103 Con...

Page 37: ...ary sub zone setups possible with this system Choose whichever works best for you MULTI ZONE listening options The following table shows the signals that can be output to ZONE 2 ZONE 3 and ZONE 4 Sub Zone Input functions available ZONE 2 DVD SAT CBL DVR BDR VIDEO INTERNET RADIO MEDIA SERVER FAVORITES iPod USB USB DAC SC LX86 only TV CD TUNER ADAPTER PORT Outputs analog audio composite video and co...

Page 38: ...LINE LEVEL INPUT VIDEO IN Sub zone ZONE 2 Main zone 3 2 1 MULTI ZONE setup using speaker terminals ZONE 2 Either the surround back or the front wide speaker terminals can be used as the speaker terminals for ZONE 2 For details see Determining the speakers application on page 19 1 Connect a pair of speakers to the surround back or front wide speaker terminals 2 Connect a TV monitor to the VIDEO ZON...

Page 39: ...terminals You should have a pair of speakers attached to the sub zone amplifier as shown in the following illustration 2 Connect a TV monitor to the VIDEO ZONE 3 OUT jack on this receiver R Sub zone ZONE 3 Main zone L FRONTWIDE B R L FRONTWIDE B R L ZONE3 OUT ZONE3 OUT VIDEO IN 2 1 MULTI ZONE setup using HDMI terminal ZONE 4 Important HDMI IN 6 and IN 7 cannot be selected for ZONE 4 In the same wa...

Page 40: ... with an Internet service provider is required For more details contact your nearest Internet service provider Connecting optional Bluetooth ADAPTER When the Bluetooth ADAPTER AS BT100 or AS BT200 is connected to this receiver a product equipped with Bluetooth wireless technology portable cell phone digital music player etc can be used to listen to music wirelessly The Bluetooth wireless technolog...

Page 41: ...e receiver into standby then connect your USB device to the USB terminal on the front panel of this receiver This receiver does not support a USB hub For instructions on playing the USB device see Playing a USB device on page 52 Connecting an MHL compatible device An MHL compatible mobile device can be connected to enjoy full HD videos high quality multi channel audio and photos etc with charge th...

Page 42: ...rtain settings are required to use a wireless LAN converter AS WL300 For instructions on making these settings see the operating instructions included with the wireless LAN converter AS WL300 WAN DC 5V WPS Ethernet LAN 10 100 DC OUTPUT forWIRELESSLAN OUTPUT 5V 0 6 AMAX LAN 10 100 DC OUTPUT forWIRELESSLAN OUTPUT 5V 0 6 AMAX Internet Modem Wireless LAN converter AS WL300 Router Connecting an IR rece...

Page 43: ...e the power cord by the plug part Do not pull out the plug by tugging the cord and never touch the power cord when your hands are wet as this could cause a short circuit or electric shock Do not place the unit a piece of furniture or other object on the power cord or pinch the cord in any other way Never make a knot in the cord or tie it with other cables The power cords should be routed so that t...

Page 44: ...uage OSD Language 45 Changing the TV format setting 45 Changing the frequency step 45 Automatically conducting optimum sound tuning Full Auto MCACC 45 The Input Setup menu 47 Operation Mode Setup 48 About the Home Menu 48 Basic Setup ...

Page 45: ...s RESET c NO d 3 Use TUNE i j to select FREQ STEP c 9k d and then use PRESET k l to select 9k or 10k Automatically conducting optimum sound tuning Full Auto MCACC The Full Auto MCACC Setup measures the acoustic characteristics of your listening area taking into account ambient noise speaker connection and speaker size and tests for both channel delay and channel level After you have set up the mic...

Page 46: ... simply select GO NEXT and continue Now Analyzing 2 10 Environment Check 1a Full Auto MCACC A V RECEIVER Exit Cancel Ambient Noise OK Microphone Speaker YES NO L YES FHL YES C YES FHR YES R YES SR YES SBR YES SBL YES SL YES SW YES 1a Full Auto MCACC 10 OK RETRY A V RECEIVER Exit Cancel The configuration shown on screen should reflect the actual speakers you have If you see an ERR message or the sp...

Page 47: ...ut you ve connected it to The numbering OPT 1 to OPT 2 corresponds with the numbers beside the inputs on the back of the receiver 6 When you re finished proceed to the settings for other inputs There are optional settings in addition to the assignment of the input jacks Input Name You can choose to rename the input function for easier identification Select Rename to do so or Default to return to t...

Page 48: ...al height channel sound for playback 73 V WIDE Virtual Wide Creates a virtual wide channel sound for playback 73 V DEPTH Virtual Depth Plays with a sound field suited for 3D images 73 Operable settings items Descriptions Page Other functions INPUT SELECT INPUT SELECTOR Switches the input 50 VOLUME MUTE Use to set the listening volume 50 LISTENING MODE Selects your favorite listening modes 57 PQLS ...

Page 49: ... a source 50 Playing an iPod 51 Playing a USB device 52 Playing an MHL compatible device 53 Playing music from a PC 54 Listening to the radio 54 Bluetooth ADAPTER for Wireless Enjoyment of Music 55 Basic playback ...

Page 50: ...o this receiver Note The playback operation can be performed on the OSD screen for certain inputs but the OSD screen is only displayed when the receiver and TV are connected with an HDMI cable If the receiver and TV are connected with anything other than an HDMI cable perform the various operations while watching the front panel Turning off the sound Mutes the sound or restores the sound if it has...

Page 51: ... switch the receiver to the iPod USB When the display shows the names of folders and files you re ready to play music from the iPod The controls of your iPod will be inoperable when connected to this receiver Playing back audio files stored on an iPod To navigate songs on your iPod you can take advantage of the GUI screen of your TV connected to this receiver You can also control all operations fo...

Page 52: ...on a USB memory device The maximum number of levels that you can select in Step 1 below is 9 Note that non Roman characters in the playlist are displayed as 1 Use i j to select a folder then press ENTER to browse that folder To return to the previous level any time press RETURN 2 Continue browsing until you arrive at what you want to play then press d to start playback Copyrighted audio files cann...

Page 53: ...e but some parts of the specification are not supported specifi cally Pro Lossless Voice c Apple lossless encoding is not supported d Uncompressed FLAC files are not supported Pioneer does not guarantee playback e DSD files cannot be played in the sub zone Photo files Category Extension Format JPEG jpg Meeting the following conditions Baseline JPEG format Y Cb Cr 4 2 2 Playing an MHL compatible de...

Page 54: ...o this 1 Press TUNER to select the tuner 2 Use BAND to change the band FM or AM if necessary 3 Tune to a station There are three ways to do this Automatic tuning To search for stations in the currently selected band press and hold TUNE for about a second The receiver will start searching for the next station stopping when it has found one Repeat to search for other stations Manual tuning To change...

Page 55: ...ed between turning the power on and completion of startup Wireless music play When the Bluetooth ADAPTER AS BT100 or AS BT200 is connected to this unit a product equipped with Bluetooth wireless technology portable cell phone digital music player etc can be used to listen to music wire lessly Also by using a commercially available transmitter supporting Bluetooth wireless technology you can listen...

Page 56: ... 7 From the Bluetooth wireless technology device list select Bluetooth ADAPTER and enter the PIN code selected in step 4 8 Check to see that the Bluetooth ADAPTER is detected by the Bluetooth wireless technology device If the receiver and Bluetooth wireless technology device are not paired start over from step 6 Note The PIN code may in some cases be referred to as PASSKEY For information on enabl...

Page 57: ...es of playback using the listening modes 58 Selecting MCACC presets 60 Choosing the input signal 60 Better sound using Phase Control 61 Better sound using Phase Control and Full Band Phase Control 61 Listening to your system ...

Page 58: ... STANDARD SURROUND If necessary press repeatedly to select a listening mode If the source is Dolby Digital DTS or Dolby Surround encoded the proper decoding format will automatically be selected and shows in the display If the surround back speakers are not connected 2 Pro Logic IIx becomes 2 Pro Logic II 5 1 channel sound With two channel sources you can select from 2 Pro Logic IIx MOVIE Up to 7 ...

Page 59: ...s to see which you like 1 Press to the receiver operation mode 2 Press ADV SURR ADVANCED SURROUND repeatedly to select a listening mode ACTION Designed for action movies with dynamic soundtracks DRAMA Designed for movies with lots of dialog SCI FI Designed for science fiction with lots of special effects MONO FILM Creates surround sound from mono soundtracks ENT SHOW Suitable for musical sources E...

Page 60: ...ting for example watching movies from a sofa or playing a video game close to the TV 1 Press to the receiver operation mode 2 While listening to a source press MCACC Press repeatedly to select one of the six MCACC presets See Data Management on page 95 to check and man age your current settings These settings have no effect when headphones are connected You can also press k l to select the MCACC p...

Page 61: ...er system consisting of multiple speakers in case of typical 3 way speakers for instance the tweeter the squawker midrange and the woofer output sound in the high middle and low frequency ranges respectively Though these speakers are designed to flatten the frequency amplitude charac teristics across wide ranges there are cases where the group delay characteristics are not effectively flattened Th...

Page 62: ...cteristics of the front speakers FRONT ALIGN Full Band Phase Control calibration can be performed in the FRONT ALIGN mode by making the settings and performing the operations below 1 Perform Full Band Phase Control measurements with the Full Auto MCACC or Auto MCACC procedure 2 Perform measurements with EQ Type set to FRONT ALIGN with the Full Auto MCACC or Auto MCACC procedure 3 Press the MCACC b...

Page 63: ...63 Introduction 64 Playback with Network functions 65 About network playback 66 About playable file formats 67 Playback with NETWORK features ...

Page 64: ...P Depending on the external controller being used playback may be interrupted when the volume is adjusted from the controller In this case adjust the volume from the receiver or remote control Using AirPlay on iPod touch iPhone iPad and iTunes AirPlay works with iPhone 4S iPhone 4 iPhone 3GS iPod touch 4th 3rd and 2nd generations iPad 2 iPad with iOS 4 2 or later and iTunes 10 1 Mac and PC or late...

Page 65: ...rrestrial or OTA over the air radio stations are geographically restricted on the range of radio waves broadcast from a transmitter through the air Internet radio stations are accessible from anywhere in the world as long as there is a connection to the Internet as services are not transmitted through the air but are delivered over the World Wide Web On this receiver you can select Internet radio ...

Page 66: ... include a revocation list with the licenses Content owners may require you to upgrade WMDRM to access their content If you decline an upgrade you will not be able to access content that requires the upgrade This product is protected by certain intellectual property rights of Microsoft Use or distribution of such technology outside of this product is prohibited without a license from Microsoft DLN...

Page 67: ...ernet radio playback may be affected by the Internet communications environment and in this case play back may not be possible even with the file formats listed here Music files Category Extension Stream MP3 a mp3 MPEG 1 Audio Layer 3 Sampling frequency 32 kHz 44 1 kHz 48 kHz Quantization bitrate 16 bit Channel 2 ch Bitrate 8 kbps to 320 kbps VBR CBR Supported Supported WAV wav LPCM Sampling frequ...

Page 68: ...with HDMI connections 69 HDMI Setup 69 Before using synchronization 70 About synchronized operations 70 Setting the PQLS function 70 About Sound Retriever Link and Stream Smoother Link 70 Cautions on the Control with HDMI function 71 Control with HDMI function ...

Page 69: ...mponent 1 Press on the remote control then press HOME MENU 2 Select System Setup then press ENTER 3 Select HDMI Setup then press ENTER 4 Select the Control setting you want Choose whether to set this unit s Control with HDMI function ON or OFF You will need to set it to ON to use the Control with HDMI function When using a component that does not support the Control with HDMI function set this to ...

Page 70: ...e remains in effect even if the receiver s input is switched to a component other than one connected by HDMI The operations below can also be used on Pioneer Control with HDMI compatible TVs When the receiver s volume is adjusted or the sound is muted the volume status is displayed on the TV s screen When the OSD language is switched on the TV the receiver s language setting also switches accordin...

Page 71: ... this receiver Interrupting a direct connection with other amps or an AV converter such as an HDMI switch can cause operational errors Only connect components Blu ray Disc player etc you intend to use as a source to the HDMI input of this receiver Interrupting a direct connection with other amps or an AV converter such as an HDMI switch can cause operational errors When the receiver s Control is t...

Page 72: ...r terminals 77 Using the MULTI ZONE controls 78 Making an audio or a video recording 78 Network settings from a web browser 79 Using the sleep timer 79 Dimming the display 79 Switching the HDMI output 79 Checking your system settings 79 Resetting the system 80 Using other functions ...

Page 73: ...lso when a player supporting the Sound Retriever Link function is connected to the receiver by HDMI by setting this to ON the bitrate information of the compressed audio file being played on the player is acquired using the Control with HDMI function and the sound is optimized based on this information Sound Retriever Link OFF ON DNR Digital Noise Reduction May improve the quality of sound in a no...

Page 74: ... display resulting in a sound field with the same depth as the 3D picture to achieve a better sense of presence OFF MIN MID MAX AMP n This is set to turn power amplifier sections off and use channels exclusively in the pre amp mode Select ON to use the power ampli fiers for all channels Select Front OFF to turn off the front channel s power amplifier and use the front channel exclusively in the pr...

Page 75: ...ust Depending on the current status mode of the receiver certain options may not be able to be selected Check the table below for notes on this 3 Use k l to set as necessary See the table below for the options available for each setting 4 Press RETURN to confirm and exit the menu Video parameter menu Setting What it does Option s V CONV Digital Video Converter a Converts video signals for output f...

Page 76: ...noise distortion generated at the contours of the picture upon MPEG compression in the picture c d The image is only an example for checking the effect c 0 to 8 d Default 0 DETAIL d e Adjusts how sharp edges appear c d The image is only an example for checking the effect c 0 to 8 d Default 0 Setting What it does Option s BRIGHT Brightness d e Adjusts the overall brightness c 0 d The image is only ...

Page 77: ... the receiver s PRE OUT terminals by individually turning off the power of the amplifiers for those channels Press repeatedly to choose a speaker terminal option When you select 9 1ch FH FW you can select from SP FH FW ON Front height or front wide channels are added to the front center surround and surround back channels maximum 7 channels and a maximum of 9 channels are output The front height a...

Page 78: ...the front panel to switch off all output to the sub zone You won t be able to switch the main zone off completely unless you ve switched off the MULTI ZONE control first If you don t plan to use the MULTI ZONE feature for a while turn off the power in both the sub and main rooms so that this receiver is in standby MULTI ZONE remote controls Press the remote control s ZONE 2 ZONE 3 or ZONE 4 to ope...

Page 79: ...ights Switching the HDMI output Set which terminal to use when outputting video and audio signals from the HDMI output terminals The HDMI OUT 1 terminal is compatible with the Control with HDMI function Press to the receiver operation mode then press HDMI OUT Please wait a while when Please wait is displayed The output switches among HDMI OUT ALL HDMI OUT 1 and HDMI OUT 2 each time the button is p...

Page 80: ...z AMP ON X Curve OFF DIMMER Brightest Inputs See Input function default and possible settings on page 47 HDMI HDMI Audio AMP HDMI output HDMI OUT ALL Control OFF Control Mode OFF ARC Audio Return Channel OFF PQLS AUTO Standby Through OFF Setting Default DSP Power On Level LAST Volume Limit OFF Mute Level FULL Phase Control ON Auto Sound Retriever iPod USB INTERNET RADIO MEDIA SERVER FAVORITES ADAP...

Page 81: ...m other remote controls 83 Erasing one of the remote control button settings 83 Erasing all learnt settings that are in one input function 84 Direct function 84 Setting the backlight mode 84 About the ALL ZONE STBY All Zone Standby and DISCRETE ON Discrete On functions 84 Resetting the remote control settings 85 Controlling components 85 Controlling the rest of your system ...

Page 82: ...rated is switched by inputting the preset code to set the remote control setting Set the remote modes on the receivers before using this function see Remote Control Mode Setup on page 101 1 Press and hold RCU SETUP then press 4 for three seconds Release the button after the LED flashes once The LED continues to flash To cancel the preset setup mode press RCU SETUP 2 Press the number button for the...

Page 83: ...nks once and flashes continuously 3 Point the two remote controls towards each other then press the button that will be doing the learning on this receiver s remote control The LED flashes once then stops flashing remaining lit The remote controls should be 3 cm apart 3 cm This receiver s remote control Other remote control 4 Press the corresponding button on the other remote control that is sendi...

Page 84: ...UP 2 Press the number button for the backlight mode you want to set 1 normal mode The backlight is turned on and off with the light button After it lights it turns off auto matically if no operation is performed for 10 seconds 2 frequent lighting mode The backlight turns on when any button on the remote control is pressed It is turned off with the light button After it lights it turns off automati...

Page 85: ... 2255 DVD 2256 DVR BDR 2257 HDMI 2034 TV 0305 CD 5000 SAT CBL 6325 TV CONTROL INPUT 0305 Controlling components This remote control can control components after entering the proper codes see Setting the remote to control other components on page 82 for more on this Use the input function buttons to select the component RECEIVER D ACCESS CH LEVEL DIMMER SLEEP SIGNAL SEL SPEAKERS MPX PRESET TUNE BAN...

Page 86: ...URN RETURN RETURN RETURN RETURN d d d d d e AUTO SETUP e e e e g FREEZE g g g g m m m m m n n n n n o ANT AV SELECTION o o o p SCREEN SIZE p p p AUDIO AUDIO AUDIO AUDIO AUDIO AUDIO AUDIO DISP DISPLAY DISPLAY DISPLAY DISPLAY DISPLAY INFO CH CH CH OUTPUT RESOLUTION a CH CH CH a Controls for BD Audio Video components Button s LD CD CD R SACD MD DAT TAPE u SOURCE POWER ON OFF POWER ON OFF POWER ON OFF...

Page 87: ...URCE POWER ON 1 MOVIE 2 STANDARD 3 DYNAMIC 4 USER1 5 USER2 6 USER3 7 COLOR 8 SHARP 9 GAMMA 0 COLOR CLR SHARP ENTER CLASS COLOR TEMP EXIT INFO i j k l i j k l ENTER ENTER TEST HIDE MENU m HDMI1 d HDMI2 n COMP o VIDEO e S VIDEO g BRIGHT p BRIGHT AUDIO POWER OFF DISP ASPECT CH CONTRAST ...

Page 88: ...88 Making receiver settings from the Advanced MCACC menu 89 Automatic MCACC Expert 89 Manual MCACC setup 91 Checking MCACC Data 94 Data Management 95 The Advanced MCACC menu ...

Page 89: ... receiver settings from the Advanced MCACC menu on page 89 2 Select the parameters you want to set Use i j to select the item then use k l to set Auto MCACC The default is ALL recommended but you can limit the system calibration to only one set ting to save time if you want When data measurement is taken after selecting ALL or Keep SP System the reverb characteristics data both before and after ca...

Page 90: ...icrophone listening position or when using speakers that affect the phase dipole speakers reflective speakers etc Reverse Phase may be displayed even if the speakers are properly connected If Reverse Phase is displayed the speaker s wiring and may be inverted Check the speaker connections If the connections were wrong turn off the power disconnect the power cord then reconnect properly After this ...

Page 91: ...nel Level from the Manual MCACC setup menu The volume increases to the 0 0 dB reference level 2 Adjust the level of the left channel This will be the reference speaker level so you may want to keep the level around 0 0dB so that you ll have plenty of room to adjust the other speaker levels After pressing ENTER test tones will be output 3 Select each channel in turn and adjust the levels 12 0 dB as...

Page 92: ...level down until OVER disappears from the display 3 When you re finished press RETURN You will return to the Manual MCACC setup menu Note Changing the frequency curve of one channel too drastically will affect the overall balance If the speaker bal ance seems uneven you can raise or lower channel levels using test tones with the TRIM feature Use k l to select TRIM then use i j to raise or lower th...

Page 93: ... settings on screen Precision Distance SC LX86 only Before using this function perform the Full Auto MCACC Setup procedure see page 45 Performing the Full Auto MCACC procedure corrects the distance to a precision of 1 cm but the Precision Distance function lets you adjust the distance to the speakers their position with a precision of under 1 cm Here rather than correct the numerical value of the ...

Page 94: ...splay the distance from the different channels to the listening position See Speaker Distance on page 98 for more on this 1 Select Speaker Distance from the MCACC Data Check menu 2 When MCACC is highlighted use k l to select the MCACC preset you want to check The distance from the various channels set at the selected MCACC preset is displayed is displayed for chan nels that are not connected Stand...

Page 95: ... MCACC presets as necessary then press RETURN when you re finished You will return to the Data Management setup menu Copying MCACC preset data If you want to manually adjust the Acoustic Calibration EQ see Manual MCACC setup on page 91 we recom mend copying your current settings to an unused MCACC preset Instead of just a flat EQ curve this will give you a reference point from which to start The s...

Page 96: ...g receiver settings from the System Setup menu 97 Manual speaker setup 97 Network Setup menu 99 Checking the Network Information 100 The Other Setup menu 101 MHL Setup 103 The System Setup and Other Setup menus ...

Page 97: ...ting Specifies whether you are using a THX speaker setup page 99 3 Make the adjustments necessary for each setting pressing RETURN to confirm after each screen Speaker system setting Default setting 9 1ch FH FW There are several ways you can use the speaker terminals with this receiver In addition to a normal home theater setup where they are used for the front height speakers or front wide speake...

Page 98: ...o the subwoofer If you did not connect a subwoofer choose NO the bass frequencies are output from other speakers If you have a subwoofer and like lots of bass it may seem logical to select LARGE for your front speakers and PLUS for the subwoofer This may not however yield the best bass results Depending on the speaker placement of your room you may actually experience a decrease in the amount of b...

Page 99: ...een appears on your TV Use i j k l and ENTER to navigate through the screens and select menu items Press RETURN to exit the current menu 2 Select System Setup from the Home Menu 3 Select Network Setup from the System Setup menu 4 Select the setting you want to adjust If you are doing this for the first time you may want to adjust these settings in order IP Address Proxy Sets up the IP address Prox...

Page 100: ...you want to restore the name to the default select Default 3 Input the name you want Use i j to select a character k l to set the position and ENTER to confirm your selection Parental Lock Set restrictions for using Internet services Also set the password accompanying the usage restrictions Upon shipment from the factory the password is set to 0000 Important When the INTERNET RADIO or FAVORITES in...

Page 101: ...ected from among 30 min 1 hour 3 hours 6 hours 9 hours and OFF The power turns off after the selected time Note Depending on the connected devices the Auto Power Down function may not work properly due to excessive noise or other reasons Volume Setup You can set the maximum volume of this receiver or specify what the volume level will be when the power is turned on 1 Select Volume Setup from the O...

Page 102: ...es that can be used with this receiver can be changed and adjusted here CAUTION Note that when Volume Level is set to 0 dB Fixed the audio output from the AUDIO ZONE 2 OUT terminals is set to the maximum Also depending on the volume setting on the connected amplifier large volumes may be produced even when Volume Level is set to 40 dB Fixed 1 Select ZONE Setup from the Other Setup menu 2 Select ZO...

Page 103: ...This status display can be turned off by switching this setting to OFF Default setting ON 1 Select On Screen Display Setup from the Other Setup menu 2 Select the On Screen Display setting you want 3 When you re finished press RETURN You will return to the Other Setup menu Note The on screen display is only displayed for video output from the HDMI OUT 1 terminal The on screen display is not display...

Page 104: ...io problems 106 ADAPTER PORT terminal 107 Video 107 Settings 107 Professional Calibration EQ graphical output 108 Display 108 Remote control 109 HDMI 109 AVNavigator 110 USB interface 110 iPod 110 Network 111 USB DAC 112 Web Control 112 Wireless LAN 112 FAQ ...

Page 105: ...the receiver on Unplug the receiver from the wall and call a Pioneer authorized independent service company The receiver suddenly switches off or the FL OFF indicator blinks There is a problem with the receiver s power unit or fan Try turning on the power If the same thing happens the receiver is damaged Unplug the receiver from the wall and call a Pioneer authorized independent service company Ot...

Page 106: ...siderable noise in radio broad casts Fully extend the FM wire antenna adjust the position for best reception and secure to a wall etc Use an outdoor antenna for better reception see page 37 Adjust the position and direction of the AM antenna Noise may be caused by interference from other equipment such as a fluorescent light motor etc Switch off or move the other equipment or move the AM antenna N...

Page 107: ...game units for example The picture quality may also depend on the settings etc of your display device Switch off the video converter and reconnect the source and display device using the same type of connection component or composite then start playback again Symptom Remedy Video signals are not output from the component terminal When a monitor only compatible with resolutions of 480i is connected...

Page 108: ...all system calibration Lower frequency response curves do not seem to have been calibrated for SMALL speakers Low frequencies used in bass management the subwoofer channel will not change for speakers that have been specified as SMALL in the configuration or do not output these frequencies Calibration is performed but due to your speakers low frequency limitations no measur able sound is output fo...

Page 109: ...und suddenly ceases Check that the HDMI Audio setting is set to AMP Setting the Audio options on page 73 If the component is a DVI device use a separate connection for the audio If analog video is being output over HDMI please use a separate connection for the audio Check the audio output settings of the source component HDMI format digital audio transmissions require a longer time to be recognize...

Page 110: ... Adobe Flash Player 10 is not installed or its version is too old Download Adobe Flash Player from the Adobe site http www adobe com downloads If your version is old update it Software updating does not operate well There may be a problem with your Internet Service Provider s network Contact your contracted provider USB interface Symptoms Causes Remedies The folders files stored on a USB memory de...

Page 111: ...f the client is automatically authorized you need to enter the corresponding information again Check whether the connection status is set to Do not authorize There are no playable audio files on the component connected to the network Check the audio files stored on the component connected to the network Symptoms Causes Remedies Audio playback is undesir ably stopped or disturbed The audio file cur...

Page 112: ...RR is still displayed after repeating the above procedure several times there is a problem with the receiver or the USB cable Unplug the receiver from the wall and call a Pioneer authorized inde pendent service company The LAN cable is not firmly connected Firmly connect the LAN cable page 42 Wireless LAN converter and base unit wireless LAN router etc are too far apart or there is an obstacle bet...

Page 113: ...e SSID may not be displayed on the access point list screen If not set the SSID etc by making the wireless LAN converter settings on the receiver manually The access point s security settings use WEP 152 bit length code key or shared key authentication The receiver does not support WEP 152 bit length code key or shared key authentication Network connections cannot be established even when the abov...

Page 114: ...ound ALC and Stream Direct with different input signal formats 117 Speaker Setting Guide 118 About messages displayed when using network functions 119 Important information regarding the HDMI connection 119 Cleaning the unit 119 Pioneer Authorized Distributors 120 Preset code list 127 Additional information ...

Page 115: ...undtrack in both movie theatres and in your home theatre as faithful as possible to what the director intended Movie soundtracks are mixed in special movie theatres called dubbing stages and are designed to be played back in movie theatres with similar equipment and condi tions This same soundtrack is then transferred directly onto Laserdisc VHS tape DVD etc and is not changed for playback in a sm...

Page 116: ...ng from a boundary gain effect This feature is designed to operate when used with a subwoofer certified to THX Ultra2 Select2TM specifications THX Loudness Plus Description THX Loudness Plus is a new volume control technology featured in THX Ultra2 PlusTM and THX Select2 PlusTM Certified amplifiers With THX Loudness Plus home theater audiences can now experience the rich details in a surround mix ...

Page 117: ...nnected Dolby Digital Surround 2 Pro Logic II MOVIE 2 Pro Logic II MOVIE DTS Surround Neo X CINEMA Neo X CINEMA Other stereo sources Stereo playback Stereo playback Analog sources As above ANALOG DIRECT stereo PCM sources As above Stereo playback DVD A sources As above As above SACD sources As above As above Multichannel signal formats Input signal format Auto Surround ALC PURE DIRECT DIRECT Surro...

Page 118: ...ers and the listening position However the sense of sound positioning can differ according to the conditions in the room and the speakers being used In smaller environments in particular when the front speakers are close to the listening position with this method the speakers will be pointed too inward We suggest you use this example of installation as reference when trying out different installat...

Page 119: ... video input The receiver can then convert the analog component video signal to a digital HDMI sig nal for transmission to the display For this configuration use the most convenient connection digital is recom mended for sending audio to the receiver See the operating instructions for more on audio connections Note The picture quality will change slightly during conversion Configuration B Connect ...

Page 120: ... Alexandra Road 04 01 Singapore 159936 TEL 64727555 TAIWAN PIONEER HIGH FIDELITY TAIWAN CO LTD 8F No 407 Ruiguang Road Neihu Dist Taipei City 11492 Taiwan PTC service telephone number 02 2657 7366 THAILAND PIONEER ELECTRONICS THAILAND CO LTD FL 17 KPN Tower 719 Rama 9Rd Bangkapi Huaykwang Bangkok 10310 TEL 02 717 0777 FAX 02 717 0700 U A E PIONEER GULF FZE Lob 11 017 Jebel Ali Free Zone P O Box 61...

Page 121: ...urces THX The THX technologies are explained below See http www thx com for more detailed information THX Cinema A mode for playing in a home theater environment the sound tracks of theater movies that have been recorded and edited for playback in large spaces such as movie theaters THX Music A mode adjusted mainly for listening to music that has been masterized at a higher level than movie sound ...

Page 122: ...Living provides consumers with easy sharing of digital media through a wired or wireless network in the home vTuner vTuner is a paid online database service that allows you to listen to radio and TV broadcasts on the Internet vTuner lists thousands of stations from over 100 different countries around the globe For more detail about vTuner visit the following website http www radio pioneer com This...

Page 123: ...n the 2 4 GHz band which does not require applications for licenses or usage registration for applications conducting wireless exchange of digital information at relatively low speeds such as computer mouses and keyboards mobile phones smart phones text and audio information for PDAs etc Pairing Pairing must be done before you start playback of Bluetooth wireless technology content using the Bluet...

Page 124: ...page 65 vTuner See Listening to Internet radio stations on page 65 DLNA See About network playback on page 66 AirPlay See Using AirPlay on iPod touch iPhone iPad and iTunes on page 64 Wireless LAN See Connecting to a wireless LAN on page 42 Playback High Resolution audio file See About playable file formats on page 67 See Playing a USB device on page 52 Slideshow See Playing back photo files store...

Page 125: ...dance REC 400 mV 2 2 kW Signal to Noise Ratio IHF short circuited A network LINE 103 dB Tuner Section Frequency Range FM 87 5 MHz to 108 MHz Antenna Input FM 75 W unbalanced Frequency Range AM 9 kHz step 531 kHz to 1602 kHz 10 kHz step 530 kHz to 1700 kHz Antenna AM Loop antenna balanced Video Section Signal level Composite Video 1 Vp p 75 W Component Video Y 1 0 Vp p 75 W PB PR 0 7 Vp p 75 W Corr...

Page 126: ... 1 FM wire antenna 1 Power cord CD ROM AVNavigator Quick start guide Safety Brochure Note These specifications are applicable when the power supply is 230 V Specifications and the design are subject to possible modifications without notice due to improvements This product includes FontAvenue fonts licensed by NEC Corporation FontAvenue is a registered trademark of NEC Corporation ...

Page 127: ...eel 0229 0140 Euroline 0152 Euroman 0125 0140 0141 0149 0155 0228 0229 Europhon 0141 0144 0149 0155 0228 0229 Expert 0156 Exquisit 0155 Fenner 0142 0154 Ferguson 0148 0152 0153 0157 Fidelity 0141 0145 0155 0228 Filsai 0229 Finlandia 0145 Finlux 0132 0138 0141 0144 0149 0152 0155 0229 Firstline 0141 0142 0149 0154 0155 0228 0229 Fisher 0125 0138 0141 0147 0150 0229 Flint 0149 0155 Formenti 0132 013...

Page 128: ...9 0155 0157 Telegazi 0155 Telemeister 0155 Telesonic 0155 Telestar 0155 Teletech 0142 0152 0154 0155 Teleton 0141 0229 Televideon 0228 Televiso 0156 Tensai 0142 0143 0149 0154 0155 0229 Tesmet 0149 Tevion 0140 0142 Texet 0141 0154 0228 0229 Thomson 0121 0122 0141 0148 0149 0153 0155 0157 0159 0210 Thorn 0152 0155 Tokai 0149 0155 0229 Tokyo 0141 0228 Tomashi 0151 Toshiba 0126 0127 0147 0176 0209 02...

Page 129: ...018 5030 5050 Panasonic 5036 Philips 5022 5032 5044 RCA 5013 5029 Roadstar 5052 Sharp 5051 Sony 5012 5023 5026 5027 5028 5039 TEAC 5015 5016 5034 5035 5037 Technics 5041 Victor 5014 Yamaha 5024 5025 5038 5046 5047 Supervision 2181 Synn 2181 Tatung 2130 2188 TCM 2097 Teac 2162 2177 2181 Tec 2186 Technika 2188 Telefunken 2183 Tensai 2188 Tevion 2097 2181 2187 Thomson 2098 2112 2155 2159 Tokai 2178 2...

Page 130: ...55 6192 6193 Hyundai 6192 ID Digital 6241 ILLUSION sat 6247 Imperial 6222 6216 6223 6238 6232 Ingelen 6213 6261 Inno Hit 6228 International 6256 Interstar 6196 Intervision 6255 Inves 6268 iotronic 6244 ITT Nokia 6176 6207 Jaeger 6238 K SAT 6180 Kamm 6180 Kaon 6251 KaTelco 6267 Kathrein 6177 6214 6213 6262 6200 6180 6179 6272 6183 Kendo 6252 Kenwood 6220 Key West 6256 Kiton 6213 KR 6200 Kreiling 62...

Page 131: ... 6218 DigiQuest 6251 Digital 6187 DMT 6192 Edision 6247 eMTech 6196 GbSAT 6196 Gecco 6199 Globo 6199 Goodmans 6254 6218 Hirschmann 6230 6199 Humax 6241 6242 Huth 6192 Hyundai 6192 Kathrein 6272 LaSAT 6230 LG 6192 Luxor 6265 Maximum 6238 Mediacom 6198 MediaSat 6277 Medion 6230 6199 Microstar 6192 Morgan s 6199 MySky 6212 6211 NEOTION 6238 Nichimen 6254 Nokia 6206 Opentel 6199 Orbis 6199 Pace 6273 6...

Page 132: ... Markham Ontario L3R 2Z5 Canada TEL 1 877 283 5901 905 479 4411 PIONEER EUROPE NV Haven 1087 Keetberglaan 1 B 9120 Melsele Belgium TEL 03 570 05 11 PIONEER ELECTRONICS ASIACENTRE PTE LTD 253 Alexandra Road 04 01 Singapore 159936 TEL 65 6472 7555 PIONEER ELECTRONICS AUSTRALIA PTY LTD 5 Arco Lane Heatherton Victoria 3202 Australia TEL 03 9586 6300 PIONEER ELECTRONICS DE MEXICO S A DE C V Blvd Manuel...

Reviews: