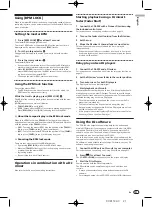
DRB1508-C
En
16
16
1 Press [
u
]
1
to turn this unit’s power off, then wait at
least 1 minute.
Never forcibly eject a disc directly after turning off the set’s power.
Doing so is dangerous for the reasons described below.
!
The disc will still be spinning when ejected and could hit your
fingers, etc., causing injury.
!
Also, the disc clamp will rotate in an unstable way, and the disc
could get scratched.
2 Use the included disc force eject pin. (Do not use
anything else.)
The included disc force eject pin is mounted on the CDJ-350’s bottom
panel. When the pin is inserted all the way into the insertion hole, the
disc is ejected 5 mm to 10 mm out of the disc insertion slot. Grasp the
disc with your fingers and pull it out.
Loading USB devices
Connect the USB device to the USB device insertion slot
3
.
The [
USB STOP
] indicator lights.
Removing USB devices from the set
!
Be sure to follow the procedure below when removing USB
devices from the set. Removing a USB device without following
this procedure could erase the set’s management data and make it
impossible to read the USB device.
!
When turning the set’s power off, be sure to remove the USB device
first.
1 Press [USB STOP]
4
for at least 2 seconds.
The [
USB STOP
] indicator turns off.
2 Disconnect the USB device.
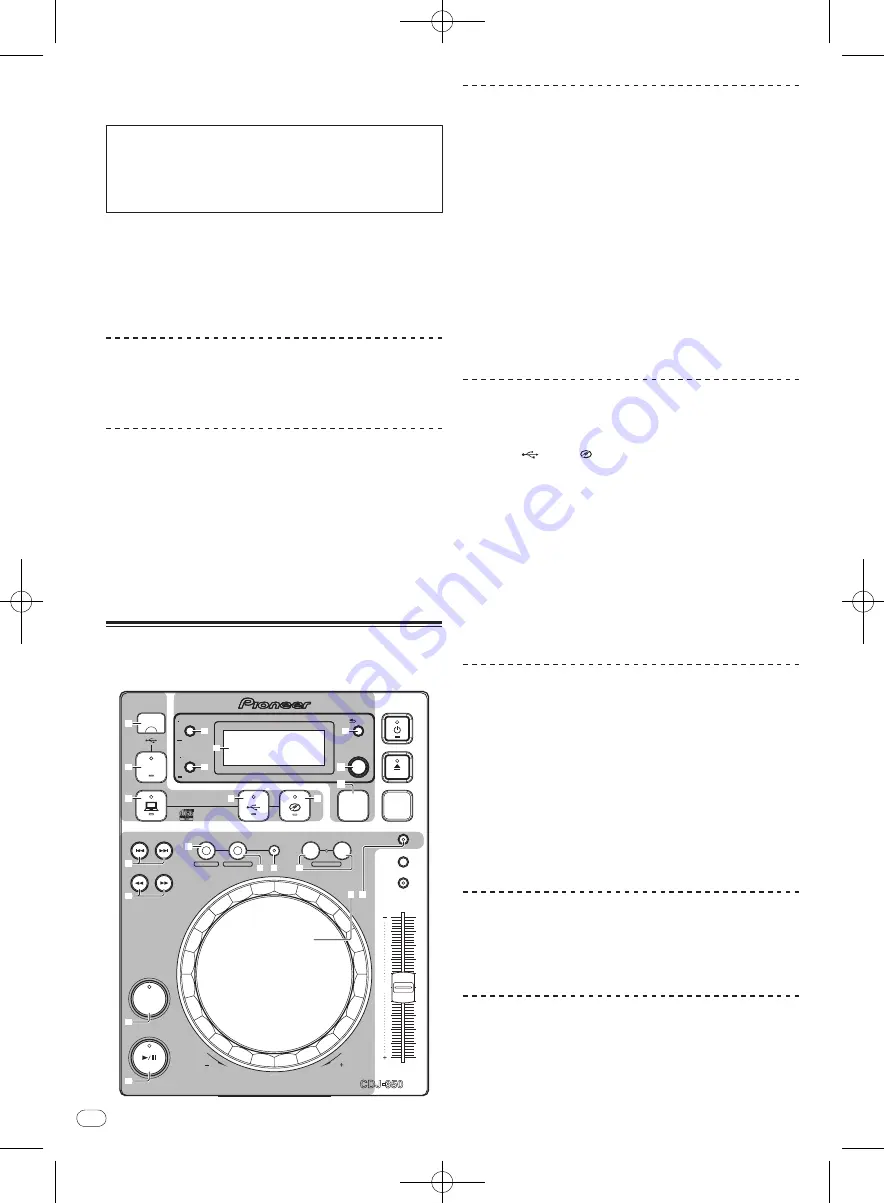
Basic Operations (player, source
select and browse sections)
MULTI PLAYER
TEMPO
0
PLAY/PAUSE
SEARCH
TRACK SEARCH
IN/CUE
OUT
OUT ADJUST
HOT LOOP
RELOOP/EXIT
BEAT LOOP
LOOP DIVIDE
—
+
VINYL MODE
TEMPO RANGE
MASTER TEMPO
LOOP
USB
STOP
SOURCE SELECT
MP3/AAC
WAV/AIFF
CUE
PLAYLIST
BPM
DISC
LOCK
REV
FWD
BACK
SELECT PUSH
TIME MODE
AUTO CUE
DISPLAY
UTILITY
PLAYLIST
BACK
SELECT PUSH
TIME MODE
AUTO CUE
DISPLAY
UTILITY
3
4
5
e
f
h
g
a
b
c
8
9
6
7
d
k
l
m
n
i
j
About the power switch of this unit
To turn the power on
Press [
u
]
1
.
Turn on the power of this unit.
The [
u
] indicator lights green.
To set to the standby mode
When this unit’s power is on, press [
u
]
1
for at least 1
second.
This unit is set to the standby mode.
The [
u
] indicator lights red.
!
When [
u
] is pressed again, the power turns on.
!
This unit is equipped with an auto standby function. For details,
see
About the auto standby function
on page 22.
Playback
1 Load the source onto this unit.
2 Press [
]
6
or [ ]
7
for at least 1 second.
This selects the source.
3 Turn the rotary selector
m
.
Select the track.
!
To move to lower layers in a folder, select the folder then press the
rotary selector.
!
To return to higher layers, press [
BACK
]
l
.
!
Press [
BACK
] for more than 1 second to move to the top layer.
4 Press the rotary selector
m
.
The track is loaded and playback begins.
!
When a disc containing music files recorded with a hierarchical
structure is loaded, playback starts from the tracks in the upper-
most level.
Pausing
During playback, press [PLAY/PAUSE
f
]
b
.
!
Playback resumes when [
PLAY/PAUSE
f
] is pressed again.
Resuming playback from the position playing
just before the disc was ejected (Resume)
After ejecting the disc, immediately reload that same disc
into this unit.
!
The resume function only works when the same disc is ejected
then reloaded before loading another disc.
!
The resume function does not work for USB devices.
Forward and reverse scanning
Press [SEARCH
m
,
n
]
9
.
The disc is forwarded when [
n
] is pressed and held in.
The disc is reversed when [
m
] is pressed and held in.
Finding the beginnings of tracks (Track
Search)
Press [TRACK SEARCH
o
,
p
]
8
.
Press the [
p
] to move to the beginning of the next track.


