background image

DRB1508-C

De

20

74

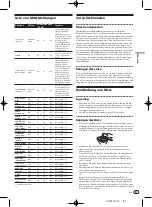
Feinjustieren des Loop-out-Punkt (Loop-

out-Justierung)

1  Drücken Sie während der Loop-Wiedergabe 
[LOOP OUT (OUT ADJUST)] 

f

.

[

LOOP OUT

 (

OUT ADJUST

)] beginnt schnell zu blinken, und [

LOOP IN

/


CUE

 (

HOT LOOP

)] schaltet aus.

Die Zeit des Loop-out-Punkts wird auf dem Hauptgerät-Display 
angezeigt.

2  Drücken Sie [SEARCH 

m

n

9

.

Der Loop-out-Punkt kann in Schritten von einzelnen Frames justiert 
werden.

!

  Der gleiche Vorgang kann auch mit der Jog-Scheibe ausgeführt 

werden.

!

  Der Einstellbereich für den Loop-out-Punkt liegt an beliebiger 

Stelle nach dem Loop-in-Punkt.

3  Drücken Sie [LOOP OUT (OUT ADJUST)] 

f

.

Loop-Wiedergabe wird fortgesetzt.

!

  Loop-Wiedergabe wird auch fortgesetzt wenn länger als 10 

Sekunden keine Bedienung vorgenommen wird.

Abbrechen der Loop-Wiedergabe (Loop 

Exit)

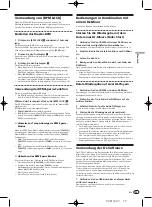
Drücken Sie während der Loop-Wiedergabe 
[RELOOP/EXIT] 

g

.

Die Wiedergabe wird nach dem Loop Out Point fortgesetzt, ohne zum 
Loop In Point  zurückzukehren.

Zurückkehren zur Loop-Wiedergabe 

(Reloop)

Nach dem Abbrechen der Loop-Wiedergabe drücken Sie 
[RELOOP/EXIT] 

g

 während der Wiedergabe.

Der Track schaltet zum vorher eingestellten Loop-in-Punkt zurück, und 
die Loop-Wiedergabe beginnt.

Teilen von Loops (Loop teilen)

Drücken Sie während der Loop-Wiedergabe [BEAT LOOP 
(LOOP DIVIDE)] 

h

.

Die Länge der Loop-Spielzeit wird bei jedem Drücken von [

] um die 

Hälfte verringert.
Wenn [

+

] gedrückt wird, kehrt die Loop-Wiedergabelänge auf die 

Originallänge zurück.

Zurückkehren zum Loop-in-Punkt (Hot 

Loop)

Drücken Sie während der Loop-Wiedergabe [LOOP IN/


CUE (HOT LOOP)] 

e

.

Der Track schaltet sofort zum gesetzten Loop-in-Punkt zurück, und die 
Loop-Wiedergabe startet.

Automatisches Setzen von Loops, 

basierend auf dem Tempo des Tracks 

(Beat Loop)

Während des Wiedergabe- oder Pause-Modus drücken 
Sie [BEAT LOOP (LOOP DIVIDE)] 

h

.

Der Loop-aus-Punkt wird automatisch entsprechend dem Tempo des 
Tracks (BPM) gesetzt, und die Loop-Wiedergabe startet.

!

  Loop-Wiedergabe kann nicht richtig ausgeführt werden, wenn der 

BPM-Wert nicht angezeigt wird.

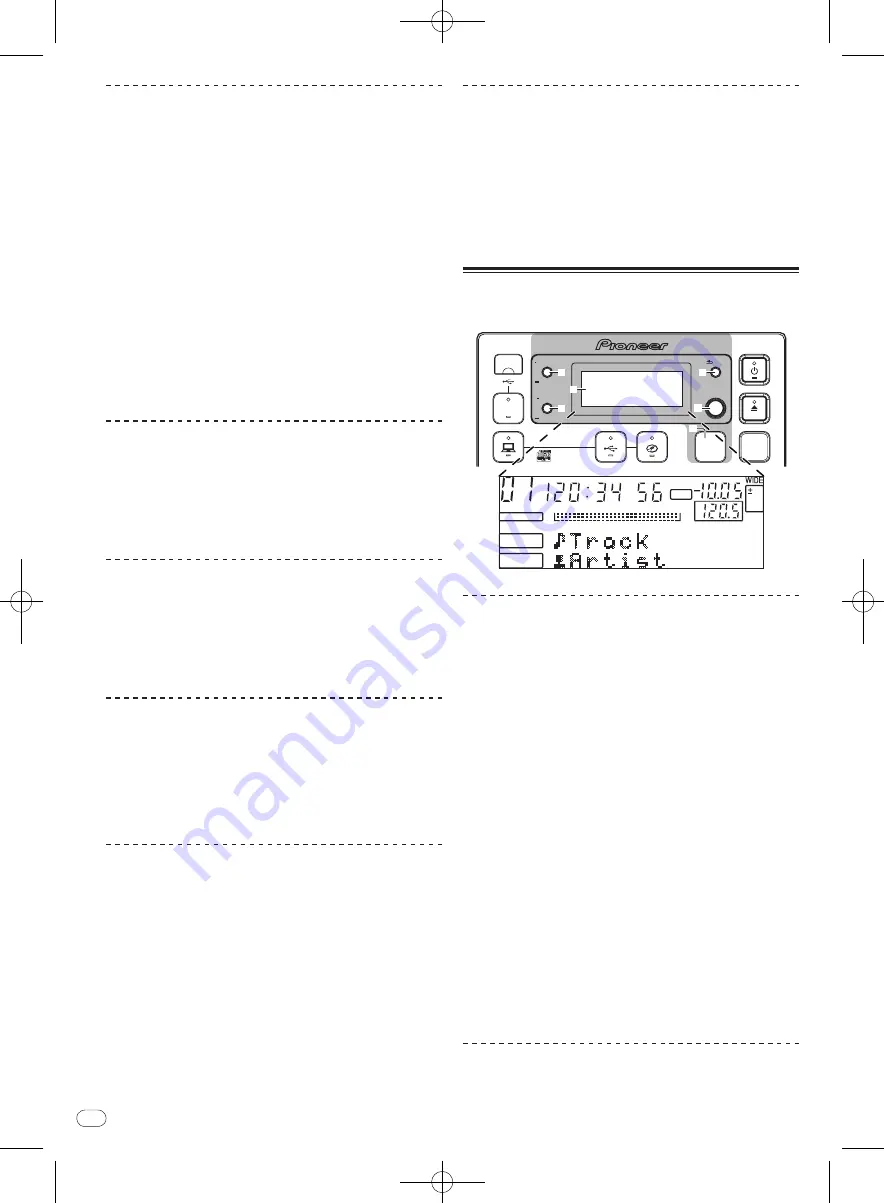
Anzeige von Track-Information des 

Tracks (Durchsuchen-Sektion)

USB

STOP

SOURCE SELECT

MP3/AAC

WAV/AIFF

PLAYLIST

BPM

DISC

LOCK

BACK

SELECT PUSH

TIME MODE

AUTO CUE

DISPLAY

UTILITY

k

l

m

n

i

j

A.CUE

LOCK

16

REMAIN

M

S

F

TEMPO

%

INFO

BROWSE

BPM

Hinweise zu den [

BROWSE

]- und [

INFO

]-

Anzeigen


[

BROWSE

]-Anzeige

Dies zeigt die geladenen Tracks an, sortiert in einer Kategorie-oder 
Baumstruktur.
Die Anzeige im in der Informationsanzeige-Sektion ist unterschied-
lich, je nachdem ob Bibliothek-Information auf dem USB-Gerät aufge-
zeichnet ist oder nicht.

  Mit Bibliothek-Informationen 

d

 Bibliothek durchsuchen: Die 

Musikdateien werden in den in rekordbox eingestellten Kategorien 
(Album, Interpret usw.) angezeigt.


Die Kategorie-Typen können in 

Voreinstellungen


(Umgebungseinstellungen) in rekordbox geändert werden.

  Ohne Bibliothek-Informationen 

d

 Ordner durchsuchen: Die 

Ordner/


Tracks auf dem Datenträger werden in einer Baumstruktur 

angezeigt.


[

INFO

]-Anzeige

Dies zeigt detaillierte Informationen über die geladenen Tracks an.
Der Interpretenname, Albumname und die Beat-Anzeige werden hier 
angezeigt.


Umschalten des Anzeige-Modus

Drücken Sie [DISPLAY (UTILITY)] 

j

.

Die [

BROWSE

]- und [

INFO

]-Anzeigen schalten bei jedem Tastendruck um.

Verwendung der Beat-Anzeige-Funktion

Dies zeigt den Beat und die Wiedergabeposition des aktuell spielen-
den Tracks an.

Summary of Contents for TRAKTOR PRO CDJ-350

Page 1: ...des informations au sujet des logiciels et d autres données mises à jour afin de venir en aide à notre clientèle Auf der oben angegebenen Pioneer Website werden unseren Kunden Antworten auf häufig gestellte Fragen Informationen über Software und weitere Unterstützung mit neuesten Daten angeboten http www prodjnet com rekordbox support For inquiries on rekordbox please see the support site indicate...
Page 2: ...nsure that it is refitted when the fuse is replaced If you lose the fuse cover the plug must not be used until a replacement cover is obtained A replacement fuse cover can be obtained from your local dealer If the fitted moulded plug is unsuitable for your socket outlet then the fuse shall be removed and the plug cut off and disposed of safely There is a danger of severe electrical shock if the cu...

Page 3: ...and mounting of an AC plug on the power supply cord of this unit should be performed only by qualified service personnel If connected to an AC outlet the cut off plug can cause severe electrical shock Make sure it is properly disposed of after removal The equipment should be disconnected by removing the mains plug from the wall socket when left unused for a long period of time for example when on ...

Page 4: ...trol panel 14 Front panel 15 Main unit display 15 Setting the source to be played source select section 15 Basic Operations player source select and browse sections 16 Operating the jog dial 17 Setting loops loop and beat loop part 18 Displaying track information browse section 18 Searching for tracks quickly using the library information 19 About the playback history HISTORY 19 Using playlists 20...

Page 5: ... registered on the play list as desired but only for tracks managed with rekordbox System setup example A DJ system like the one shown on the diagram below can be set up by combining this unit with a DJ mixer and peripheral devices MULTI PLAYER TEMPO 0 PLAY PAUSE SEARCH TRACK SEARCH IN CUE OUT OUT ADJUST HOT LOOP RELOOP EXIT BEAT LOOP LOOP DRIVE VINYL MODE TEMPO RANGE MASTER TEMPO LOOP USB STOP SO...

Page 6: ...000 folders Max number of files 1 000 files When there are many folders or files some time may be required for loading About discs created on computers Depending on the application settings and the computer s environ mental settings it may not be possible to play certain discs Record the disc in a format supported on this unit For details contact your application s retailer If the recording qualit...

Page 7: ...ning it back on If multiple partitions are set for the USB device the device may not be recognized USB devices equipped with flash card readers may not operate Depending on the USB device you are using the desired perfor mance may not be achieved Playable music file formats This unit supports music files in the formats shown below Type File extension Compatible formats Bit depth Bit rate Sampling ...

Page 8: ...nty disclaimer THE PROGRAM AND DOCUMENTATION ARE PROVIDED AS IS WITHOUT ANY REPRESENTATIONS OR WARRANTIES AND YOU AGREE TO USE THEM AT YOUR SOLE RISK TO THE FULLEST EXTENT PERMISSIBLE BY LAW PIONEER EXPRESSLY DISCLAIMS ALL WARRANTIES OF ANY KIND WITH RESPECT TO THE PROGRAM AND DOCUMENTATION WHETHER EXPRESS IMPLIED STATUTORY OR ARISING OUT OF COURSE OF PERFORMANCE COURSE OF DEALING OR USAGE OF TRAD...

Page 9: ...for connection of a USB device flash mem ory hard disc etc is required to transfer music files to the USB device Operation is not guaranteed on all computers even those with the operating environment described above Even with the required memory capacity indicated for the operating environment above in the cases described below the software may not provide full functionality and performance due to...

Page 10: ...onnected to a com puter on which Windows is installed install the driver software on the computer beforehand Installing the driver software Before installing the driver software Read Cautions on installing the software on page 9 carefully Turn off this unit s power switch then disconnect the USB cable connecting this unit and the computer If any other programs are running on the computer quit them...

Page 11: ...k Continue Anyway and con tinue with the installation Adjusting the buffer size This unit functions as an audio device conforming to the ASIO standards If an application using this unit as the default audio device DJ software etc is running quit that application before adjusting the buffer size Click Windows Start menu All Programs Pioneer Pioneer CDJ Pioneer CDJ ASIO Settings Utility A sufficient...

Page 12: ...mixer example DJM 350 MULTI PLAYER TEMPO 0 PLAY PAUSE SEARCH TRACK SEARCH IN CUE OUT OUT ADJUST HOT LOOP RELOOP EXIT BEAT LOOP LOOP DRIVE VINYL MODE TEMPO RANGE MASTER TEMPO LOOP USB STOP SOURCE SELECT MP3 AAC WAV AIFF CUE PLAYLIST BPM DISC LOCK REV FWD BACK SELECT PUSH TIME MODE AUTO CUE DISPLAY UTILITY A CUE LOCK 16 REMAIN M S F TEMPO INFO BROWSE BPM MULTI PLAYER TEMPO 0 PLAY PAUSE SEARCH TRACK ...

Page 13: ... 350 CH 2 PHONO CONTROL L R CD R L Audio cable R L R L R L Control cord included Audio cable included Using DJ software When connected to a computer by USB cable the DJ software can be operated with this units page 21 The sound of music files playing on the computer can be output from this unit page 10 AUDIO OUT R L CONTROL USB AUDIO OUT R L CONTROL USB OL CH 1 PHONO CONTROL L R CD DJ player DJ pl...

Page 14: ...ce select section Select the source to be played with this unit here page 15 3 USB device insertion slot 4 USB STOP 5 COMPUTER 6 USB 7 DISC Player section These controls can be used for such basic DJ player operations as playing discs setting cue loop points and operating the jog dial page 16 8 TRACK SEARCH o p 9 SEARCH m n a CUE b PLAY PAUSE f c Jog dial d VINYL MODE 1 Loop and beat loop part e L...

Page 15: ...ers can be displayed for each The characters that can be displayed are letters A to Z numbers 0 to 9 and certain sym bols is displayed for other characters Setting the source to be played source select section s t USB STOP SOURCE SELECT MP3 AAC WAV AIFF PLAYLIST BPM DISC LOCK BACK SELECT PUSH TIME MODE AUTO CUE DISPLAY UTILITY 3 4 5 6 7 Loading discs Set the disc with the printed side facing up In...

Page 16: ...AY UTILITY PLAYLIST BACK SELECT PUSH TIME MODE AUTO CUE DISPLAY UTILITY 3 4 5 e f h g a b c 8 9 6 7 d k l m n i j About the power switch of this unit To turn the power on Press u 1 Turn on the power of this unit The u indicator lights green To set to the standby mode When this unit s power is on press u 1 for at least 1 second This unit is set to the standby mode The u indicator lights red When u ...

Page 17: ...again for at least 1 second auto cue is set to off The auto cue level setting remains in the memory even when the power is turned off Changing the auto cue level The acoustic pressure level identified as a silent section with the auto cue function can be selected from eight levels 36 dB 42 dB 48 dB 54 dB 60 dB 66 dB 72 dB and 78 dB The auto cue level setting remains in the memory even when the pow...

Page 18: ...s Fine adjusting the loop out point loop out adjust 1 During loop playback press LOOP OUT OUT ADJUST f LOOP OUT OUT ADJUST starts flashing quickly and LOOP IN CUE HOT LOOP turns off The loop out point s time is displayed on the main unit display 2 Press SEARCH m n 9 The loop out point can be adjusted in units of single frames The same operation is possible using the jog dial The loop out point adj...

Page 19: ...Upper section Specified character Lower section Items beginning with the character in the upper section 4 Turn the rotary selector m The character displayed in the upper section of the information dis play switches The jump destination items corresponding to the character in the upper section are displayed in the lower section 5 Press the rotary selector m The display switches to the item selected...

Page 20: ... playlist beforehand 1 Press PLAYLIST n for at least 1 second The remove menu is displayed 2 Turn the rotary selector m then press it CANCEL The track s is are not removed OK The track s is are removed Deleting playlists Select the playlist you want to delete from the PLAYLIST category beforehand 1 Press PLAYLIST n for at least 1 second The delete menu is displayed 2 Turn the rotary selector m the...

Page 21: ...e CDJ 350 with a Pioneer DJ mixer using the included control cord For instructions on connecting see Basic style on page 12 2 Turn on the fader start function from the DJ mixer 3 Set the cue 4 Move the DJ mixer s channel fader or cross fader This unit s pause mode is canceled and the track is played instantaneously When the channel fader or cross fader is set back to its original position playback...

Page 22: ... Press BACK l to return to the previous screen 3 Press the rotary selector m The changed settings are stored To close the UTILITY screen press DISPLAY UTILITY or BACK Setting preferences Options settings Selection items Descriptions A CUE LEVEL 36 dB 42 dB 48 dB 54 dB 60 dB 66 dB 72 dB 78 dB For details see Chang ing the auto cue level on page 17 MIDI CHANNEL 1 to 16 AUTO STANDBY OFF 20 min 40 min...

Page 23: ... does not work Is a cue point set Set a cue point page 17 Settings are not stored in the memory Has the power been turned off directly after changing the setting After changing settings wait at least 10 seconds before turning the power off USB device is not recognized Is the USB device properly connected Connect the device securely all the way in Is the USB device connected via a USB hub USB hubs ...

Page 24: ...roblem is with that disc E 8301 E 8302 E 8303 PLAYER ERROR Disc that cannot be played normally is loaded E 8304 DECODE ERROR Music files that cannot be played normally are loaded Format is wrong dReplace with music files in the proper format E 8305 DATA FORMAT ERROR E 8306 NO FILE Track recorded in the library playlist etc has been deleted from the USB device and cannot be played Do not delete tha...

Page 25: ...r if the temperature in the room in which the unit is installed rises suddenly through heating etc The unit will not operate properly and will not be playable with condensation inside Let the unit stand for 1 to 2 hours at room temperature though this time depends on the conditions of the condensation without turning on the power The water droplets will evaporate and the unit will become playable ...

Page 26: ...ng etc may stop Recordings you have made are for your personal enjoyment and according to copyright laws may not be used without the consent of the copyright holder Music recorded from CDs etc is protected by the copyright laws of individual countries and by international treaties It is the full responsibility of the person who has recorded the music to ensure that it is used legally When handling...

Page 27: ...Output Level 2 0 Vrms 1 kHz Frequency response 4 Hz to 20 kHz S N ratio 115 dB Total harmonic distortion 0 006 USB downstream section USB Port Type A Power supply 5 V 500 mA or less USB upstream section USB Port Type B Control output CONTROL Port Mini jack The specifications and design of this product are subject to change without notice The articles concerning free repairs etc indicated on the wa...

Page 28: ...rocution pour les êtres humains ATTENTION POUR ÉVITER TOUT RISQUE D ÉLECTROCUTION NE PAS ENLEVER LE COUVERCLE NI LE PANNEAU ARRIÈRE AUCUNE PIÈCE RÉPARABLE PAR L UTILISATEUR NE SE TROUVE À L INTÉRIEUR CONFIER TOUT ENTRETIEN À UN PERSONNEL QUALIFIÉ UNIQUEMENT ATTENTION DANGER D ELECTROCUTION NE PAS OUVRIR IMPORTANT D3 4 2 1 1_A1_Fr Si vous souhaitez vous débarrasser de cet appareil ne le mettez pas ...

Page 29: ...ur sur le cordon d alimentation de cet appareil doivent être effectués par un personnel de service qualifié En cas de branchement sur une prise secteur la fiche de coupure peut provoquer une sérieuse décharge électrique Assurez vous qu elle est éliminée correctement après sa dépose L appareil doit être déconnecté en débranchant sa fiche secteur au niveau de la prise murale si vous prévoyez une pér...

Page 30: ...a source à lire section de sélection de la source 16 Opérations de base sections lecteur sélection de la source et navigation 17 Fonctionnement de la molette jog 19 Pose de boucles partie Boucle et Boucle selon le tempo 19 Affichage des informations des morceaux section de navigation 20 Recherche rapide de morceaux à l aide des informations de bibliothèques 20 À propos de l historique de la lectur...

Page 31: ... DE LECTURE Le morceau en cours de lecture ou sélectionné peut être enregistré dans la liste de lecture si nécessaire morceaux traités avec rekordbox seulement Exemple de configuration du système Un système DJ similaire à celui qui figure sur le schéma ci dessous peut être obtenu à partir de cet appareil d une table de mixage DJ et de périphériques MULTI PLAYER TEMPO 0 PLAY PAUSE SEARCH TRACK SEAR...

Page 32: ...hiers Le chargement peut durer un certain temps si la quantité de dossiers ou de fichiers est importante À propos des disques créés sur ordinateur Il est possible que certains disques ne puissent pas être lus selon les réglages de l application et de l environnement de l ordinateur Enregistrez le disque dans un format pris en charge par cet appareil Pour le détail contactez le revendeur de l appli...

Page 33: ...teindre cet appareil puis de le rallumer Si le dispositif USB comprend plusieurs partitions il risque de ne pas être reconnu Les dispositifs USB pourvus de lecteurs de cartes flash peuvent ne pas fonctionner Selon le dispositif USB utilisé vous pouvez ne pas atteindre les performances souhaitées Formats de fichiers de musique lisibles Cet appareil prend en charge les fichiers de musique enregistré...

Page 34: ... et autres droits de propriété intellectuelle liés au programme et à la documentation ainsi qu à tout produit qui en dérive Vous ne faites l acquisition d aucun droit explicite ou implicite hors de la licence limitée décrite dans cet accord 4 Pas d assistance Pioneer n a aucune obligation de fournir une assistance une maintenance des mises à niveau des modifications ou des nouvelles versions pour ...

Page 35: ...éservé à la sauvegarde de fichiers de musique etc non compris Lecteur CD Lecteur de disque optique pouvant lire le CD ROM Son Sortie audio vers des enceintes casques etc dispositif audio interne ou externe Connexion Internet Pour l enregistrement de l utilisateur et la demande d informations utilisez un navigateur web prenant en charge le SSL 128 bits Safari 2 0 ou supérieur ou Internet Explorer 6...

Page 36: ...r l icône CD_menu exe 2 Lorsque le menu du CD ROM apparaît sélectionnez rekordbox Installer le Logiciel de Gestion de Musique puis cliquez sur Démarrer Menu du CD ROM Pour fermer le menu du CD ROM cliquez sur Quitter 3 Installez rekordbox en suivant les instructions qui apparaissent à l écran Cliquez sur Annuler pour annuler l installation lorsqu elle a démarré Lancement de rekordbox Connectez vou...

Page 37: ... XP Si Installation matérielle apparaît à l écran au cours de l installa tion cliquez sur Continuer et continuez l installation Lorsque le programme d installation est terminé le message Installation terminée apparaît Raccordement de la CDJ 350 et de l ordinateur 1 Raccordez cet appareil à votre ordinateur avec un câble USB Pour les instructions sur le raccordement reportez vous à la page 14 Utili...

Page 38: ...ppareil apparaît à l écran La version du microprogramme n apparaît pas lorsque le CDJ 350 n est pas raccordé à l ordinateur ou lorsque le CDJ 350 et l ordina teur ne communiquent pas correctement Vérification des toutes dernières informations concernant le pilote Les toutes dernières informations sur le pilote dédié exclusivement à cet appareil se trouve sur notre site à l adresse suivante http ww...

Page 39: ...ilisé que lorsqu une table de mixage DJ Pioneer est raccordée Lecteur DJ Lecteur DJ Table de mixage DJ exemple DJM 350 MULTI PLAYER TEMPO 0 PLAY PAUSE SEARCH TRACK SEARCH IN CUE OUT OUT ADJUST HOT LOOP RELOOP EXIT BEAT LOOP LOOP DRIVE VINYL MODE TEMPO RANGE MASTER TEMPO LOOP USB STOP SOURCE SELECT MP3 AAC WAV AIFF CUE PLAYLIST BPM DISC LOCK REV FWD BACK SELECT PUSH TIME MODE AUTO CUE DISPLAY UTILI...

Page 40: ...ROL L R CD R L Câble audio R L R L R L Cordon de commande fourni Câble audio fourni Utilisation du logiciel DJ Quand cet appareil est raccordé à un ordinateur par un câble USB le logiciel DJ peut fonctionner avec cet appareil la page 23 Le son des fichiers de musique lus sur l ordinateur peut être restitué depuis cet appareil la page 11 AUDIO OUT R L CONTROL USB AUDIO OUT R L CONTROL USB OL CH 1 P...

Page 41: ...r la source devant être lue par cet appareil la page 16 3 Fente d insertion de dispositif USB 4 USB STOP 5 ORDINATEUR 6 USB 7 DISQUE Section lecteur Ces commandes peuvent être utilisées pour les opérations de base du lecteur DJ comme la lecture de disques la pose de points de repères boucles et les manipulations de la molette jog la page 17 8 TRACK SEARCH o p 9 SEARCH m n a CUE b PLAY PAUSE f c Mo...

Page 42: ...ique les BPM temps par minute du morceau en cours de lecture c Section d affichage des informations Un maximum de 13 caractères peuvent être affichés pour chaque élé ment Des caractères alphabétiques A à Z et numériques 0 à 9 ainsi que certains symboles peuvent être affichés apparaît à la place des autres caractères Spécification de la source à lire section de sélection de la source s t USB STOP S...

Page 43: ...facer les données de gestion de l appareil et empêcher la lecture du dispositif USB Avant d éteindre l appareil veillez à retirer le dispositif USB 1 Appuyez au moins 2 secondes sur USB STOP 4 L indicateur USB STOP s éteint 2 Débranchez le dispositif USB Opérations de base sections lecteur sélection de la source et navigation MULTI PLAYER TEMPO 0 PLAY PAUSE SEARCH TRACK SEARCH IN CUE OUT OUT ADJUS...

Page 44: ... sur SEARCH m n 9 Le point de repère peut être ajusté à la trame près La même opération peut être effectuée avec la molette jog 3 Appuyez sur CUE a Le point où la touche a été pressée est posé comme nouveau point de repère Lorsqu un nouveau point de repère est posé le point de repère antérieur est supprimé Retour au point de repère Back Cue Pendant la lecture appuyez sur CUE a L appareil revient i...

Page 45: ...ur CDJ cette opération peut aussi s effectuer en faisant tourner le haut de la molette jog Recherche de trame En pause faites tourner la molette c La position en pause peut être décalée à la trame près La position se déplace dans le sens de la lecture lorsque la molette jog est tournée dans le sens horaire dans le sens inverse quand elle est tournée dans le sens antihoraire La position bouge de 13...

Page 46: ...de BROWSE et INFO Affichage BROWSE Indique les morceaux chargés triés par catégorie ou en arborescence L affichage dans la section d affichage des informations est différent selon que les informations des bibliothèques ont été ou non enregis trées sur le dispositif USB Avec les informations des bibliothèques d Exploration de biblio thèques Les fichiers de musique sont indiqués selon les catégo rie...

Page 47: ...de caractères saisis À propos de l historique de la lecture HISTORY Lors de la lecture de morceaux gérés avec rekordbox l historique de la lecture est enregistré dans HISTORY L historique de la lecture est enregistré sur le dispositif USB Le nombre maximal de morceaux pouvant être enregistrés est de 999 L historique de la lecture n est pas enregistré si l espace disponi ble sur le dispositif USB n...

Page 48: ...PO s allume Le pitch ne change pas même lorsque la vitesse de lecture est changée avec le curseur TEMPO Le son est traité numériquement si bien que sa qualité change Utilisation de BPM LOCK Si le BPM principal est spécifié au préalable une simple pression du doigt sur une touche permettra de régler la vitesse du morceau en cours de lecture sur le BPM principal Réglage du BPM principal 1 Appuyez au...

Page 49: ...le Si l alimentation du lecteur DJ en cours de lecture est coupée il se peut que la lecture démarre sur l autre lecteur DJ Utilisation du logiciel DJ La CDJ 350 fournit aussi les données de fonctionnement des touches et molettes dans le format MIDI Si vous raccordez un ordinateur contenant un logiciel DJ compatible MIDI avec un câble USB vous pourrez utiliser le logiciel DJ depuis cet appareil Le ...

Page 50: ...veille automatique LIBRARY CREATOR LIBRARY FOLDER Précise la méthode d explo ration pour un support sur lequel des bibliothèques MEP 7000 Pioneer sont enregistrées VERSION No Affiche la version du logi ciel du CDJ 350 Réglage après l achat À propos de la mise en veille automatique Lorsque la mise en veille automatique est en service l appareil se met automatiquement en mode de veille quand le temp...

Page 51: ...e La recherche de morceau peut être longue quand il y a des passa ges silencieux entre les morceaux S il n est pas possible de localiser le morceau en l espace de 10 secondes un point de repère est posé au début du morceau La fonction de recherche arrière ne fonctionne pas Est ce qu un point de repère a été posé Posez un point de repère la page 18 La lecture de boucle ne fonctionne pas Est ce qu u...

Page 52: ...code d erreur affiché ne se trouve pas dans le tableau ci dessous ou si le même code d erreur apparaît de nouveau bien que la mesure suggérée ait été prise contactez votre revendeur ou le service après vente Pioneer le plus proche Code d erreur Type d erreur Description de l erreur Cause et solution E 7201 TOC READ ERROR Les données de la TOC ne peuvent pas être lues Le disque est craquelé dRempla...

Page 53: ...ne fonctionne pas correctement et la lecture n est pas possible si de la condensation s est formée dans l appa reil Laissez l appareil éteint pendant 1 ou 2 heures à la température ambiante selon l intensité de la condensation Les gouttelettes d eau s évaporeront et la lecture sera de nouveau possible De la conden sation peut aussi se former en été si l appareil est exposé à l air d un climatiseur...

Page 54: ...enregistrements effectués sont destinés à votre usage personnel et conformément aux lois sur les droits d auteur il se peut que leur utilisation soit soumise au consentement du détenteur des droits La musique enregistrée à partir de CD etc est protégée par les lois sur les droits d auteur de divers pays et par des traités internatio naux La personne qui effectue des enregistrements de musique est ...

Page 55: ... 1 kHz Réponse en fréquence 4 Hz à 20 kHz Rapport S B 115 dB Distorsion harmonique totale 0 006 Section aval USB USB Port Type A Alimentation 5 V 500 mA ou inférieur Section amont USB USB Port Type B Sortie de commande CONTROL Port Minijack Les caractéristiques et la présentation peuvent être modifiées sans avis préalable dans un souci d amélioration Les articles concernant les réparations gratuit...

Page 56: ...HT DEN DECKEL ODER DIE RÜCKSEITE ENTFERNEN IM GERÄTEINNEREN BEFINDEN SICH KEINE VOM BENUTZER REPARIERBAREN TEILE ÜBERLASSEN SIE REPARATUREN DEM QUALIFIZIERTEN KUNDENDIENST CAUTION RISK OF ELECTRIC SHOCK DO NOT OPEN WICHTIG D3 4 2 1 1_A1_De Mischen Sie dieses Produkt wenn Sie es entsorgen wollen nicht mit gewöhnlichen Haushaltsabfällen Es gibt ein getrenntes Sammelsystem für gebrauchte elektronisch...

Page 57: ...derartiger Austausch des Netzsteckers muss vom Kundendienstpersonal vorgenommen werden Wenn der vom Netzkabel abgeschnittene ursprüngliche Netzstecker in eine Netzsteckdose eingesteckt wird besteht akute Stromschlaggefahr Daher ist unbedingt dafür zu sorgen dass der abgeschnittene Netzstecker sofort vorschriftsmäßig entsorgt wird Vor einem längeren Nichtgebrauch des Gerätes beispielsweise während ...

Page 58: ...latte 16 Hauptgerät Display 16 Wählen Sie die abzuspielende Quelle Quellenwahl Sektion 16 Grundlegender Betrieb Player Quellenwahl und Durchsuchen Sektionen 17 Bedienung der Jog Scheibe 19 Automatisches Setzen von Loops Loop und Beat Loop Part 19 Anzeige von Track Information des Tracks Durchsuchen Sektion 20 Schnelles Suchen nach Tracks mit der Bibliothek Information 21 Über den Wiedergabe Verlau...

Page 59: ...AYLIST Der aktuell spielende oder ausgewählte Track kann in der Playlist nach Wunsch registriert werden aber nur für Tracks die mit rekord box verwaltet werden Beispiel für System Setup Ein DJ System wie das in der Zeichnung unten gezeigte kann eingerichtet werden indem dieses Gerät mit einem DJ Mixer und Peripheriegeräten verbunden wird MULTI PLAYER TEMPO 0 PLAY PAUSE SEARCH TRACK SEARCH IN CUE O...

Page 60: ...1 000 Ordner Max Anzahl der Dateien 1 000 Dateien Wenn es viele Ordner oder Dateien gibt kann einige Zeit kann für das Laden erforderlich sein Hinweise zu Discs die auf Computern erstellt wurden Je nach den Einstellungen der Anwendung und den Umgebungseinstellungen des Computers kann es unmöglich sein bestimmte Discs abzuspielen Nehmen Sie die Disc in einem Format auf das von dieser Einheit unters...

Page 61: ...er ein Wenn mehrere Partitionen für das USB Gerät gesetzt sind kann das Gerät möglicherweise nicht erkannt werden USB Geräte mit Flash Card Lesern arbeiten möglichweise nicht Je nach verwendetem USB Gerät wird die gewünschte Leistung möglicherweise nicht erzielt Abspielbare Musikdateiformate Diese Einheit unterstützt Musikdateien in den unten gezeigten Formaten Typ Dateierweiterung Kompatible Form...

Page 62: ... noch durch Dritte abändern rekonstruieren ausein ander nehmen oder dekompilieren außer bis zu dem vom geltenden Gesetz zugelassenen Ausmaß und auch dann nur nachdem Sie Pioneer schriftlich von ihren beabsichtigten Tätigkeiten informiert haben Sie dürfen das Programm nicht auf mehreren Prozessoren installieren ohne vorher die schrift liche Zustimmung von Pioneer eingeholt zu haben 3 Eigentum Pione...

Page 63: ...rdbox mit einem Betriebssystem in einer anderen Sprache befolgen Sie die Anweisungen auf dem Bildschirm um die Option English Englisch zu wählen Unterstützte Betriebssysteme rekordbox Treiber Software Mac OS X 10 4 6 und höher 1 1 Windows 7 Home Pre mium Professional Ultimate 32 Bit Version 1 1 64 Bit Version 1 1 2 Windows Vista Home Basic Home Pre mium Business Ulti mate SP1 und höher 32 Bit Vers...

Page 64: ...x erforderlich Melden Sie sich vor der Installation von rekordbox als der als Administrator Ihres Computers registrierte Benutzer an 1 Setzen Sie die mitgelieferte CD ROM in das CD Laufwerk Ihres Computers ein Die CD ROM Menü wird angezeigt Wenn das CD ROM Menü nicht angezeigt wird wenn die CD ROM eingesetzt wird öffnen Sie das CD Laufwerk von Computer oder Arbeitsplatz im Menü Start und doppelkli...

Page 65: ...eren und fahren mit der Installation fort Bei Installation unter Windows XP Wenn während der Installation Hardwareinstallation auf dem Bildschirm erscheint klicken Sie auf Installation fortsetzen und fahren mit der Installation fort Wenn das Installationsprogramm fertiggestellt wird erscheint eine Fertigstellungsmeldung Verbinden des CDJ 350 mit dem Computer 1 Schließen Sie dieses Gerät über ein U...

Page 66: ... auf dem Bildschirm prüfen Die Firmware Version wird nicht angezeigt wenn der CDJ 350 ist nicht mit dem Computer verbunden ist oder wenn der CDJ 350 und der Computer nicht richtig kommunizieren Prüfen der neuesten Informationen über die Treibersoftware Für die neuesten Informationen zur Treibersoftware zur exklusiven Verwendung mit diesem Gerät besuchen Sie unsere Website wie unten gezeigt http ww...

Page 67: ...ur Verfügung wenn ein Pioneer DJ Mixer angeschlossen ist DJ Player DJ Player DJ Mixer Beispiel DJM 350 MULTI PLAYER TEMPO 0 PLAY PAUSE SEARCH TRACK SEARCH IN CUE OUT OUT ADJUST HOT LOOP RELOOP EXIT BEAT LOOP LOOP DRIVE VINYL MODE TEMPO RANGE MASTER TEMPO LOOP USB STOP SOURCE SELECT MP3 AAC WAV AIFF CUE PLAYLIST BPM DISC LOCK REV FWD BACK SELECT PUSH TIME MODE AUTO CUE DISPLAY UTILITY A CUE LOCK 16...

Page 68: ...CONTROL L R CD R L Audiokabel R L R L R L Steuerkabel mitgeliefert Audiokabel mitgeliefert Verwenden der DJ Software Bei Anschluss an einen Computer über USB Kabel kann die DJ Software mit diesen Geräten bedient werden Seite 23 Der Musikton von auf dem Computer abgespielten Musikdateien kann von diesem Gerät Seite 11 ausgegeben werden AUDIO OUT R L CONTROL USB AUDIO OUT R L CONTROL USB OL CH 1 PHO...

Page 69: ... Sie die mit diesem Gerät abzuspielende Quelle hier Seite 16 3 USB Gerät Einsetzschacht 4 USB STOP 5 COMPUTER 6 USB 7 DISC Player Sektion Diese Regler können für grundlegende DJ Player Bedienungen wie Abspielen von Discs Einstellen von Cue Loop Punkten und Bedienen der Job Scheibe Seite 17 verwendet werden 8 TRACK SEARCH o p 9 SEARCH m n a CUE b PLAY PAUSE f c Jog Scheibe d VINYL MODE 1 Loop und B...

Page 70: ... eingestellt werden kann b BPM Zeigt BPM Taktschläge pro Minute des laufenden Tracks an c Informationdisplay Abschnitt Bis zu 13 Zeichen können für jeden angezeigt werden Die anzeig baren Zeichen sind die Buchstaben A bis Z die Ziffern 0 bis 9 und bestimmte Symbole wird für alle anderen Zeichen angezeigt Wählen Sie die abzuspielende Quelle Quellenwahl Sektion s t USB STOP SOURCE SELECT MP3 AAC WAV...

Page 71: ... Geräte vom Set abnehmen Durch Abnehmen eines USB Geräts auf andere Weise könnten die Verwaltungsdaten des Sets gelöscht und das Lesen des USB Geräts unmöglich gemacht werden Beim Ausschalten der Stromversorgung des Set nehmen Sie immer zuerst das USB Gerät ab 1 Drücken Sie USB STOP 4 mindestens 2 Sekunden lang Die USB STOP Anzeige erlischt 2 Trennen Sie das USB Gerät ab Grundlegender Betrieb Play...

Page 72: ...en Anpassung der Cue Punkt Position 1 Drücken Sie während beim Cue Punkt auf Pause geschaltet ist SEARCH m n 9 Die Anzeigen PLAY PAUSEf und CUE blinken 2 Drücken Sie SEARCH m n 9 Der Cue Punkt kann in Schritten von einzelnen Frames fein justiert werden Der gleiche Vorgang kann auch mit der Jog Scheibe ausgeführt werden 3 Drücken Sie CUE a Die Position bei der die Taste gedrückt wurde wird als neue...

Page 73: ...n Sie die Hand von der Oberseite der Jog Scheibe c los Die normale Wiedergabe wird fortgesetzt Pitch bend Während der Wiedergabe wirbeln Sie die Außensektion ohne die Oberseite der Jog Scheibe c zu berühren Die Wiedergabegeschwindigkeit nimmt zu beim Wirbeln im Uhrzeigersinn und nimmt ab beim Wirbeln gegen den Uhrzeigersinn Wenn das Wirbeln stoppt schaltet die Wiedergabe auf normale Geschwindigkei...

Page 74: ...gesetzten Loop in Punkt zurück und die Loop Wiedergabe startet Automatisches Setzen von Loops basierend auf dem Tempo des Tracks Beat Loop Während des Wiedergabe oder Pause Modus drücken Sie BEAT LOOP LOOP DIVIDE h Der Loop aus Punkt wird automatisch entsprechend dem Tempo des Tracks BPM gesetzt und die Loop Wiedergabe startet Loop Wiedergabe kann nicht richtig ausgeführt werden wenn der BPM Wert ...

Page 75: ...gen in rekord box gewählte Kategorien werden nicht angezeigt 1 Drücken Sie DISPLAY UTILITY j Schalten Sie auf die BROWSE Anzeige um 2 Drehen Sie den Drehregler m Wählen Sie SEARCH 3 Drücken Sie den Drehregler m Die Anzeige schaltet auf den Zeicheneingabe Bildschirm um 4 Verwenden Sie den Drehregler m zur Eingabe eines Zeichens Drehen Sie den Drehregler und wählen das gewünschte Zeichen und drücken...

Page 76: ...e Track s wird werden nicht entfernt OK Der die Track s wird werden entfernt Löschen von Playlisten Wählen Sie die Playlist zum Löschen vorher aus der PLAYLIST Kategorie 1 Drücken Sie PLAYLIST n mindestens 1 Sekunde lang Das Löschen Menü wird angezeigt 2 Drehen Sie den Drehregler m und drücken Sie ihn dann CANCEL Die Playlist wird nicht gelöscht OK Die Playlist wird gelöscht Einstellen der Wiederg...

Page 77: ...on mit einem DJ Mixer Siehe auch Bedienungsanleitung des DJ Mixers Starten Sie die Wiedergabe mit dem Fader eines DJ Mixers Fader Start 1 Verbinden Sie den CDJ 350 mit einem DJ Mixer von Pioneer mit dem mitgelieferten Steuerkabel an Anweisungen zum Anschließen finden Sie in Basic Stil auf Seite 13 2 Schalten Sie die Fader Start Funktion vom DJ Mixer ein 3 Setzen Sie den Cue 4 Bewegen Sie den Kanal...

Page 78: ...DISPLAY UTILITY k l m n i j 1 Drücken Sie DISPLAY UTILITY j mindestens 1 Sekunde lang Die UTILITY Bildschirm wird angezeigt 2 Verwenden Sie den Drehregler m zum Ändern der Einstellung Drücken Sie BACK l um zum vorherigen Bildschirm zurückzukehren 3 Drücken Sie den Drehregler m Die geänderten Einstellungen werden gespeichert Zum Schließen des UTILITY Bildschirms drücken Sie DISPLAY UTILITY oder BAC...

Page 79: ... verkratzte Disc lässt sich möglicherweise nicht abspielen Ist die Disc verschmutzt Wischen Sie die Disc sauber Seite 27 Track Suche dauert zu lange Ist die Funktion Auto Cue aktiviert Track Suche kann einige Zeit dauern wenn es zu lange stille Abschnitte zwischen den Tracks gibt Wenn Track Suche innerhalb von 10 Sekunden nicht möglich ist ist ein Cue Punkt am Anfang des Tracks gesetzt Back Cue Fu...

Page 80: ...enn ein Fehlercode nicht in der Tabelle aufgeführt ist oder wenn der gleiche Fehlercode erscheint nachdem die angegebenen Maßnahmen getroffen worden sind wenden Sie sich an das Geschäft in dem das Gerät gekauft wurde oder an eine Pioneer Kundendienstvertretung in Ihrer Nähe Fehlercode Fehlertyp Beschreibung des Fehlers Ursache und Abhilfe E 7201 TOC READ ERROR TOC Daten können nicht gelesen werden...

Page 81: ...ichtig und kann nicht zur Wiedergabe verwendet werden wenn sich im Inneren Kondensation gebildet hat Lassen Sie das Gerät 1 bis 2 Stunden lang bei Raumtemperatur stehen die genaue erforderliche Zeit ist je nach Bedingungen der Kondensation unterschiedlich ohne es einzuschalten Die Wassertröpfchen verdampfen und das Gerät wird betriebsbereit Kondensation kann auch im Sommer auftreten z B wenn das G...

Page 82: ... dem Urheberrecht nicht ohne Zustimmung des Urheberrechtsinhabers anderweitig verwendet werden Musik die von CDs usw aufgenommen wurde ist durch die Urheberrechtsgesetze der einzelnen Länder sowie durch internationale Abkommen geschützt Es liegt in der vollen Verantwortung der Person die die Musik aufgenommen hat sicherzu stellen dass die Aufnehmen nicht gesetzwidrig verwendet werden Beim Umgang m...

Page 83: ... Veff 1 kHz Frequenzgang 4 Hz bis 20 kHz Signalrauschabstand 115 dB Gesamtklirrfaktor 0 006 USB Downstream Bereich USB Port Typ A Stromversorgung 5 V 500 mA oder weniger USB Upstream Bereich USB Port Typ B Steuerausgang CONTROL Anschluss Mini Buchse Änderungen der technischen Daten und das Design dieses Geräts ohne vorherige Ankündigung bleiben vorbehalten Die Angaben über kostenlose Reparatur usw...

Page 84: ...ight 2010 Pioneer Corporation All rights reserved PIONEER CORPORATION 1 1 Shin ogura Saiwai ku Kawasaki shi Kanagawa 212 0031 Japan Корпорация Пайонир 1 1 Син Огура Сайвай ку г Кавасаки префектура Канагава 212 0031 Япония Импортер ООО ПИОНЕР РУС 125040 Россия г Москва ул Правды д 26 Тел 7 495 956 89 01 PIONEER EUROPE NV Haven 1087 Keetberglaan 1 B 9120 Melsele Belgium TEL 03 570 05 11 K002_PSV_SY ...

Reviews: